Mini Monets and Mommies

Sunday, June 22, 2014

July 4th Glitter American Flag Kids' Art

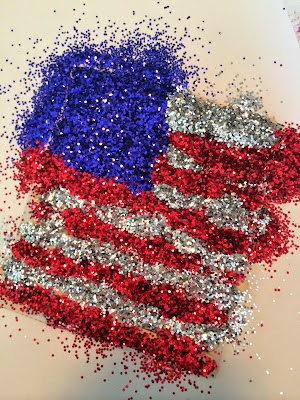
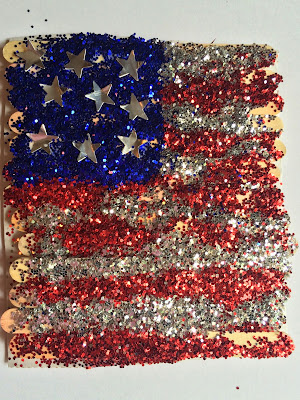
What says Fourth of July sparkler better than gooey globs of glitter? The weather is finally warmer and my family has been going through popsicles like they are – well, candy (but, aren’t they kind of like candy anyway?). Instead of tossing the sticks, I’ve been saving them for this holiday craft.

Patriotic Art
Gather together a handful of popsicle sticks (or you can buy craft sticks if you don’t have any popsicles around) and get ready to help your child craft a sparkly patriotic flag. Although I personally am game for anything involving glitter and really don’t care much about the mess (well, I kind of mind picking sparkles off of the floor, table and my son’s clothes weeks later), prepping for this project means covering your work surface with something suitable to catch the teeny tiny shining specks. Use a garbage bag, newspaper or a sheet of scrap foam board.

Here’s What You’ll Need:

·         Cardboard – Reuse the side of an old box.

·         Popsicle or craft sticks

·         Clear drying school glue

·         Scissors

·         Red, silver and blue glitter

·         A paintbrush

·         Star stickers

Here’s What to Do:

1.      Line the craft sticks up horizontally on the cardboard to make the flag’s stripes.

2.      Glue the sticks to the cardboard. Let them dry.

Craft sticks
3.      Help your child to cut the cardboard around the sticks. Typically I prefer to have the child do all of the art-making for herself. But, in this circumstance the cardboard may be too tough for little hands to slice through. If your child is struggling, give her a hand with the cutting.

Children's art
4.      Paint a layer of glue over the craft sticks. Have your child squeeze a few quarter-sized dabs of glue on the top left side, spreading it out into a rectangle shape.

5.      Sprinkle blue glitter over the glue. I find this best to do over a piece of paper. When your child is done crafting you can fold the paper and the left over glitter into a plastic baggie to use later.

Glitter art
6.      Paint glue over the rest of the sticks.

7.      Alternating red and silver, have your child sprinkle glitter over the stripes. Shake off the excess.

July crafts
8.      Let the glue dry.

Kids' crafts
9.      Add star stickers to the blue area.

Holiday Art
10.  Paint another layer of glue over the entire project to seal in the sparkles.

Sparkle Art
You can use the artwork as a display piece for a July 4th get-together or even as coasters for cool drinks at a barbeque.
Are you looking for more art activities? Follow Mini Monets and Mommies on Facebook or check out and follow my Pinterest board for ideas! Follow Mini Monets and Mommies's board Creative Kids Crafts on Pinterest.

Saturday, June 21, 2014

Beginning Blogging: First Trimester Lessons Learned


Mom Blog
 
My blog is 3-months-old today, yay! I feel like I’ve made it through my first trimester. But, this one may have been more challenging than my first trimester of pregnancy (minus the full-day morning sickness). During the first three months of pregnancy I had no idea what I was doing, was beyond nervous when it came to if I was doing the right thing or what I was supposed to be doing and had absolutely no idea of what to expect. Ditto for blogging. Since I don’t have a sweet little ultrasound picture to post on my fridge, I’m going to have to settle for an actual post.

Even though I normally post kids’ art activities (and anything else related to children’s crafts), writing about the blogging process is something that gives me a way to look back and remember (or evaluate) how it’s going and maybe even hopefully help a new blogger someday. I know that I enjoy reading about blogging from bloggers, so here’s what I’ve learned in my first trimester:

1.      Don’t compare yourself to anyone else. Every blog, like every baby, is different. I wouldn’t have compared my son at 3-months pregnant to another woman’s 4-year-old. Likewise, I can’t do the same with my blog. Although it’s not exactly a confidence boost to see that another blogger has 100,000 Facebook likes, a similar number of Pinterest followers and tens of thousands of page views a day (when my numbers look miniscule), I have to constantly remind myself that these things take time. Oh yeah, and hard work too!

2.      Pictures, pictures, pictures! In honor of my blog turning 3-months-old, I went back and took a look at the first month’s posts. I found that the photo aspect was sorely lacking. For example, I posted on seven ways to make finger painting more fun. That’s the perfect opportunity to add in creative and colorful photos of the process. I had one picture – and it wasn’t so hot. A blob of green paint next to a little pile of salt. Really? Who wants to Pin that? Nobody. It just isn’t interesting. I went back and added some newer pictures as well as creating a few (hopefully) eye-catching collages courtesy of Picmonkey.
http://www.pinterest.com/pin/383509724491603553/
Cute with colors!

Ummm? Not so great.
 
3.      Tone down the snarky type of writing. What I thought of as cutesy when I wrote it actually read as somewhat preachy when I went back to re-evaluate it. Was I trying to hard? Yes. Lesson learned – I should just be me and not try to impress anyone (it really wasn’t very impressive anyway).

4.      Provide options. After years of teaching museum-based children’s art classes I tend to create projects that are kind of involved. That’s ok for when I get to teach them, but I’ve realized that not every mom wants to pull out the plaster to make a puppet (but, some certainly do). So, going forward I’m going to provide more options.

5.      Blogging isn’t just writing. For the past five or so years I’ve been writing for other people as a freelancer. I write what they want me to, they pay me and we both go on our merry ways until they ask me to write for them again. Whether one person or one million people read what I wrote really isn’t my concern – I get paid the same amount either way. But, with blogging it’s my job to promote my posts. I’ve found that the actual content creation is only a small part of getting a blog up and running. As someone who only used Facebook, and only used it to connect with friends and relatives who didn’t live nearby, I feel like I’ve gotten a crash course on social media marketing.

6.      Bloggers = a fantastic, supportive community. I was blown away by how helpful, non-competitive and positive the other bloggers who I’ve connected with have been. I seriously would have quit a few weeks in if it hadn’t been for the insights and help of other much more seasoned bloggers. I only hope that someday I’ll be able to pay it back and help someone who is in the place that I am now!

Friday, June 20, 2014

Glitter Rainbows: Kids' Clay Art Activity


Glitter rainbows! If that doesn’t say childhood, I don’t know what does. Even as an adult, I still go a bit gaga over glitter art. So, any chance I get to throw some sparkles in – I do. One of my favorite ways to introduce a splash of sparkle to kids’ art is by combining the shiny stuff with clay.
Weather Art

Clay? Isn’t that for making pinch pots and teeny tiny sculptures of farm animals? Well, yes it is! But, it is also a super-easy (and less mess) way to “finger paint”. Although there’s technically no paint involved (hence, the less mess ides), your child will make a similar motion and get a very paint-like result.

Back to the art activity at hand: Super sparkly glittering rainbows. Whether your little artist is learning about the spring season, the weather or she just happened to look outside and exclaim, “Mommy, look at the colors in the sky!” this art project combines clay play and a color lesson into one rainbow-hued artsy adventure.

Here’s What You’ll Need:

·         Modeling clay

·         White Model Magic

·         Glitter

·         Card stock or poster board paper

·         Clear drying school glue

·         A paintbrush

Here’s What to Do:

1.      Pick at least four colors for the rainbow. Set out clay and glitter in each color. Ask your child to match them up. For example, green glitter goes with the green clay.

Kids Colors
2.      Roll the first piece of clay into a snake shape. As your child rolls the clay, have her begin to move it into the coordinating glitter color.

3.      Press the glitter-covered clay onto the paper in an upside down U shape. Have your child make a finger painting motion, pushing the clay into the paper and spreading it out into a rainbow form.

4.      Repeat the steps to make more rainbow bands.

5.      Mold two pieces of white Model Magic into balls. Turn the balls into clouds by having your child squish them down onto the paper at the ends of the rainbows.

6.      Sprinkle opal or silver glitter onto the clouds. Your child can press the glitter into the Model magic, making it stick.

7.      Seal the glitter in. have your child brush a layer of clear drying school glue over the entire clay project.


Are you looking for more kids' art ideas? Check out and follow my Pinterest board!

Follow Mini Monets and Mommies's board Creative Kids Crafts on Pinterest.

Thursday, June 19, 2014

D is for Dirt

Dirt art for kids? Yep, it's true! So, the kids might get messy -- but, isn't that half the fun anyway!

nature science


It’s the fourth day of the ABC’s of Nature hosted by School Time Snippets and…D is for Dirt! I’m a dirt aficionado. When my son was 2-years-old the only thing that he loved more than trains was dirt. He could spend hours kicking up the dirt at the playground making steam for his imaginary trains. He also spent plenty of time digging through our garden, looking at the creepy crawlies that worked their way through the soil just under the ground.

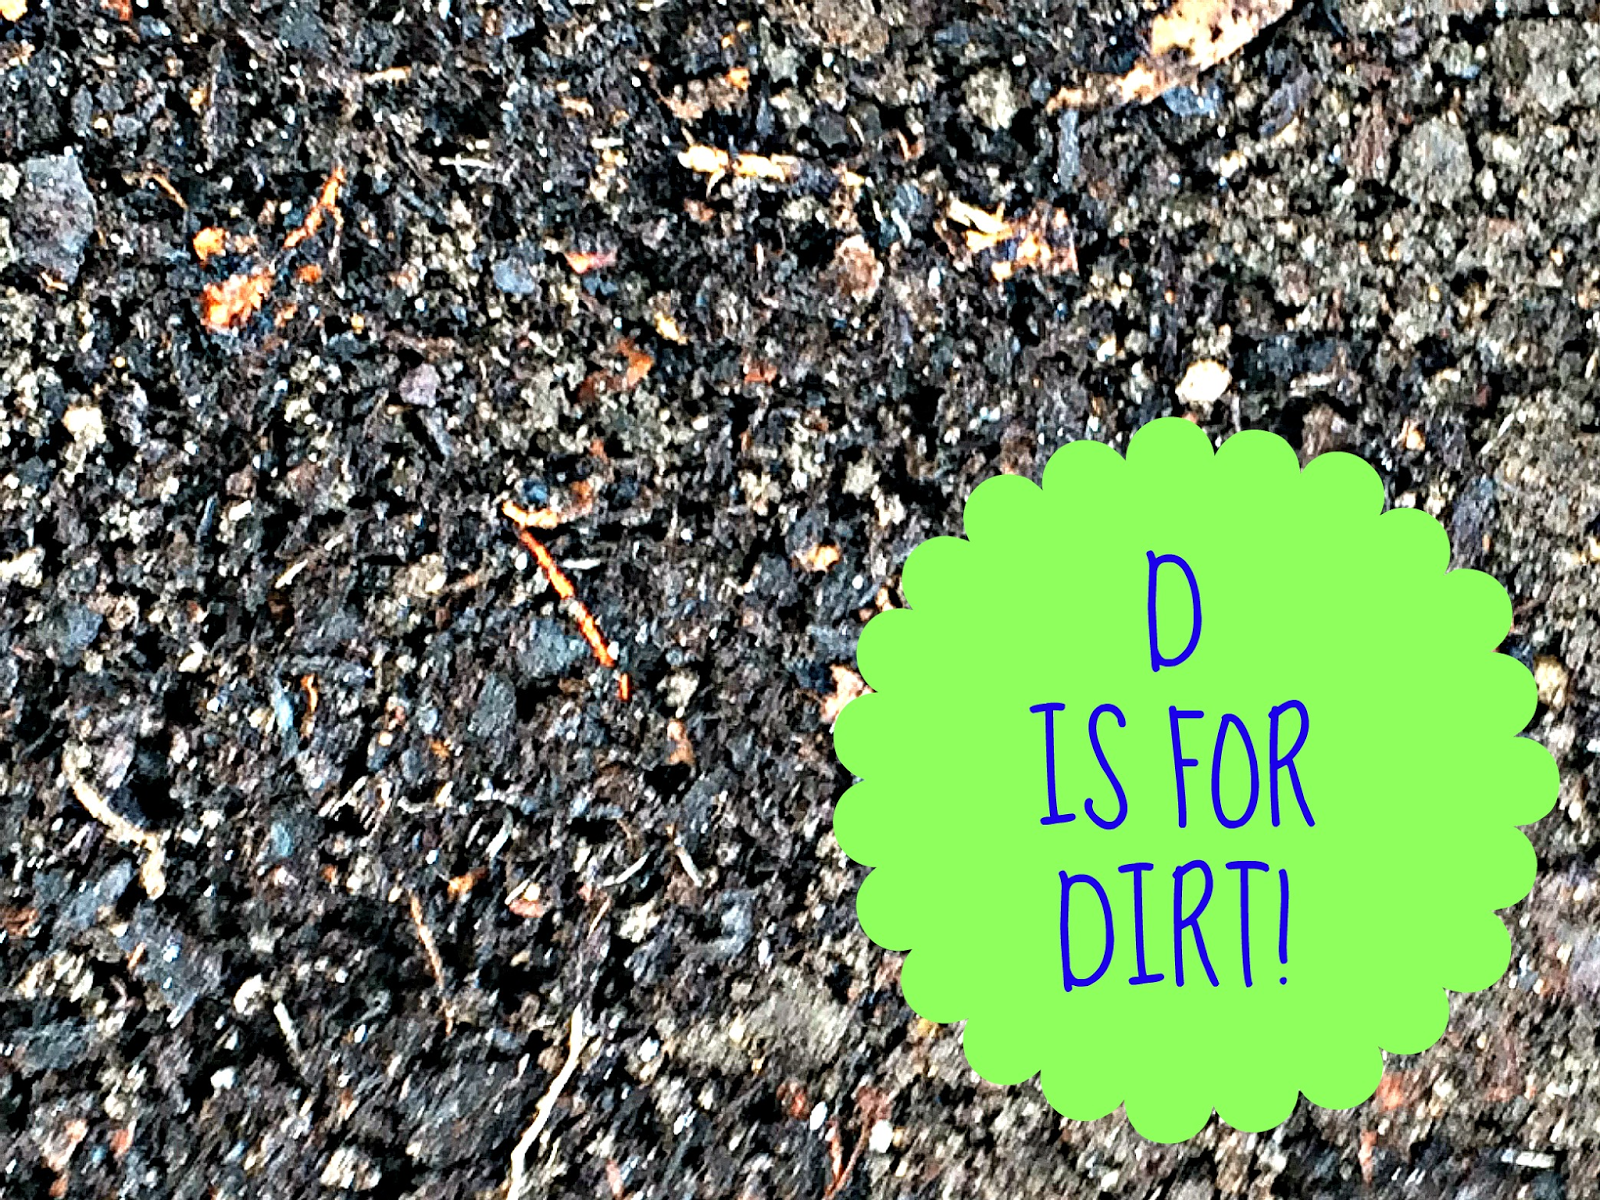
I’m always up for a good old dig through the dirt to explore what’s in it activity. At the same time I also can’t help but to turn this theme crafty. So, let’s combine science and art. Start your child out with a bin of dirt. Scoop a few cups out of the garden or yard, and put them into a container or an old cardboard box. Give your child a magnifying glass to get up close and personal with the dirt. Have her draw what she sees to document her observations. This may include:

·         Small-sized pieces or clumps of soil

·         Seeds

·         Pieces of plants

·         Earthworms or other bugs

Kids' activities
 
Go back later (or on another day) and re-visit her science exploration by talking about her drawing.

Before you toss the dirt back into the garden, stop and show your child how she can transform it into a colorful crafting item. If the dirt is damp, set it out in the sun to dry out. Ask your child what she thinks will happen if you spread out the dirt in a bin or on a piece of cardboard and put it in the hot sun. Check back to investigate how the sun is drying it out. When the dirt is dry, you’re ready to start the art-making process. Your child can mix up batches of her own colorful dirt (use it like colored craft sand) to make a textured piece of art shaped like the letter D.

Here’s What You’ll Need:

·         Your dirt

·         Food coloring

·         A stick or craft stick

·         Plastic containers or a cupcake tin– Reuse old yogurt containers or those little tubs that deli turkey comes in.

·         Clear-drying school glue

·         A marker

·         Cardboard or thick paper – You can reuse the front of an old cereal box instead of buying new board.

Here’s What To Do:

1.      Divide the dirt into at least two containers (or sprinkle it into each segment of a cupcake tine). The more containers that you use, the more colors of dirt your child can make. 


Soil science
2.      Add a few drops of food coloring to each bin. Use one color per container or mix two (such as yellow and blue) to make a new hue. Have your child mix up the dirt and food coloring with a stick. Allow the colorful dirt to dry. Hint: If the dirt is still wet, you won’t see the color clearly. The drier the dirt is, the more vibrant the color.


Children's art
3.      Write the letter D on the cardboard. Your child can draw this herself, or (if she’s struggling) you can write it first and she can trace over it.

4.      Squeeze the glue over the letter D.

5.      Sprinkle the colorful dirt on the glue.

Alphabet activity
If you want to create an alphabet of dirt letters or don’t want to bring the dirt inside later, your child doesn’t have to use glue. Make letter cards by drawing on card stock or cardboard and simply have your child shape the colorful dirt over the lines. Snap a photo to save this temporary art. Hang your pics up inside or use them as letter learning cards!

Add to the literacy lesson and read a book (or two!) about dirt. Here are a few titles on the subject:

Dirt: The Scoop on Soil (Amazing Science) by Natalie M. Rosinsky and Sheree Boyd

A Handful of Dirt by Raymond Bial

Dirt: Jump Into Science by Steve Tomecek and Nancy Woodman

SOIL! Get the Inside Scoop by David L. Lindo

Seed, Soil, Sun: Earth’s Recipe for Food by Cris Peterson and David R. Lundquist

http://www.schooltimesnippets.com/p/abcs-of-nature.html

Wednesday, June 18, 2014

Pink and Purple Paint Print for Kids: Letter P Project

Put your pretty pink and purple paints out and let your little princess (or prince) print away! This easy-to-make art activity is more about the process than the product. It encourages exploration and experimentation, while adding in a letter-learning lesson! I’m all for combining art with other learning areas, and have found (both as a mom and as an arts educator) that it’s extremely helpful when introducing new subjects. I mean, you could just have your child point at the letter P over and over and over and over again, but she’s likely to get bored almost immediately.
Kids' Print
When my son was in kindergarten his teacher had this thing about writing out each letter somewhere along the lines of a million times. I get it; kids need to practice their handwriting. But, at some point between page three and four of penning the same letter, he just gave up.
You can start by pointing out the letter P – just not to the point where your child starts to stare blankly at a piece of paper and phase completely out. Look for the letter everywhere – at the grocery store, on walks around your neighborhood, in books that the two of you read or have your child verbally point it out when you say a P word such as pencil, pig or pat.
Paint print
 
Now you’re ready to gather the pink and purple materials.
Here’s What You’ll Need:
·         Pink, white, purple and blue tempera paints – Not only do pink and purple start with P, but so does paint.
·         Card stock or construction paper – P is for paper.
·         Pipe cleaners – Yep, that’s another P word!
·         Pom poms – And, yes another P word too!
Here’s What to Do:
1.      Pour puddles (P word again) of paint onto a tray, piece of thick cardboard or a plastic-ware lid. Have your child mix different colors to make her own hues. For example, dark pink plus white equals a light baby pink. Adding blue to deep pink or a rose color to make purple.
2.      Coil or fold the pipe cleaners to make squiggly painting tools.


Kids' art


3.      Dip the pom poms and pipe cleaners into the paint and print (P is for printing too). Your child can layer the colorful prints or make a pattern (that’s our letter again) of alternating pink and purple.
Letter art

Kids art


Process art
 
Are you looking for more artsy activities? Like the Mini Monets and Mommies Facebook page to see projects galore!

Tuesday, June 17, 2014

My Many Colored Days Art: Red Collage Theme

My Many Colored Days may not be as well-known as The Cat in the Hat or Green Eggs and Ham, but this Dr. Seuss book is a true work of art. Written by Dr. Seuss in 1973, and later illustrated (amazingly, I must add) by husband and wife team Steve Johnson and Lou Fancher, this children’s book takes kids through a range of emotions in vivid color.

Red Theme
 
Whether you’re looking for an art activity to accompany this book, you want to help your child to explore the creative process or you’re teaching a lesson on colors, making a mixed-media monochromatic (one-colored) collage allows little hands to explore and experiment with materials. Add an extra literacy layer on to the art-making and start by writing or stenciling the color word (in this case it’s “Red”) or just let your child go free-form and create her own abstract masterpiece.

Here’s What You’ll Need:

·         An array of red art materials – Give your child plenty of choices. I used tissue paper, construction paper, craft sand, craft feathers, tempera paint and an oil pastel. Look for items that have slight variations of the main color. In this case you might add in a maroon, cherry red and light (almost pink) red.

·         Clear drying school glue

·         A paintbrush (if your child is using paint)

·         Card stock paper or poster board

Here’s What to Do:

1.      Choose either a letter collage or abstract artwork. If your child is making a letter collage – have her draw the letters RED on the paper. If she’s struggling, you can draw them first using a pencil and have her trace over them or she can use alphabet stencils.

2.      Create piles of the different materials. This makes it easy for your child to see what she has to choose from. Let her cut or tear pieces of tissue or construction paper.

Paper crafts


Kids crafts

Multi-media collage
3.      Sit back and watch as your child works away, making her Many Colored Days themed red art!

Color Art


Color theme
 
Are you looking for more colorful art creations? Check out the Mini Monets and Mommies Facebook page for a week’s worth of color activities. If Dr. Seuss activities are on your young artist’s agenda, visit and follow my Pinterest board for more ideas!

 
Follow Mini Monets and Mommies's board Dr. Seuss Children's Activities on Pinterest.

Monday, June 16, 2014

Easy Kids' Stick Puppet: It Was a Cork, Now It's Not

Kids Crafts

If you’re searching for an easy puppet making craft for kids, look no further. I’ve made loads of puppets – plaster pretend friends, paper bag versions and even a marionette or two (not the super-fancy kinds that you see on stage, but a pint-sized version that a child can create). The other day my husband left a cork sitting out on the kitchen counter. As a picked it up to throw away – along with my son’s popsicle stick – it struck me that combining the two items could equal an uber-easy puppet craft that also had a lesson on the environment thrown in too.

So, recycle, reuse and get crafting. After your little artist creates her cork stick puppet, she can use it to stage a pretend play! Your child can make an imaginary creature, an animal or a favorite character from a book or movie.

Here’s What You’ll Need:

·         A cork

·         A pipe cleaner

·         A popsicle stick

·         Tempera paint

·         A paintbrush

·         Googley eyes

·         Clay

·         Clear drying school glue

·         Optional: Craft feathers, glitter, felt, pom poms or craft fur

Here’s What to Do:

1.      Paint the cork with the tempera. Set the cork aside until it dries.


2.      Glue the googley eyes to the front of the cork.  Your child can add the other facial features – the nose and mouth – with modeling clay. Use colorful clay or encourage your child to paint it her own hue.

3.      Wrap the pipe cleaner around the cork under the mouth. Fold the two ends in to create arms at the sides of the cork.

4.      Add extra embellishments such as craft feathers or craft fur to “dress up” the puppet.

5.      Push the popsicle stick into the bottom of the cork. If your child struggles with this step, cut a small slit in the bottom with a pair of scissors for her to ease the stick in.


Kids Art
 
 
Are you looking for more kids' arts and crafts? Check out and follow my Pinterest board for loads of ideas! 
 

Follow Mini Monets and Mommies's board Creative Kids Crafts on Pinterest.