Mini Monets and Mommies: puppets
Showing posts with label puppets. Show all posts

Saturday, November 19, 2016

Kids' Craft Stick Puppet Art Activity

The kids want to make their own puppets. But, you’re not terribly crafty. When you hear the word “puppet” you see visions of dancing marionettes or over-sized plush play toys. Now you’re thinking, “How could I help my kiddo to make one of these?” Well, don’t worry. This kids’ puppet craft is super simple—and still totally creative too!

Puppet-making craft


(This post contains affiliate links. Please see my disclosure statement for more information).

Set your child’s imagination lose. Right now. You don’t need fancy art materials or crazy processes for the kids to make their own playful puppet friends. With a craft stick and a few basic art materials your child can create her own imaginary creature. And, she can dress it up in some DIY crafty clothes.

Not only does this activity help your child to explore art (gluing, painting, cutting), but it also helps her to build fine motor skills. After she’s done with the art-making, your child can also get in some dramatic play. She can use her imagination to create a character for her puppet and act out story (either one that she makes up or one from a favorite book).

Here’s What You’ll Need:

·        Craft felt (choose a variety of different colors—you can use 8x10-inch sheets or scraps left over from other projects)

·        Scissors

·        Clear-drying school glue

·        Wide craft sticks

·        Googley eyes

·        Tempera paint

·        A paintbrush or a sponge (instead of painting, your child can sponge the paint on—creating textures)

·        Pipe cleaners

·        Modeling clay

·        Optional: Craft feathers

Here’s What to Do:

1. Glue the googley eyes on to the top of the stick.
Kids' art

2. Ball a small piece of clay up to make a nose.

3. Cut out felt clothes. Your child can cut simple shapes (such as triangles). Cut smaller shapes to add on to the clothes as decoration. Glue the felt together.
Children's crafts

4. Twist a pipe cleaner to make “hair.” Your child can also add craft feathers to the pipe cleaners.

Your child can glue the clothes on now, or she can keep the art-making going and paint the craft stick.
Kids' art


5. Paint the craft sticks. Pour a few different colors onto a palette (or use wax paper as an inexpensive barrier). Your child can use a brush or a sponge. Cover the top side, let the paint dry and then flip it over to paint the other side.

6. Now, glue the felt clothes onto the DIY puppets.
Kids' crafts

When the puppets are dry, your child is ready to play, create stories and act out her favorite tales!


Saturday, October 29, 2016

Use Those Felt Scraps: Totally Not Scary Monster Puppets for Kids

Halloween monsters! Spooky! Um, now your 4-year-old is in tears. She’s not exactly ready for the fill-on ghoulishly scary experience that comes along with this holiday. That’s okay. This kids’ craft felt art activity is far from the walking dead, vampires and chainsaw-wielding maniacs that spook their ways through horror flicks.

Craft felt


(This post contains affiliate links. Please see my disclosure statement for more information).

So, this started with scraps. We’ve got crazy amounts of craft felt. I’m a fan of DIY felt boards, so the leftovers tend to pile up. Actually, I stash them away in a baggie, tuck them into the craft bin and usually forget all about them. What happens? I end up with a ridiculous number of felt-filled baggies.

The problem with using the scraps is that they tend to be oddly shaped. There were no circles to add on as faces or roof-shaped triangles to make houses. What to do with these bits and pieces?

Well, instead of tossing them (awfully wasteful, right?) they became sweet—not scary—monsters. Yep, your child can turn a bag, handful or a few felt scraps into perfectly adorable Halloween monster puppets. Oh yeah, you might need a few other things too.

Here’s What You’ll Need:

·        Felt scraps

·        Scissors

·        Clear-drying school glue

·        Googley eyes (I prefer a variety of sizes)

·        Thick craft sticks

Here’s What to Do:

1. Trim the scraps. Or not. It depends on what your child wants to do. She can use the scissors to create any sizes and shapes she wants.

Puppet art
 
2. Glue the scraps onto the tops of the craft sticks. Layer and overlap them to create hairy-looking Halloween monsters!
 
Kids' art
 

3. Glue the eyes onto the felt. Your child can use one giant eye or glue a group of differently sized eyes on.
Kids art
 

That’s it. Well, of course, your child needs to let the glue dry. After it’s completely dry, she can play with the monster puppets. She can create her own stories or act out a monstrous tale. Don’t stop at one puppet, make a few too!

This is also an easy option for a Halloween or birthday party. Simply set out the scraps on a table and let the kiddos glue away. Use a permanent marker to write each child’s name on their puppet’s craft stick (a washable marker will run when your child holds the puppet by the handle).

You can also pack up the very few materials (felt, eyes and sticks), and put them into baggies to use later on. Easily stash the kids’ craft in your bag and bring it to grandma’s, on vacation or anywhere else!

Tuesday, February 16, 2016

Celebrate Dr. Seuss with a Crafty Kids' Activity!

And, March 2 is? … Dr. Seuss’s birthday! Celebrate everything Seuss with a few (or more than a few) fun-filled family activities.
Art activities

(This post contains affiliate links. Please see my disclosure statement for more information).

Get crafty with the kids, creating art activities based on favorites such as ‘The Cat in the Hat’ or ‘Green Eggs in Ham’ or join in on a Read Across America event (schools, libraries and community organizations hold this event annually on March 2). If you’re not exactly sure where to start or what to do, begin with a book. Pick up your child’s favorite Seuss story or grab your own childhood ‘best book pick’ and introduce your little reader to a new-to-her tale. A few favorites to try:

Green Eggs and Ham
The Cat in the Hat
My Many Colored Days
Oh, the Places You'll Go 
The Lorax 
One Fish Two Fish Red Fish Blue Fish 
What Pet Should I Get? 
Horton Hears a Who

What else can you do to celebrate Dr. Seuss?

Try a…

Green Eggs and Ham felt board art activity


Green Eggs


Create a crafty Cat in the Hat

Felt art
Mix colors – Seuss style

Kids' art

Felt art
You can also:

·        Draw your own Seuss-style book together, using paper and crayons.

·        Make paper bag puppets for a pretend play session with some of your child’s favorite characters.

·        Storyboard out one of the books – comic book style.

·        Turn a Seuss story into a one act play. Record your child acting out the characters.

·        Play Seuss-style dress-up. Raid the dress-up bin and create imaginative character costumes.

·        Cook a snack (or a meal) based on a book – such as green eggs and ham.

For even more activities, follow my Pinterest board!
Follow Mini Monets and Mommies's board Dr. Seuss Children's Activities on Pinterest.

Saturday, January 10, 2015

Groundhog Day Shadow Puppets

Groundhog Day is right around the corner. I live only a few mere hours away from the day’s big guy – Punxsutawney Phil! In celebration of the hope that Phil will emerge from his home in Gobbler’s Knob and not see his shadow (meaning an early spring), we’re making groundhog shadow puppets.

Holiday puppets

(This post contains affiliate links. Please see my disclosure statement for more information.)

These aren’t the traditional shadow puppets. Your child can use it as a regular animal stick puppet for hours of pretend play after (or before) she heads outside to see if her ‘Phil’ sees his shadow or not.

Before the art-making starts, why not add in a few fun facts about groundhogs (and Phil’s day). We have groundhogs a ’plenty in this area of the country. When my son was younger we had a family living in our backyard. He thoroughly enjoyed sitting on our deck and watching the little whistle-pigs (yes, that’s another name for them). He also enjoyed learning about the chubby, cute creatures:

·        Groundhogs typically weigh 12 to 15 pounds and are 20 inches long as adults. According to the Punxsutawney Groundhog Club, Phil weighs 20 pounds and is 22 inches long. He’s a big whistle-pig, isn’t he?

·        They are usually found in the northeastern and northcentral U.S., along with Canada and Alaska.

·        Usually solitary animals, they will stay with their young for a few months. That said, the family of groundhogs living in my backyard stayed together for at least two years (we moved after that, so I don’t know what happened to them. Especially because the not-so-whistle-pig-loving people who bought our house filled in all of the burrow holes, according to the neighbors).

·        They live in burrows, where they will hibernate for the winter. They also dig escape tunnels and holes.

·        Groundhogs are rodents of the species marmot. They are part of the squirrel family, according to National Geographic.

·        Even though they have the word “ground” in their name, these animals can climb and swim!

Now, on to the art-making:
Holiday art

Here’s What You’ll Need:

·        Brown craft felt (in 8x10-inch sheets)

·        Scissors

·        Clear-drying school glue

·        Cardboard – Reuse the sides of an old box

·        A dark marker

·        Tape

·        Googley eyes

·        Black card stock or construction paper

·        1 pipe cleaner

Here’s What to Do:

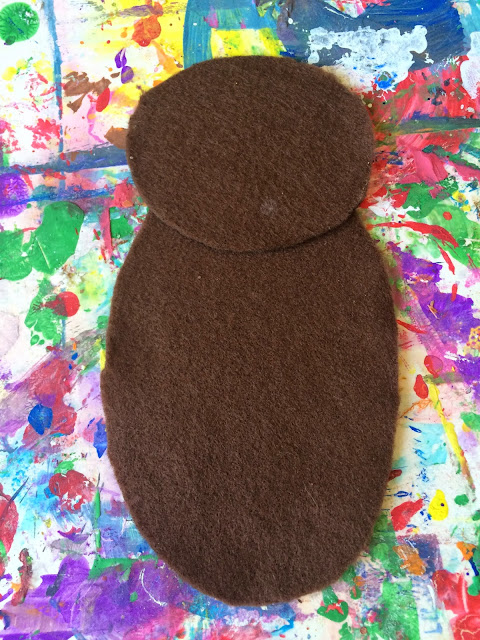
1.     Draw one oval and one circle onto the cardboard. The bigger your child draws them, the bigger the puppet. This is a great opportunity to talk about shapes – adding in a mini-lesson on math and geometry.
 
Geometry math

2.     Cut the shapes out.
Math crafts

3.     Place the shapes onto the felt. Trace around them.
 
Drawing art

4.     Cut the felt out.
Kids' crafts

5.     Glue the felt to the cardboard.
 
Craft glue

6.     Assemble the groundhog. Glue the circle head onto the oval body.
 
Kids' activity

7.     Cut two semi-circles out of the leftover felt to make ears. Have your child glue these to the top of the head.
 
Puppet making

8.     Add a face to the puppet. Cut out an oval or semi-circle out of the black paper to make a nose. Glue this, along with two googley eyes to the circle face.
 
Holiday craft

9.     Give Phil a smile. Cut an inch or two from a pipe cleaner. Have your child curve it to make a mouth. Glue it to the face.

10.  Turn the puppet over (after the glue has dried), and tape a rectangle-shaped piece of cardboard to the back. Your child can also use a thick craft stick.
Puppet craft

Shadow puppet

After the puppet-making is complete, take Phil outside. Have your child hold him in the sunlight and look for his shadow on the ground. When you go back inside write whether or not the groundhog saw his shadow on the handle.
Shadow Puppet

Add a book to the activity. Here are a few fun Groundhog Day reads for young children:

Who Will See Their Shadows this Year? By Jerry Pallotta and David Biedrzycki

Groundhog Day! By Gail Gibbons

Groundhog Day by Clara Cella

Go to Sleep, Groundhog by Judy Cox and Paul Meisel
Are you looking for more winter themed kids' activities? Follow my Pinterest board for ideas!
 
Follow Mini Monets and Mommies's board Winter Activities for Kids on Pinterest.

Sunday, January 4, 2015

Process Art Game and Puppet-Making for Kids

My arts and crafts storage is a mess. Really, truly. Maybe it’s the lack of time or maybe it’s the years of keeping a massive art closet super-neat and tidy at work (teaching kids at an art museum), but I can’t seem to keep the tissue separate from the clay or the googley eyes out of the glitter. Seriously, this is how I store it:

Materials Storage

I don’t recommend storing your child’s art stash like this. But, if you have something similar going on (or a drawer, bin or box full of loose materials) here’s a way to use them, while encouraging your child to explore process art and her own creativity.
Kids' games

I’m a fan of putting out materials in the style of an art buffet. Your child can pick and choose what she wants to use, and create a mixed media type of collage. I used to do this at work when we had odds and ends to use up. This is kind of the same idea, but without setting up art stations or separate materials. Treat it like a game. Your child is going to create a piece of art, but what she makes is up to the materials that she gets and how it evolves. It won’t come out like the one here (at least, it doesn’t have to) and it might not look like anything specific in the end. That’s ok. The idea is for your child to explore and experiment with the materials that she has and use her critical thinking skills to create something out of them. Let your child know that it’s ok if she starts with one idea, and then it turns into something completely different.

Go into your bags, bins, boxes or whatever you have the arts and crafts stuff in and have your child grab a random bunch of materials. This is what we got:

Children's Crafts
 

Have your child sit and look at what she’s got. She can inspect, explore and feel the different items. Ask what she thinks she could make. She might find inspiration in one or two items or come up with an overall game plan. The yarn and hole punch in our materials pile inspired a marionette puppet made from paper.

Kids' crafts
 

Encourage her to use the materials in whatever way she wants until she feels like she is finished. Again, she may not have created ‘something’ or a ‘project’.

If you’re wondering how to make the puppet with your child, here’s the how-to:


Here’s What You’ll Need:

·        Card stock paper or poster board

·        Scissors

·        A hole punch

·        Yarn

·        Clear-drying school glue

·        Googley eyes

·        Modeling clay

·        Tissue paper

·        Tempera paint (and optional shaving cream)

·        Optional: Craft feathers, pom poms, cotton balls

Here’s What to Do:

1.     Cut out shapes. A circle for the head, a big rectangle for the body and smaller rectangles for the arms in legs. This is a great opportunity to talk about math (geometry) and science (the human body). Go over the vocabulary words for the shapes and the body parts that your child is creating.

Math crafts
 

2.     Punch holes in all of the spaces where the body parts connect – under the head, at the top, sides and bottoms of the body and at the arm and leg joints. Your child will also need to make a hole at the top of the head and at the bottoms of the arms and legs (for the strings to control the puppet).
 
Puppet Craft

3.     Use a different process for each section. Your child doesn’t have to make hers look like this. For the body, we mixed shaving cream and tempera for a wash of paint. The puppet’s body is also decorated with a butterfly made from craft feathers and pom poms.
Kids' craftsTempera paint


4.     Make a face. Remember, we were using up the materials that we took out of the art bag – so some of the clay already had glitter mixed in. We used this to make a mouth and nose. The hair is made from unrolled cotton balls and there are two googley eyes.
Child's project

5.     Decorate the arms and legs. The arms are a fluffy, textured tissue paper collage (simply tear off small bits of tissue, crumble them and then glue them to the paper).  The legs are made from modeling clay that is spread over the paper finger paint style and oil pastels.

Collage art

Finger paint
 

6.     Secure the puppet together by tying it with yarn- through the holes that are punched. Add another piece of yarn at the top of the head, and more pieces at the ends of the arms and legs (your child will need longer pieces of yarn for the legs- as they are farther away).

Marionette Crafts
 

Are you looking for more creative crafts? Follow my Pinterest board for ideas!

 
Follow Mini Monets and Mommies's board Creative Kids Crafts on Pinterest.