Mini Monets and Mommies

Sunday, October 11, 2015

Kids' Fall Tree Finger Paint Art Exploration

It’s autumn and the fall leaves are – well, falling. Celebrate the change in the season with a fun felt kids’ art activity!
Fall art

This easy art-making exploration lets your little artist explore the colors of the fall, make his very own tree and change it up later on (but, that’s for another season). I always enjoy felt art activities. The fact that felt sticks to felt is always fun for the kids and it allows them to ‘do’ for themselves. If you have glue fear (and many parents do), this project is much more manageable than the possibility of your child coating the entire kitchen table in a pool of the sticky stuff. Ok, so this paint project is still somewhat messy. It includes finger painting, so it’s not exactly tidy.

One of the best parts of felt crafts is that your child can easily change them out. He can build fine motor skills while putting the pieces together, problem-solve as he puzzles out the picture and think creatively when he rearranges everything the next time around. Keep in mind, this is only the autumn part of the art activity. Next season I’ll be bringing you a new kids’ tree craft!

Here’s What You’ll Need:
Kids' feltboard

·        Craft felt sheets (one whole sheet to stick the tree onto and another to make the tree parts)

·        Tempera paint in fall colors

·        A paper plate or wax paper (use this as a palette)

·        Scissors

Here’s What to Do:

1.     Pour the tempera onto the paper plate or wax paper. Make quarter-sized pools of red, orange, yellow and/or brown.

2.     Finger paint! Have your child dip his fingers into the paint. Each finger print turns into a fall leaf. Keep going until your child creates a full circle of fall foliage.
Kids' art

Children's crafts


3.     Cut the top of the fall tree out.
 
Finger Painting

4.     Make a trunk. Ask your child what shape he thinks a tree trunk is. Cut the rectangle from a piece of brown felt.

5.     Puzzle together the fall tree on another piece of felt.
Finger Paint

Save the pieces for later on to create more trees. Your child can use these in other seasons to make winter, spring and summer nature scenes.

Are you looking for more kids’ crafts?

Paint a few fall leaves!
Kids' crafts
 

Turn the leaves into an autumn wreath!

Fall art
 

AND

Follow my Pinterest board for ideas!
Follow Mini Monets and Mommies's board Creative Kids Crafts on Pinterest.

Tuesday, October 6, 2015

15 Halloween Kids' Crafts and Art Activities

Are you looking for a few fun Halloween kids’ crafts? Of course you are! If you were looking for the top 10 colleges in America or the best new dog hairdos, you probably wouldn’t be here. That said, supposing you’re still on the hunt for anything that’s spooky (in a kid-friendly sense of course) for the October holiday, we’ve got it!
Holiday art

From bat mobiles (literally, and not the vehicle that Batman drives around in), spiders, mummies and haunted houses to anything else Halloween-themed, these are a few of my favorites.
Halloween art

Pumpkins


How-To Color Pumpkin Seeds

Bats


Glow In the Dark


Mummies and Ghosts

Sea shell


Spiders

Paint art


If you’re still on the hunt for Halloween activities, check out my fall Pinterest board for ideas!
Follow Mini Monets and Mommies's board Fall Activities for Kids on Pinterest.
Monday, October 5, 2015

Pumpkin Suncatcher Halloween Kids' Craft

Halloween is coming up! Unless, of course, you go by the store display schedule. In that case, it’s been fall since somewhere in July. If you’re just starting to get around to dressing up your home for any autumn festivities (I haven’t even really begun yet either), these Halloween pumpkin kids’ crafts are perfect.

Halloween art


These are super-simple to make and teach the kids a lesson or two. Not only are the kiddos getting artsy, but they are learning about math (shapes and the fractions) and science. You can hang the finished product on the windows and watch the sun shine in through the pumpkin’s eyes, nose and mouth. Use this as an opportunity to explore the science of the light. Ask your child why the light comes through the cut out shapes, but not through the rest of the jack o’lantern. You can also use a flashlight (if you don’t want to hang the art on a window) to explore and experiment.

Here’s What You’ll Need:

·        Black craft foam

·        Scissors

·        Orange acetate – Or you can use clear orange folder dividers.

·        Double-sided tape

·        A white crayon or chalk

Here’s What to Do:

1.     Fold the craft foam in half.

2.     Starting at the fold, draw a semi-circle. Ask your child what she thinks will happen when you unfold the foam.

3.     Add half of a square at the top to make a stem.

4.     Cut around the drawing.

5.     Unfold the foam to see what happens.
 
Pumpkin art


6.     Re-fold the pumpkin. Again, starting at the fold cut half of a triangle for the nose and half of a semi-circle (or smile) to make the mouth.

7.     Unfold the pumpkin again.

8.     Cut two circle or triangle shaped eyes at the top.
 
Fall art

9.     Turn the pumpkin over onto its back.

10.  Cut the acetate into a circle that is slightly smaller than the pumpkin shape.
 
Sun-catcher craft

11.   Place the tape on the craft foam. Stick the acetate on top.

12.  Hang the Halloween craft on the window!

Pumpkin window cling
 

Are you looking for more kids’ fall crafts? Check out our:

Glitter pumpkins
No-carve pumpkin

Leaf wreath

Kids' painting

Fizzing fall paint
Autumn art

AND... Follow my Pinterest board for ideas!
Follow Mini Monets and Mommies's board Fall Activities for Kids on Pinterest.

Monday, September 28, 2015

Halloween Glow Paint Sensory Kids' Art Activity

Glow paint is one of my favorite art materials for Halloween. Last fall I mixed the glow-in-the-dark paint with Model Magic to make googley-eyed ghosts (and a few odd little mash-up monsters).

Halloween craft

If you’re looking for a sensory exploration that combines science and art, this craft sand activity is an easy option. Your child can paint a picture, a simple word, individual letters or just make a design. After she’s done painting, start the scientific inquiry with a few open-ended questions. These don’t have to be difficult, just enough to spark your child’s thought process.

For example, try:

·        What do you think will happen to the paint when we turn off the lights?

·        If we cover part of the design with sand, what will change when it ‘glows’?

·        How do you think the craft sand will feel when you glue it onto the paper?

Now it’s time to start the art-making…

Here’s What You’ll Need:

·        Glow paint – Make sure it is age-graded as safe for your child.

·        A paintbrush

·        Construction paper

·        Craft sand or glitter

·        Clear drying school glue

·        A black light

Here’s What to Do:

1.         Paint a picture or a word onto the paper (I used “Boo”, but you can choose another simple Halloween word, your child’s first letter or even a spooky design).
Kids' craft

2.         Draw a pattern or lines onto the letters with glue. Make sure that your child doesn’t completely cover the paint with the glue. If she does, she won’t see the glowing effect.

3.         Sprinkle craft sand or glitter over the glue. Shake off the excess.
 
Fall actvity

4.         Let the glue dry completely.

5.         Turn off the lights and turn on the black light (most glow paints need this to work).
 
Kids' crafts

Are you looking for more fall kids’ activities? Follow my Pinterest board for ideas!

 
Follow Mini Monets and Mommies's board Fall Activities for Kids on Pinterest.

Sunday, September 27, 2015

Candy Corn Fried Ice Cream Halloween Dessert

What does fried ice cream have to do with Halloween, fall treats or candy corn? Usually nothing. But, in this case I’m putting the super-sweet dessert ideas together into one recipe.

Candy corn

Ok, so I kind have a thing for ‘fried ice cream’. Technically, this isn’t really fried. It’s more breaded, but still quite tasty. When I was in high school the ‘cool’ math teacher was obsessed with Chi Chi’s fried ice cream. As an educational pioneer of the time, he put us into work groups to study with, do classwork with and take tests with. Before a big exam he would always say, “I want you all to get together the night before the test, go to Chi Chi’s for fried ice cream, and study there.” As you can imagine, I was totally excited when (fast-forward a few decades) my son came home from his middle school cooking class telling me that he had learned how to make none other than – fried ice cream!

Deciding not to make the ICE CREAM completely unhealthy, his teacher had them ‘bread’ them frozen stuff with corn flakes. I used that technique in this dessert as well. This method also works well if you have your kids helping. They can do most of the prep-work. Not wanting to miss out on the opportunity to carry the corn them on, I figured, “Why not add in some candy corn and make a Halloween fall treat?”

And here’s what happened…

Here’s What You’ll Need:

·        Vanilla ice cream

·        Corn flakes cereal

·        Candy corn

·        A tortilla

·        Cinnamon

·        Vegetable oil

·        Sugar

·        Optional: Honey

Here’s What to Do:

1.     The actual fried part – Fry the tortilla. Coat a frying pan with oil, put the tortilla on and fry it. Flip it and fry the other side.
 

2.     Mix a tablespoon of sugar with a pinch of cinnamon. Sprinkle the mix over the tortilla.
Sugar tortilla

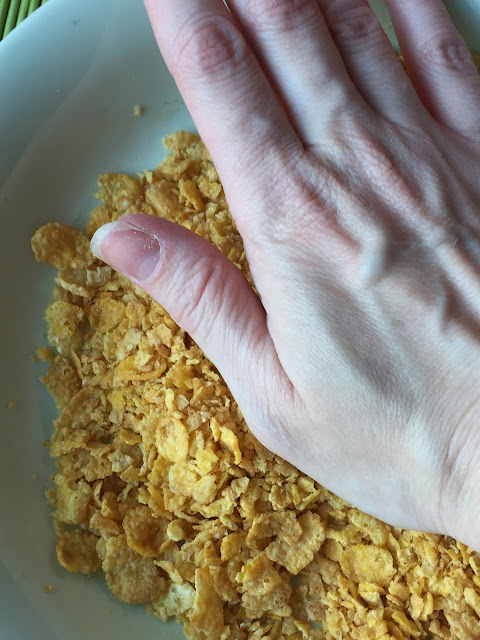
3.     Crush the corn flakes. Put them into a bowl and use your freshly washed hands to smoosh them (as a bonus, this action is quite exfoliating and leaves your hands super-soft).
Crushed cereal

4.     Scoop the ice cream into a ball. Honestly, I don’t own an ice cream scoop. My solution was to use my hands (ala snow ball-making style) to form the sphere. The kids will get a kick out of ‘playing’ with their food while making an ice cream ball.
 
Dessert scoop

5.     Roll the ice cream in the corn flakes, coating it.
 
Corn flakes

6.     Press a few candy corns onto the outside of the ice cream where the corn flakes didn’t stick.

Halloween treat
 

7.     Set the finished product onto the fried tortilla.
 
Ice cream

8.     Optional: Add a drizzle of honey, a pinch more of cinnamon sugar or even garnish with festive gummies.

Are you looking for more fall recipes? Follow my Pinterest board for ideas!
Follow Mini Monets and Mommies's board Fall Foods on Pinterest.
Wednesday, September 23, 2015

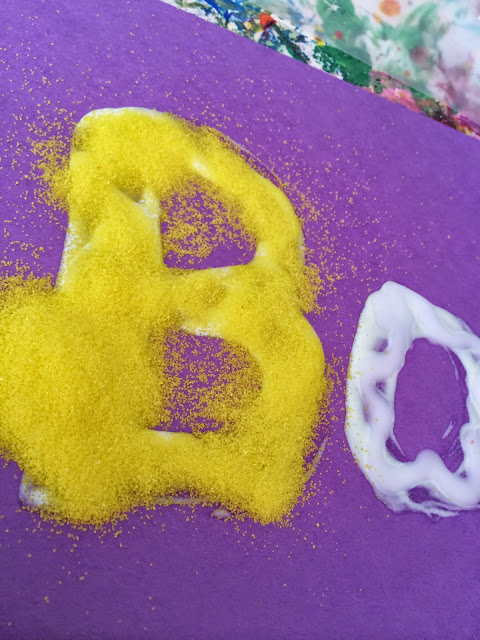
How-To Color Pumpkin Seeds

Fall means a lot of things. It’s finally sweater weather and it’s time for pumpkins, leaves turning, Halloween and all things apple! Every year we head off to the same local farm to pick our pumpkins at their Fall Festival. Actually, I started going to this particular farm when I was about 5-yars-old with my own parents. Each annual trip includes climbing on the mountain of pumpkins, eating some sort of deep fried apple delicacy and taking home a trunk filled with would-be jack o’lanterns.
Pumpkin activity

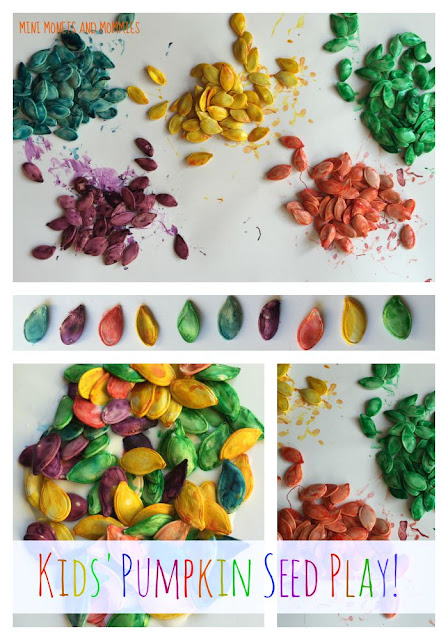
With so many pumpkins we have more than our fair share of seeds. While we bake some, I have to admit there are plenty that get tossed out with the rest of the pumpkin ‘guts’. If you’re in the same situation (i.e., you have about a zillion pumpkin seeds and nothing to do with them), try coloring them! Not only does this autumn activity for kids help your little one get artsy, but it also includes science, a sensory exploration and fine motor skill-building. After coloring the seeds, your child can use them for activity after activity. First, let’s start with the color-coating process…

Here’s What You’ll Need:

·        Pumpkin seeds

·        Sandwich-sized baggies – I recommend using the zipper kind, but I did also try the fold over ones. Even though these worked, remember to be extremely careful to twist the top together (this keeps the seeds and color from spilling out).

·        Food coloring

·        Cardboard

Here’s What to Do:

1.     Explore the pumpkin! Let your child scoop out the seeds with his hands, putting them on cardboard (reuse the side of an old box). Spend some time investigating what’s inside the pumpkin and comparing it to the outside. If you have a magnifying glass, use that too. Ask a few questions such as, “Does the inside look like you thought it would?” or, “What can we use the seeds for?”

2.     Rinse off the seeds. Put them in a strainer and run them under tap water until they aren’t quite so slimy.

3.     Divide the seeds into the baggies—using one bag per color. Make as many colors as you want. You can use dried seeds as well. I like to use the still-wet ones, as it helps spread the food coloring around.
Fall activity
 

4.     Drip two drops of food coloring into each baggie.
 
Color craft

5.     Completely close the bags. Shake, mush and push the color over the seeds. This is an easy fine motor sensory activity to for your child. While kneading the color through, ask your child what he feels through the bag.
 
Kids' crafts

6.     Open the bags (one at a time), and dump the seeds out into like-colored piles onto a dry piece of cardboard.

Fall project
 

7.     Let the seeds dry. I put them on a sunny windowsill.
 
Seed science

8.     Play with the colorful pumpkin seeds!

What can your child do with the seeds?

Try:

·        Sorting them by color.

·        Making a pattern by hue.

Kids' science

Math activity
 

·        Tossing them into a fall-themed sensory bin.

·        Using them to create a picture.

·        Sprinkling them into glue (like you would with glitter or craft sand).
 
Children's crafts

·        Anything else your child can imagine.

Are you looking for more fall activities? Follow my Pinterest board for ideas!
Follow Mini Monets and Mommies's board Fall Activities for Kids on Pinterest.