Mini Monets and Mommies: fall
Showing posts with label fall. Show all posts

Monday, November 16, 2015

Pecan Pie Cookie Ball Truffles

Cookie truffle balls are one of my favorite things to not bake. OK, so they might also be one of the few things that I ‘cook’ well. Pecan pie might not be anyone’s immediate thought when hearing the words, “Cookie balls”, but maybe it should be!
Cookie Balls

You’re looking for an easy dessert solution to your Thanksgiving and holiday party baking woes. This is super-simple, and the kids can even get in on the baking action.

Here’s What You’ll Need:

·        1 cup pecans

·        Golden sandwich cookies (Oreos or other cookies, with a cream filing)

·        6 oz. softened cream cheese

·        1 cup brown sugar

·        ½ cup cornstarch

·        ¼ cup water

·        2 egg yolks

Here’s What to Do:

Make the cookie balls—

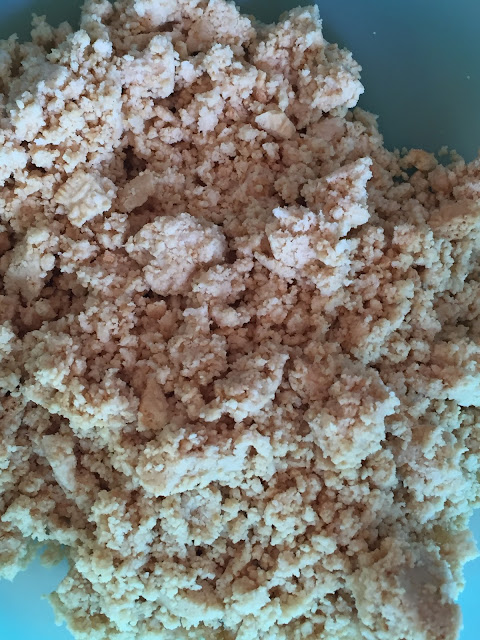
1. Crush the cookies in a food processor.
 

Cookie recipe

2. Mix the cream cheese in with the cookies.

3. Shape the mix into balls that are slightly smaller than plums.

4. Pop the cookie balls into the freezer for one hour.

5. Take the cookies out of the freezer.

Make the pecan mix –

1. Chop the pecans – if you didn’t already buy pre-chopped ones.

2. Measure and mix the brown sugar and cornstarch (if the kids are helping, this is a perfect opportunity to sneak in some math).

3. Add the water and egg yolks, mixing in a saucepan over a low heat.

4. Stir in the pecans. Continue mixing until you’ve got a pecan pie filling consistency.
Holiday recipe

Complete the recipe –

1. Coat the cookie balls with the pecan pie mix – be careful, it will be hot.
Thanksgiving dessert

2. Serve! I served mine with vanilla ice cream and a drizzle of maple syrup. Yum!
Pie cookies

Are you looking for more cookie truffle recipes?

What about pumpkin pie truffles?

Cookie recipe
 

OR, how about chocolate pretzel cookies?

Cookie balls
 

Or, you could follow my Pinterest board for ideas galore!

 
Follow Mini Monets and Mommies's board Oreo Truffle Balls on Pinterest.

Friday, November 6, 2015

Thanksgiving Table Toppers Kids' Art Activity, With Turkeys!

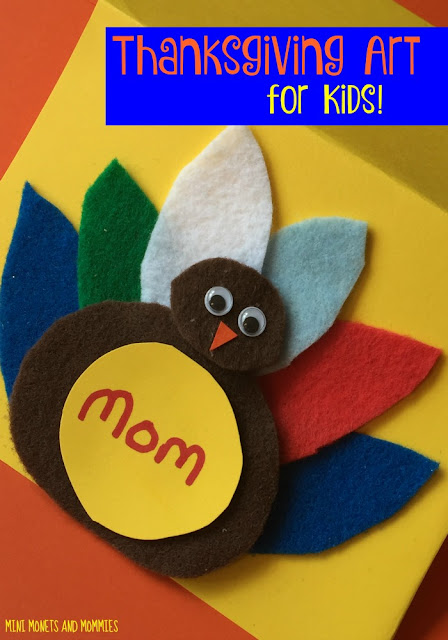
Thanksgiving table toppers range from perfectly pricey little pieces to handmade (or rather, kid-made) creations. When my son was younger we used to make crafty little place cards, napkin rings and other holiday accessories every year. These turkey-themed notecards are a favorite.


Kids' crafts

Not only does this Thanksgiving art activity result in a cute little craft that helps you set the holiday table, but it also gives the kiddos something to do while you prep for a mega meal. Gather the family in the kitchen and start the crafting as you prep for Thanksgiving dinner. This gives you the chance to supervise the kids and join in on the art-making too! Assign each child a family member or guest to create for. Even if there are only three of you having a family meal, your little artist can still craft up a card for you or your spouse.

And now, on to the art…

Here’s What You’ll Need:

·        8x10-inch card stock paper – choose any color that you and your child want

·        Craft felt sheets – in a few different colors

·        A marker

·        Scissors

·        Googley eyes

·        Clear-drying school glue

Here’s What to Do:

1. Position the card stock paper vertically. Fold the paper from the top to the bottom.

2. Cut the paper at the fold. Now you have two cards for two different family members or guests.
Paper craft


3. Fold one of the card stock pieces in half (from top to bottom), making a tent shape.
Kids' craft

4. Cut two circles from one of the felt sheets. Make one bigger than the other (both need to fit on the front of the folded card). The smaller circle is the turkey’s head, and the bigger one is its body.

5. Cut ‘feathers’ from other colors of felt. Have your child draw and cut oval shapes.

6. Glue the feathers to the front of the card, making a fan. Overlap the edges a bit.
Thanksgiving art

7. Glue the turkey’s body onto the center of the feathers. Add the smaller circle (with glue) to the top.
Place card

8. Draw and cut a small triangle from another piece of card stock paper to make a beak. Glue the beak to the turkey’s face.

9. Add two googley eyes with glue.
Craft felt

10. Write the guest’s name onto another piece of card stock with a marker. Cut the name out, making a circle shape.

11. Glue the name to the center of the turkey.
Thanksgiving table-topper

Place card

Hey wait! Your child didn’t just make a cutesy craft, she also got in a bit of learning. She explored geometry (the turkey’s shapes), puzzled together pieces while learning about the part-to-whole relationship (when she put together the turkey) and even got in a mini writing lesson.

Are you looking for another Thanksgiving art activities for the kids? Follow my holiday Pinterest board for ideas!
Follow Mini Monets and Mommies's board Thanksgiving Kids' Activities on Pinterest.

Saturday, October 24, 2015

Pumpkin Seed Fall Tree Kids' Art!

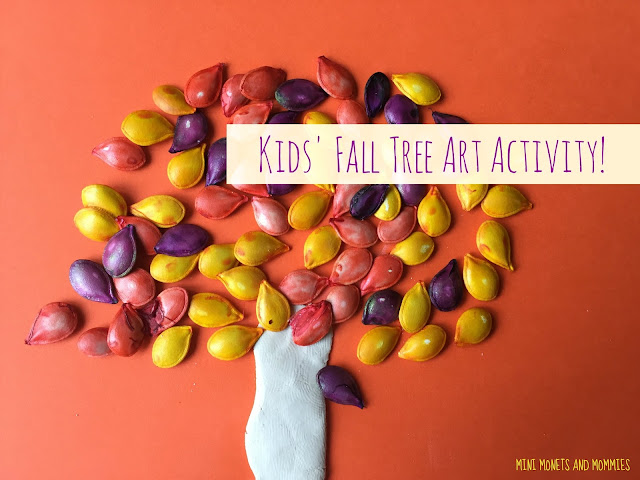
Fall is pumpkin time! Pumpkin spice, coffee, cookies, cakes, cupcakes and of course crafts. My favorite thing to do with the seeds that we scoop out after carving out Halloween jack o’ lantern is coloring them (of course, that comes in a close second to eating them). While the colorful seeds are fun enough on their own, we added a little glue and made a textured fall tree!

Fall tree

(This post contains affiliate links. Please see my disclosure statement for more information).

This isn’t just an autumn art activity. Instead of coloring the seeds with fall hues, your child can go with green and make spring or summer trees. In the winter, try some white tempera and make snow-covered seed-leaves.

What can the pumpkin seed art activity teach your child? A lot! Aside from the artsy aspect, there’s color recognition, math (count the seeds or make patterns with them), science (explore the seeds through the senses and discover the wonders of the fall season) and it also builds fine motor abilities.

Here’s What You’ll Need:

·        Pumpkin seeds

·        Food coloring (in fall colors)

·        Sandwich baggies

·        Card stock paper

·        Modeling clay

·        Clear-drying school glue

Here’s What to Do:

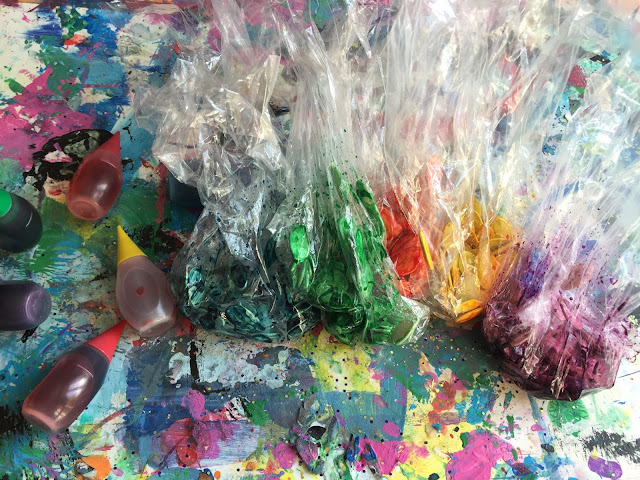
1.     Color the seeds. Put them in baggies. Add a drop or two of food coloring into each bag. Shake, and then pour the seeds out onto a piece of wax paper. Let them dry. For more detailed steps, check out my pumpkin seed coloring how-to.
 
Colorful craft

Pumpkin art


2.     Sculpt a trunk. Spread the clay out on the card stock in the shape of a trunk. Think of it like your child is finger painting with clay. Unless the clay is very old, it should stick. If it doesn’t, use a few dabs of glue.
 
Kids' craft

3.     Glue the dried colorful seeds on top of the trunk as leaves. Make patterns or just attach them in a random fall spread. Your child can also add a few to the bottom of the paper to look like fallen leaves.
 
Autumn art

That’s it! It’s a super-simple fun fall craft for kids.


Are you looking for more autumn activities? Follow my fall Pinterest board for ideas!
Follow Mini Monets and Mommies's board Fall Activities for Kids on Pinterest.

Tuesday, October 13, 2015

BOO Someone with a Monster Themed Gift Kit

This shop has been compensated by Collective Bias, Inc. and its advertiser. All opinions are mine alone. #BOOItForward #CollectiveBias


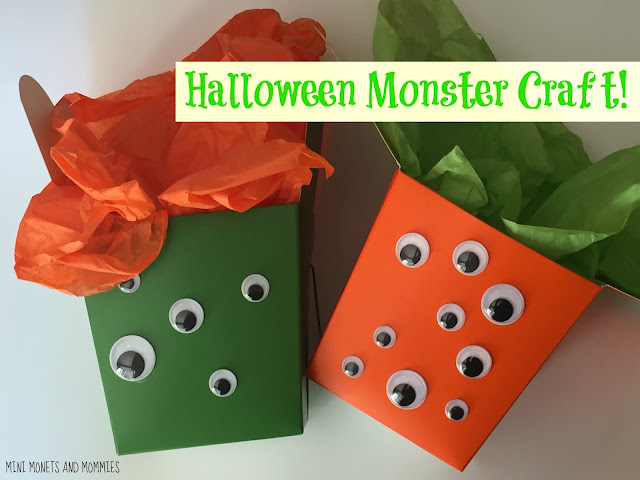
Halloween is coming up, and we’re getting ready with to BOO a few friends with some crafty little gift baskets. My son is well past the age where getting candy thrown at him during the community Halloween parade is cool (he just turned 14, so just about everything is uncool now). That said, after spending the better part of a Saturday morning at Wal-Mart he was a bit more than ok with picking out some tasty treats. Little did he know that they really weren’t all to give away – I had planned on saving a few to BOO him with.
Halloween basket
 

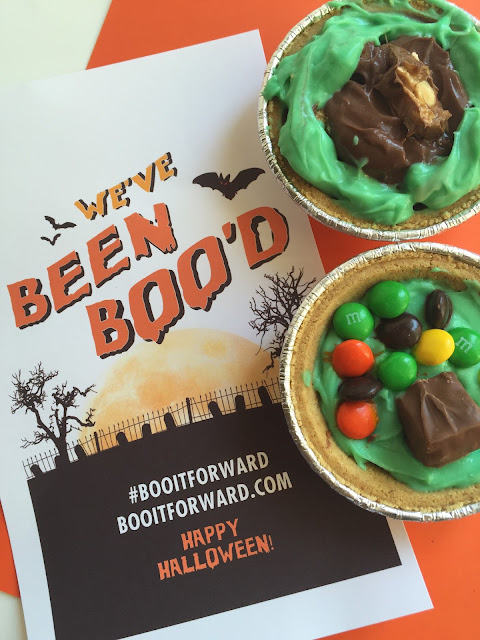
If you’re wondering how you can BOO someone (or what exactly that means), check out this free printable BOO card! After downloading and printing it, you can put together a BOO basket too. I opted for a monster-themed take-out container.

Here’s What You’ll Need:


·        Paper take-out containers – I used orange and green, but you can also use plain white and paint the outside.

·        Clear-drying school glue

·        Googley eyes – Preferably in different sizes.

·        Tissue paper

·        Candy I used a mix of TWIX®, SNICKERS®, 3 MUSKETEERS® and M&M’s®.

·        Mini soda cans – I used 8 oz. Halloween cans of 7UP® and A&W®

Here’s What to Do:

1.     Turn the container on one side.

2.     Dot between 5 and 10 dabs of glue on the container.
 

3.     Press googley eyes on the glue.
 

4.     Let the glue dry.

5.     Flip the container onto the next side and repeat.

6.     Keep going until each side has eyes on it.

7.     Stuff the container with tissue. Fluff the ends so that they stick out.
Monster box

8.     Add the soda can to the top or put it in the center and arrange the candy around it.

9.     Insert your printed BOO card into the back of the basket (or tape it behind the container as a frame).
Treat Pack

After I BOO’d my teen, we whipped up a quick batch of Halloween mini pies. These are so simple, and I don’t have to worry about cooking or lengthy bake times (these are completely no bake). To make these little Halloween treats….

Here’s What You’ll Need:

·        Mini graham pie crusts

·        Pudding – I used chocolate and vanilla.

·        Food coloring – I added green to the pudding for a Halloween look. You could also use orange as well.

·        Chocolate candy – I used a mix of TWIX®, SNICKERS®, 3 MUSKETEERS® and M&M’s®.

Here’s What to Do:

1.     Cut the candy bars into pieces.
 

2.     Crumble the candy into the bottom of the pie crust.

3.     Add a few drops of food coloring to the pudding.


4.     Scoop the pudding on top of the candy.


5.     Sprinkle some more candy/candy pieces on top.
 
Candy pie

We also took the A&W®, and made spooky ice cubes. I had a silicone bat-shaped mold left over from some holiday baking. I cleaned out all of the crumbs, filled it up with the soda and froze the cubes. I popped them in to a clear soda (such as 7UP®) to go along with the mini pies!

Soda cubes

Halloween treats

So, go ahead BOO it forward, and check out how to win an eGiftcard!

#booitforwardsweepstakes


Tuesday, October 6, 2015

15 Halloween Kids' Crafts and Art Activities

Are you looking for a few fun Halloween kids’ crafts? Of course you are! If you were looking for the top 10 colleges in America or the best new dog hairdos, you probably wouldn’t be here. That said, supposing you’re still on the hunt for anything that’s spooky (in a kid-friendly sense of course) for the October holiday, we’ve got it!
Holiday art

From bat mobiles (literally, and not the vehicle that Batman drives around in), spiders, mummies and haunted houses to anything else Halloween-themed, these are a few of my favorites.
Halloween art

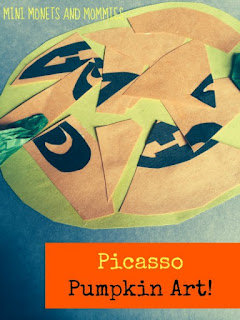
Pumpkins


How-To Color Pumpkin Seeds

Bats


Glow In the Dark


Mummies and Ghosts

Sea shell


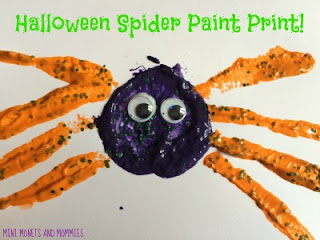
Spiders

Paint art


If you’re still on the hunt for Halloween activities, check out my fall Pinterest board for ideas!
Follow Mini Monets and Mommies's board Fall Activities for Kids on Pinterest.

Friday, August 28, 2015

9 Awesome Autumn Art Activities for Kids!

Fall is right around the corner. Ok, so I’m not jumping to get the summer over with just yet. But, pretty soon those leaves will begin turning and it will once again be sweater weather! In honor of the impending autumn season, I’m looking back to some of my favorite fall leaf kids’ art activities.


kids' crafts

Even if it’s not fall yet (or you live in a climate that is constantly warm – and the leaves never change shades), you can still do plenty of these children’s crafts. There are green leaf activities and a few that use paper versions of the real thing.

Tissue Paper Prints: If you’ve ever accidentally gotten non-colorfast tissue paper wet, you know what happens. The color runs everywhere. Use this principle to make autumn-hued prints on paper leaves.

Paint Splatter: Jackson Pollock lover’s will get a kick out of this autumn abstract art activity! Your child can use the real deal or draw and cut out paper leaves for this project.
Abstract art

Leaf Mobile: Take those paint splatter leaves (or make other artsy paper ones) and add some physics to your child’s art-making.

Fall Tree: Use leaves (either colorful ones or those leftover summer green ones) to paint print a seasonal tree.

Color Change Clay: This is one of my favorites! I used to teach a preschool art class in a museum’s galleries – that means no paint. So, we’d use clay to ‘finger paint’ with. This activity lets your little artist change a green paper leaf into a colorful concoction, minus the mess.

Water Colors: Pretty paints plus a leaf or two makes a fantastic fall craft.

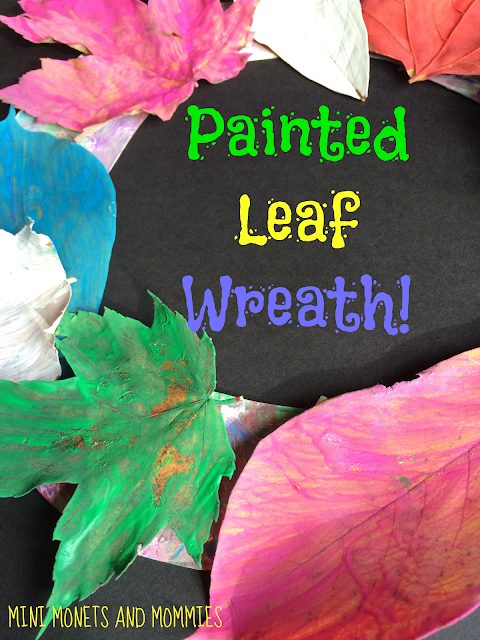
Fall Wreath: I originally made this one for Thanksgiving, but the kids can create it any time of the year.

Abstract Art: Paint, paint and more paint makes this abstract activity fall fun for the kids!

Finger Paint: Perk up those dull brown leaves with some finger paint sensory process art.
Fall art-making

Are you looking for more fall kids’ activities? Follow my Pinterest board for ideas galore!
Follow Mini Monets and Mommies's board Fall Activities for Kids on Pinterest.

Tuesday, November 25, 2014

Rainbow Art for Black Friday Sale Day!


Black Friday is on the horizon and there will be sales galore (many of them starting on or even before Thanksgiving itself)! Even though you may enjoy the deals that the shopping festivities have in store, will your child be equally as pleased? When she gets the gifts she will be, but she won’t feel that giddy sense of glee as you drag her from store to store.
Kids' crafts

(This post contains affiliate links. Please see my disclosure statement for more information).

Instead of bringing your child on your shopping excursion, let her stay home with dad, a sitter or grandma. Turn Black Friday into a rainbow of activities with an imaginative array of art projects. These crafting adventures won’t just occupy your child while you’re away (and the rest of the family is still in a post-Thanksgiving turkey stupor). They will help to build color recognition skills, work out her fine motor abilities and let her get creative!
Click on the pictures to see the full activities--

Fall Leaf Finger Paint:
Finger Paint
 

Bring in a few fall leaves and let your child create a rainbow with them! This is super-messy, but also super-fun.

Frozen Color Mixing:

Frozen Paint
 
Combine science and art in this primary to secondary color mixing activity. Your child can explore how two colors make a new one as well as scientific concepts such as states of matter.

Pink and Purple Paint Print:

Print Project
Learning letters, sounds and colors together! What could be better? Sand, it’s a creatively messy art activity that allows your child to investigate how she can make paint prints using different objects.

Red Collage:

Dr. Seuss Art
 
This mixed-media collage is based on one of my favorites – My Many Colored Days by Dr. Seuss. You can also use this book for plenty of other colorful collage and paint projects.

GlitterRainbow:
Glitter Craft
 

Clay, glitter and smiles. This easy art project encourages your child to play with clay, “finger painting” with it. Add in a hint (or more than a hint) of glitter for a sparkling good time.

Are you looking for more colorful art activities? Follow my Pinterest board for ideas!

 
Follow Mini Monets and Mommies's board Creative Kids Crafts on Pinterest.