Mini Monets and Mommies: famous artists
Showing posts with label famous artists. Show all posts

Wednesday, May 18, 2016

Kids' Impressionist Art Activity: Painting Without a Brush!

Painting without a brush? That’s right! Kids’ art activities don’t always require the ‘materials’ that you might think they need. Before hitting the craft store, take a look around you. This Monet-inspired children’s art exploration gives your little artist the chance to explore Impressionism, while getting into nature.

Plant art


(This post contains affiliate links. Please see my disclosure statement for more details.)

How? Let’s start with Impressionism. Way back when (I’m talking about back in the days of Monet, Manet and Degas) the Impressionist painters took their easels outside and captured what they saw – the setting, the season, the time of day and the natural light. So, with that in mind we’re going outside to paint too!

Okay, maybe you don’t have an easel. Don’t worry about buying one (or truing to DIY one). Your child can put her paper on the ground or any other solid surface – such as a picnic table, clip board or even a thick piece of a reused cardboard box.

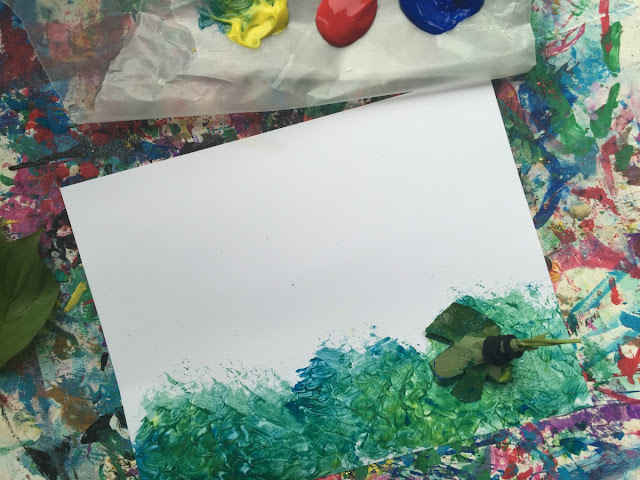
Now you might be asking, “How is my child going to paint like an Impressionist, without a paintbrush?” Look around you. You’re outside, and what do you see? Ask your child. She’ll tell you – trees, plants and other growing greens. Grab a few leaves and make your own brush. The leaf brush adds texture and is a fun way for your child to explore making art.
Children's art

And, now on to the actual painting process…

Here’s What You’ll Need:

·        Cardstock paper

·        Leaves

·        Scissors

·        Tempera paint

·        A rubber band (or yarn)

Here’s What to Do:

1. Bundle the leaves together.

2. Bind the leaves with the band, or tie them with yarn.
Kids' activity

3. Cut the top of the leaf bundle, making slits to create a ‘brush’.

4. Pour the paint onto a palette (we use wax paper as a less expensive option). Try using only the primary colors (red, blue and yellow) plus white. This gives your child the chance to mix her own hues.

5. Take a look around (your child should be outside). Ask your child what she sees. Talk about the light, the time of day, the time of year and anything else in the environment.

6. Start painting! Your child can paint the grass, the trees, the skies or whatever else she sees. Dip the leaf ‘brush’ into the paint and dab it onto the paper. Layer color on top of color. If the brush starts filling with too many colors, make a new one.
Plant activity

7. Add smaller details with a rolled leaf. Simply roll up the leaf, like a scroll, and use the end as a paintbrush.
Monet painting


Are you looking for more kids’ art activities? Try out these famous artist ideas:

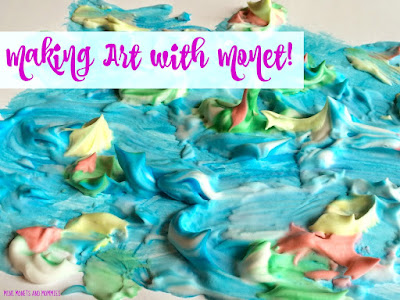
Shaving Cream Monet Painting
Monet art
 

Van Gogh Clay Paint
Kids' art
 

Renoir Garden Art
Renoir art
 

And, follow us on Pinterest!

Tuesday, February 23, 2016

Spring Flower Kids' Art Actvity, with Monet

The weather’s warming up, and you’ve got spring on the brain. Kids’ flower art activities may just be the answer! This one focuses on Claude Monet’s famous Impressionist painting – Water Lilies.

Monet art


(This post contains affiliate links. Please see my disclosure statement for more details).

Obviously I’m all in for Monet themed art. Water Lilies is one of my favorite works for art-viewing experiences. When I worked as a museum educator, I always enjoyed taking the kids (even children as young as 3-years) to look at this painting. Recently we did a DIY chalk finger paint activity with this artwork. I’ve also done a clay finger paint and shaving cream art.

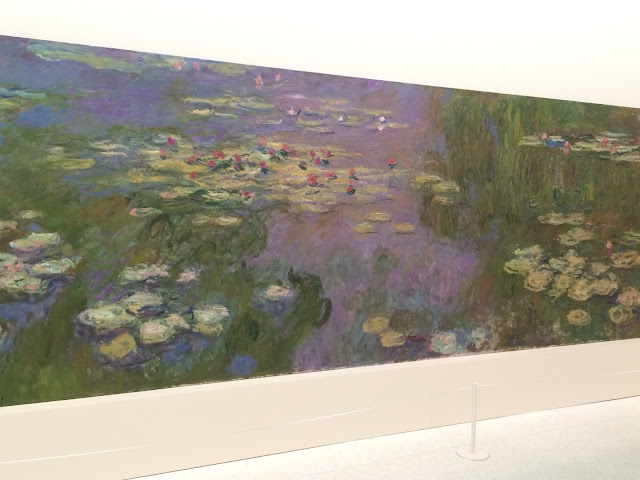
This spring art activity includes a few different processes (water color painting and collage), while getting into concepts such as color, shape and texture. Start out with a look at the real thing. If you don’t happen to have one of Monet’s Water Lilies on hand (and why would you?), here’s a photo to use:
Water Lilies
 

No, your child won’t get to see the complete texture of the work. But, she can take a look and tell you what she sees. If she’s not sure where to begin, ask a few open ended questions such as:

·        What do you see?

·        Why do you think the artist painting this?

·        What do you think the artist used to create this?

·        What time of the year do you think this is, and why?

·        What season do you think this is, and why?

Now let’s get to the art-making…

Here’s What You’ll Need:

·        White card stock paper

·        Water color paint

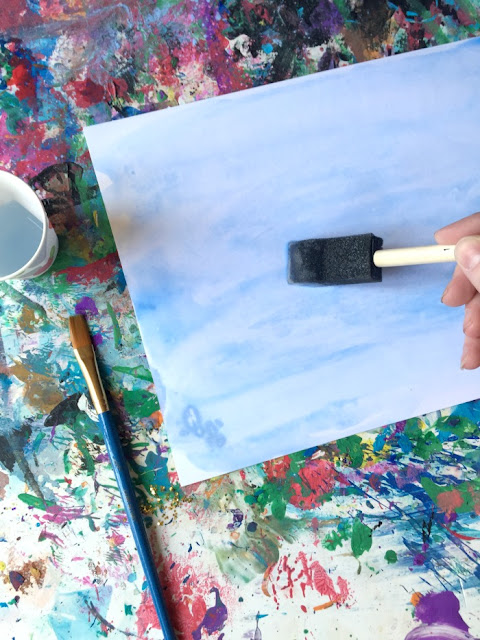
·        2 paintbrushes (a regular bristle type brush and a spongy one work best)

·        Clear-drying school glue

·        Tissue paper

·        Scissors

Spring craft
Here’s What to Do:

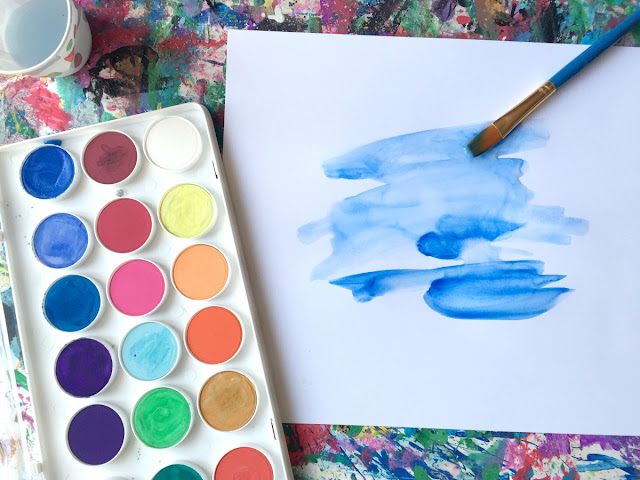
1. Dot a few dabs of water color paint on the paper. Brush over it with water to make a light color wash of blue (this will become the pond’s water). Your child can also experiment with pouring small amounts of water directly on to the paint. Yes, this is messy. But, it’s also tons of fun! Let her pour the water on the paint, and then brush it across the paper.

Water art

Children's art
 
2. Cut green tissue paper out into lily pad shapes. Cut others colors of tissue out into slightly irregular circles to make flowers.

Tissue paper
 
Paper flowers
 
3. Squeeze glue across the paper. Brush the glue over the paint.

School glue
 
4. Press the lily pads onto the paper.

Spring activity
 
5. Pinch the flower paper in the center (your child can also layer two together to make multi-colored flowers). Press it onto the lily pads. You may need to add more glue to make the paper stick.
Tissue paper

Kids' art
 

Are you looking for more famous artist themed activities? Follow our Pinterest board for ideas!
Follow Mini Monets and Mommies's board Famous Artist Kids' Activities on Pinterest.

Wednesday, February 17, 2016

Chalk Finger Paint with Monet's Water Lilies

What do chalk paint, a famous artist and kid-created art have in common? Well, you can find them all here in this Impressionist Monet’s Water Lilies finger paint art exploration!

Monet painting
 
(This post contains affiliate links. Please see my disclosure statement for more details).

Monet is one of my favorite artists. Back when I was working as a museum arts educator, taking the children to see his Water Lilies was always a treat. Maybe it had something to do with the colors, the brush strokes or the sheer size of the work, but the kids were always drawn to it. With that in mind, I’m also kind of a fan of having kids make some of their own Monet’s Water Lilies-inspired art.

Let’s start with the painting itself. If you don’t have the opportunity to look at the real thing (and plenty of us don’t), you can just as easily use a reproduction. Ok, so you won’t get the full-on texture feel of the work. But, your child will still get the chance to see the famous artwork. If you’re not exactly sure how to get started looking at art with your child, I like to begin with a few open-ended questions. For example:

·        What do you think is going on in this painting?

·        What do you see?

·        Why do you think the artists used these colors?

·        How do you think the artist made this?

·        How could you make an artwork like this?

Now that you’ve take a look at the artwork, it’s time to move on to the art-making…

Let’s start with the Impressionist DIY chalk finger paint. There are two ways to do this. For either, you’ll only need two ingredients: Colorful chalk and petroleum jelly. Ok, so you’ll also need plastic baggies for one of the options.

Put the chalk in the baggies, tie/seal them up and smash away. I used the back of a wooden spoon, but your child can come up with her own creative way to crush the chalk into bits (this promotes problem-solving and critical-thinking skills).

Kids' art
 
When the chalk is smashed, mix in the jelly (the more you put in the lighter the color). Now you’re little artist is ready to finger paint. Yay!

DIY paint
 
OR, try this option:

1. Draw with the chalk on white card stock paper. Start with a blue, creating a pond of water.

Monet project
 
2. Add green lily pads, pink, purple, yellow (and other colors) flowers and draw in a few shaded or highlighted areas with different hues of chalk.


Impressionist art
 
3. Scoop some petroleum jelly out. Your child can use her fingers to spread the jelly over the chalk, smudging and smearing it. Add more chalk drawing (and jelly) as needed.

Children's paint
There’s no ‘right’ way to do this art activity. Let your child experiment and explore with the chalk and jelly, discovering how to make the colors spread or how to make textures.

What was that? Did you just ask about more Monet art for kids? Sure, no problem! If your child enjoyed this one, try a Monet…

Clay art
 

Shaving cream Water Lilies
Water Lilies
 

Cupcake (yes, cupcake)
Baking with kids
 

Monet's art
 

Looking for more activities, but with different famous artists? Follow my Pinterest board for ideas!
Follow Mini Monets and Mommies's board Famous Artist Kids' Activities on Pinterest.

Friday, June 5, 2015

Slime Paint Kids' Messy Art Activity

Slime paint! Combining kids’ science and art is a favorite pastime of mine. I also enjoy creating ‘famous artist’ activities (probably from too many years of teaching children’s museum art classes). So, when I started making slime all of the time (even my 13-year-old son enjoyed it, and anything that takes him away from the Xbox is a-ok in my world) I wanted to do something a bit more artistic with it.
Kids' science

In the past I’ve painting with shaving cream, clay and textured finger paint. For this one, we took the famous artist theme and re-created Monet’s Water Lilies – in slime!

I tried a few different recipes that failed in majorly miserable ways. The first ended up looking something like wiggly string floating in water, the second was basically putty and the third was a bit too jello-like. I’m not saying that I’ve perfected the recipe, but I did finally get a consistency that worked as a finger paint. By adding more (and some more) glue, I eventually got a slimy paint that could spread, but also spread apart into fringy strings (like a spider web). When you try this with your child, encourage him to experiment with the amounts. Trying to make different consistencies is half the fun of this activity.


Here’s What You’ll Need:

·        School glue

·        Water

·        Liquid starch

·        Food coloring

·        Card stock paper or cardboard

Here’s What to Do:

1.     Combine the glue and water. We used ½ cup of water and roughly 1 ½ cups of glue. You can change the quantities, but try to keep the water-to-glue ration at 1:3.
 
Kids' math

2.     Measure and mix in ½ cup of liquid starch.
 
Kids' activity

3.     Separate the slime. I chose to use cupcake tins. They have the perfect size of compartments.

4.     Drop a few drips of food coloring into each compartment. Mix it thoroughly. You can add a few drops of water as well. This makes it easier to mix the colors.
 
Kids' art

5.     Spread the slime onto the paper. It kind of looks like melty cheese or something that came out of an alien's nose (i.e., it's not pretty). But, it sure is fun!
 
Paint play

Your child doesn’t have to create a Monet painting with the slimy stuff. He can make an abstract work of art or whatever design he imagines!

Are you looking for more kids’ art activities? Follow my Pinterest board for ideas!
Follow Mini Monets and Mommies's board Creative Kids Crafts on Pinterest.

Wednesday, April 8, 2015

Famous Artist Collage Activity for Kids: Van Gogh

Looking for a famous artist activity for your child to try today? One of my favorite artworks to look at with kids (when I used to teach children’s museum art classes) was Van Gogh’s “The Plain of Auvers”. Maybe it was textures, the colors or the whirly, swirly clouds – I don’t really know. But, the children always seemed to connect with it.
 
Art lesson

Before creating, take a few minutes to look at the painting and talk about it. So, here you go. Turn the laptop around and show this Van Gogh painting to your child. Ask a few open ended questions such as, “What do you think is going on?” or, “How do you think the artist made this?”.  

Famous Artist
 
Now, it’s time for the art-making. A while ago I posted a clay landscape art activity based on this artwork. This time, it’s more of a patchwork collage. Keep in mind, it doesn’t have to look like the Van Gogh painting – it’s just inspired by it. Each panel of the collage should represent a different landscape or natural item. Easy. Basically, grassy fields and flowers!

Here’s What You’ll Need:

·        1 12x18-inch or larger piece of poster board or foam (we used a piece of craft foam)

·        Clear-drying school glue

·        Craft foam

·        Scissors

·        Model magic – the plain white kind

·        Oil pastels

·        Felt

·        Card stock paper

·        Tissue paper

Here’s What to Do:

1.     Cut the card stock paper into rectangles. Make them index card-sized or larger.

2.     Create different panels. Your child can try:

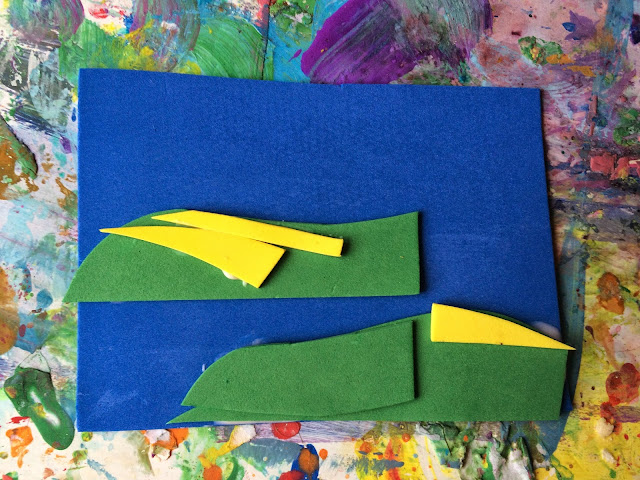
Craft foam shape landscapes: Cut shapes from the foam and glue it onto the card stock or a similarly sized piece of foam.
Kids' Activity

 
Model magic flowers: Mold and press the model magic onto the card stock. Color it with oil pastels.

Kids' art
 
Felt flowers: Cut pieces of felt into shapes and glue them to the card stock or another piece of felt. Your child can also add embellishments with tissue paper.

Felt art
 
Tissue garden: Cut or tear tissue paper. Paint a layer of glue across a piece of card stock. Crumble the tissue into balls, and press it onto the glue.

Kids' crafts

Flower Project
 
Oil pastels: Your child can use the oil pastels to blend a colorful grassy area or a farm field.

Kids' drawing
 
3.     Glue the panels onto the poster board or foam.

4.     Add flowers or plants to the blank spaces. Cut stems from the felt and glue on tissue as petals.
Kids' crafts

Are you looking for more Van Gogh themed activities? Check out my printable art-viewing activity page.

And

Follow our Famous Artists Pinterest board for ideas galore!
Follow Mini Monets and Mommies's board Famous Artist Kids' Activities on Pinterest.

Sunday, March 1, 2015

Textured Painting with Renoir: Famous Artist Kids' Activity

Famous artist activities for kids are some of my favorite lessons! I suppose it’s from years of teaching children’s programs at a museum, but I truly enjoy bringing the world of art to little learners. Recently I’ve done activities on Monet and Jackson Pollock. This time I’m going with Pierre Auguste Renoir.


Renoir activity
 
The French impressionist’s “The Garden in the Rue Cortot, Montmarte” is so springy that I can’t help but to use it for this activity. If the weather where you are is anything like the weather where I am, you’re beyond sick of seeing snow. I’m craving the green grass and bold budding bulbs of the spring. So, to get ready for the new season, we’re going to do a little bit of spring art with Renoir.

I have nothing against using a paintbrush, but I think this artwork lends itself to a bit more of a sensory exploration than a brush will do justice to. With that in mind, this activity uses a few different household items (cotton balls, cupcake liners, tissue and plastic straws) to create a layered texture. I also added in a bit of color mixing to this one! Instead of giving your child a rainbow of colors, try just the primaries (red, yellow and blue) and white. Let her explore and discover her own colors to use in this flower art activity.

Before you begin…

Impressionist painting
 
Take a look at the Renoir painting. Ask your child to tell you what she sees. Ask a few open-ended questions about the painting. Talk about the colors that Renoir used, what season it shows and what time of day it looks like. Ask your child what her favorite part of the painting is and why. Let her brainstorm ways that the artist made the artwork, without telling her that he used paints and a brush.

Now it’s time for the art-making…

Famous Artist
 
Here’s What You’ll Need:

·        Tempera paints in the primary colors, plus white

·        Textured items for painting – Try cotton balls, crumpled tissue paper, straws, cupcake liners, pieces of scrap fabric or anything else that you find around the house that’s suitable.

·        White card stock paper

·        A paint palette or wax paper – It works just like a palette, but is cheaper.

Here’s What to Do:

1.     Pour the paint on the palette. Make four pools- one in each color.

Paint art
 
2.     Pick an item to start painting the stem with. Let your child choose how she wants to begin.

3.     Mix the yellow and blue together to make green. Add in a vocabulary lesson and give your child the words primary and secondary for the colors. Explain that green is a secondary color that she can make by mixing two primaries – yellow and blue. She can also add in some white to make the green lighter.

Color Mixing
 
4.     Dab the paint onto the paper in a line to make a stem. Have your child also add leaves that are oval or triangle shaped.

Paint art
 
5.     Keep mixing new colors.

6.     Brush, dot, dab or sponge the paint onto the card stock, adding a flower top to the stem.

Texture Art
 
7.     Get a fresh piece of paper, and dab on some green paint to start a garden scene. Have your child look back at the Renoir. She doesn’t need to copy the garden in the painting, just get inspiration from it!

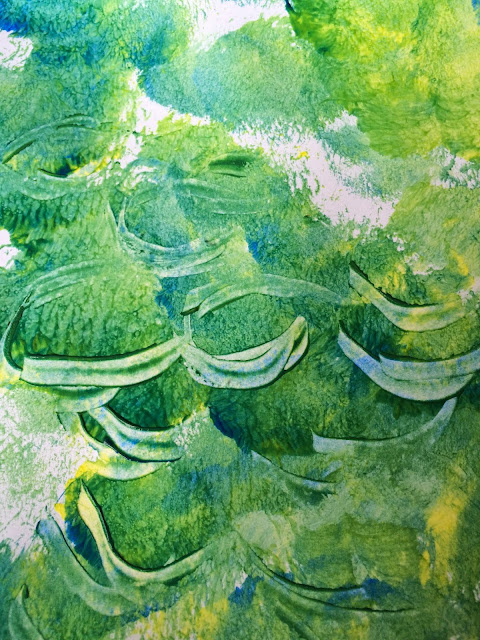
8.     Create leaves in the green paint. Your child can use her fingers or the edge of a straw to make lines, pulling the paint away.

Kids' art
 
9.     Add flowers with different colors of paint.

Renoir art
 
Are you looking for more famous artist activities? Follow my Pinterest board for ideas!
Follow Mini Monets and Mommies's board Famous Artist Kids' Activities on Pinterest.