Mini Monets and Mommies: print-making
Showing posts with label print-making. Show all posts

Saturday, November 12, 2016

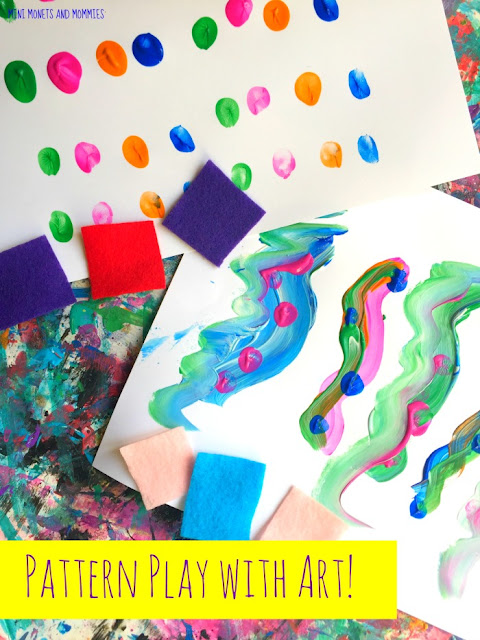
Pattern Play: Kids' Math and Art Activity

For many kids, math isn’t fun. I know, I know. Math skills are totally important for children. But, that doesn’t mean they want to sit at a desk and complete worksheet after worksheet after worksheet. I know my child certainly didn’t. So, when it comes to learning about patterns (a basic math concept) I’m not going to go with the dull approach. I mean, why would I?

Pattern play


(This post contains affiliate links. Please see my disclosure statement for more information).

For many us, math equals dull lessons, doing equations and holding a pencil until our fingers feel like breaking. Okay, so years ago (when many of us were in school) math was a paper and pencil only subject. There was no creativity in it. Well, things have changed. Now our kiddos get the chance to explore and experiment with math concepts in many different ways. And, what an awesomely amazing advancement that is!

Think about it, what would your child rather do—play or toil over worksheets? Um, I’m pretty sure I know the answer. That’s why I really do enjoy taking basic skills (such as recognizing and using patterns) and mixing them into other areas—namely art. This isn’t to say that visual art is the only way to extend math education. Not by far. Plenty of educators add it to music, movement, science, history or any other subject that it fits into.

This kids’ math activity takes patterns off of the printed page and puts them into your child’s hands. She can explore the painting process, play with felt shapes (bringing in geometry too!) and get abstract in an absolutely artsy way! In other words—she’s learning while having fun too. Your child is also getting the chance to explore the science of coloring mixing, discover through her senses, build fine motor skills and get creative.
Math activity

We’re going to cover three separate art activities here. That said, you can also combine them into one pattern play math-art activity. Let your child take the lead. After she feels comfortable with the concept of patterning, encourage her to make a multi-media masterpiece! She can add the felt to the painting (collaging it on with glue), paint on the felt or come up with her own imaginative idea. As long as she’s still playing with patterns (which is the central concept here), take all other “lesson” constraints off of your child. This lets her creative side loose. You might just be completely surprised (in a good way) at what you see!

Here’s What You’ll Need:

·        Craft felt

·        Scissors

·        Clear-drying school glue

·        Card stock paper

·        Tempera paint

·        Optional: Paintbrushes (or your child can use her hands)

Here’s What to Do:

Felt Pattern Play

1. Cut at least two different colors of craft felt into shapes. Assign one shape to each color, or make them all the same shape. Your child can draw the shapes on with a marker or try this freehand.

2. Arrange the felt shapes in a pattern. Your child might choose to make an alternating color pattern or alternate the shapes (if you are using at least two different shapes). As your child gets the hang of this, try adding in more colors. For example, she might make a red, green, blue, yellow, red, green, blue, yellow pattern.
Pattern art

Pattern Finger Print Paint

1. Pour at least two (or you can use more) colors of tempera paint onto a palette, paper plate or piece of wax paper.

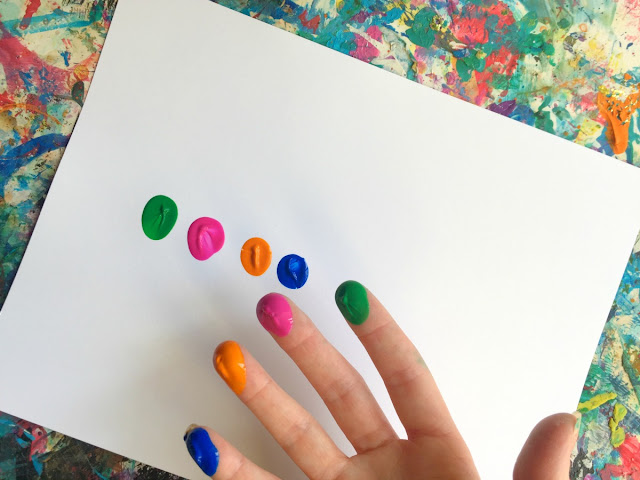
2. Dip one of your child’s fingers into one paint color. Have her make a print on the paper.

3. Repeat the paint printing step with another color.
Finger paint

4. Continue, making a pattern with the colors. Your child can also add one color of paint to each of her four fingers (this is excluding her thumb). She can press her fingers down on the paper, add more paint to them and repeat to create a pattern.
Finger paint

Abstract Art

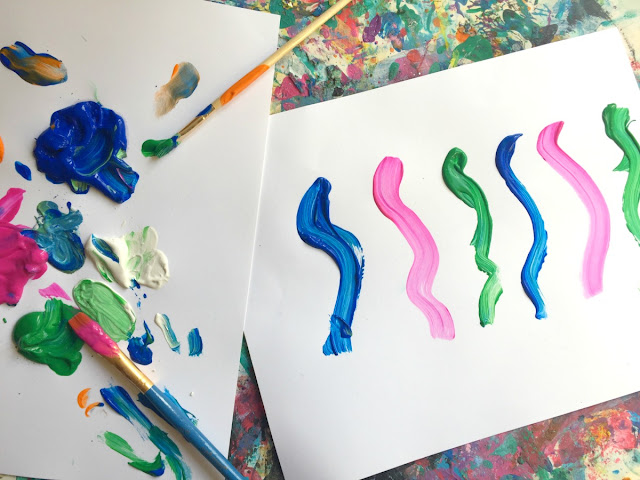
1. Use the paint that you’ve already poured to make a more sophisticated or complex pattern. Your child can start with her painted fingerprints and move from there or create an entirely new painting.
Painting activity

2. Finger paint (or use brushes) make alternating patterns with squiggles, polka dots, zig zags or anything else your child wants. She can create patterns through the colors or shapes that she paints. Your child can also add extra colors. Invite her to mix the colors that you've given her. She can take three colors, and turn them into a rainbow of hues.
Art activity

Combine all of the options or keep them separate as their own art and math activities. It’s up to your child!

Sunday, August 28, 2016

Kids' Painting Art Activities: Without a Brush!

Kids’ painting art activities require a brush, right? Not always! Sometimes it’s entirely possible to help your child get as crafty as she wants, without a store-bought ‘painting tool’.

Kids' art


(This post contains affiliate links. Please see my disclosure statement for more information).

Okay, so you went out and bought a crazy-big pack of paintbrushes. You’re set! Or not. In something like 30 seconds your preschooler turned those brand new brushes into much-covered, crusty, sticky things that barely resemble anything that could be used for art-making. The bristles are bent and matted together, making it awesomely difficult to actually use them for anything at all.

It happens. A lot. When I taught children’s art classes, I was constantly helping the kids to keep their brushes in working order (obviously the museum where I worked frowned upon buying a constant stream of new ones). But, younger children always seem to have the desire to mash, smash and generally smush brushes onto paper. And, sometimes you’d rather let your little artist explore and experiment with painting art activities than sit next to him and say, “Please don’t break the brush.”

So, if you don’t have a brush left (and your child really wants to paint) or you’re just looking for something different to do – try this easy recycled option! Seriously. It’s low-cost and helps your child to get even more creative. He’ll have to figure out how to use the items that you’re giving him to create his artsy masterpiece! Your child will also get a fine motor workout (using the different materials to paint requires him to move his fingers and hands in different ways). If you do have one of those super-sticky brushes, you can also toss that into the mix. Why? Your child can use the other end (the handle end) to create paint-covered point prints or even roll the entire length of the brush (the handle and all) through the paint to make lines.
Child's art

Now, on to the art activity…

Here’s What You’ll Need:

·        Paper (we used card stock, but you could also use construction paper or poster board)

·        Scraps (really, any left-over art item—such as fabric, felt, tissue, cut pipe cleaners, cardboard, paper)

·        Tempera paint

·        Scissors

Here’s What to Do:

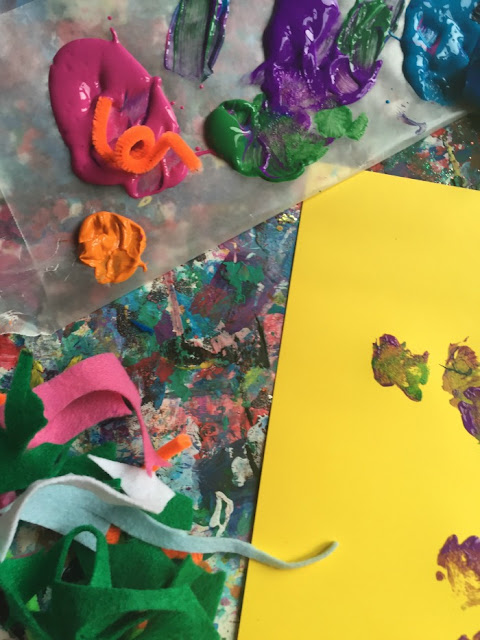
1. Gather the scraps together. Your child can cut some of them into smaller sizes (if needed). He can also crumble pieces of paper or bend pipe cleaners, making new shapes to paint with!
Felt pieces

2. Pour the paint onto a palette. If you don’t have an actual palette, use a piece of thick cardboard or wax paper as an easy (and totally affordable) alternative. Use a rainbow of colors or create a color-mixing kids’ art activity by choosing only the primaries (red, blue and yellow).

Kids' crafts

3. Give your child a piece of paper to paint on. He can dab the scraps into the tempera, and then press them down onto the paper. He makes ‘brushstrokes’ with fabric, prints with pipe cleaners or anything else he can think up!
Kids' paint

Don’t worry if your child isn’t painting ‘something’. Encourage him to explore the process of painting. Doing so lets him make his own discoveries, while getting creative!

Children's art
 

Tuesday, July 12, 2016

Kids' Art and Science: Frozen Vegetable Oil Prints

What happens to vegetable oil when you put it in the freezer? That’s the starting point for this kids' art and science activity!

Science art
 

(This post contains affiliate links. Please see my disclosure statement for more information).

Okay, so I’ve never frozen oil of any sort before. I’m not sure why I ever would have. I’m not a whiz in the kitchen – and, when would there be a recipe that called for freezing olive oil anyway? What I do happen to do a lot is freeze water. No, I’m not an ice-in-every-drink type of girl. Actually, I rarely put ice in drinks. When my son was 4 we went to a friend’s house on one of those scorching hot summer days (we didn’t have AC at the time). She handed him a glass of lemonade with ice cubes in it. And, he cried. Why? He ran over to me screaming, “Mommy, she gave me lemonade with glass in it.” My son was so not used to ice in drinks, he actually thought it was glass.

Fast-forward a decade and I’m making ice all the time. Only now, it’s more for art purposes than drinking (unless my family wants to drink the rainbow-colored cubes that typically inhabit our freezer. So, this time I decided to pour some veggie oil into the mix. And, here’s where the experimenting begins…

Oh yeah, wait just a moment. Not only is this science-y fun, but it’s also an art exploration. Yep. As your child is making discoveries and experimenting with freezing different liquids, he can also create a print. Let me say now, this printing project part happened totally by accident. But, that’s one of the joys of art (and even some science activities). You don’t have to set out to make ‘something’ -- sometimes even if you do, it turns out completely (and amazingly) different than you and your child thought. What does that mean for you? Let go of the idea that everything has to be ‘right’ or look like it does on Pinterest. Sometimes going off course is better than you could have ever expected -- especially when it comes to kids' art and science activities.

And, here’s what you’ll need:

·        Ice cube tray

·        Vegetable (or olive or canola) oil

·        Food coloring

·        Light-colored or white card stock paper

·        Water

Here’s what to do:

1. Drop one or two drips of food coloring into each compartment of the ice cube tray. Try using the primary colors (red, blue and yellow). Mix them (adding one drop of red and one of blue, and so on) to make more hues.

2. Add water to half of the compartments and oil to the other half. Encourage your child to observe and describe what happens to the food coloring when he adds the oil. He can add another drop to the oil too (it’s pretty cool).

Science art
 
3. Freeze overnight. Ask your child to predict what will happen to the water side and the oil side.

4. Take the cubes out. I don’t want to give away any big secrets here, but I’m going to anyway. For those of you who aren’t up on what freezes and what doesn’t – the oil side will turn into a creamy semi-solid. Shhh – don’t tell your child. Let him explore and observe for himself. So, you can pop the ice cubes out, but not the oil cubes

5. Compare the two kinds of cubes. Your child can use his sense of sight and sense of touch to find out what the differences are. Put the water ice cubes on a piece of paper. Let them start melting. Ask your child to predict what will happen if you put them in the sun. Go ahead and put them outside or on a sunny window sill. Make sure to out cardboard, a garbage bag or something else under it.
Kids' art

6. Scoop out the oil cubes (they won’t pop out). Put them on another piece of paper. Ask your child to describe the differences between the oil and water cubes (when he puts them on the paper).
Vegetable Oil

7. Play! Your child can smoosh, smooth and push the food coloring-oil cubes around. Ask him what words describe how they feel (such as slimy).

 8. Go back to that other paper (you know, the one with the water ice on it). As the cubes begin to melt, your child can paint the paper with them. Compare the two paintings (the one with the water ice and the other with the oil ice).

Children's science

9. Drip the excess water (and remove any un-melted ice cubes) from the paper. Turn it over and press it onto the front of the oil-food color paper. Press or pat it together. As your child pats the surface, some of the oil and the food coloring will seep through. What’s the result? An abstract-looking print!
Art Activity

Science print

Keep experimenting with the oil, food coloring and ice (to keep the kids' art and science activities going). Your child can mix together colors, blend the different liquids and see what happens when you try to re-freeze the paper!

Wednesday, June 22, 2016

DIY Rainbow Building Blocks

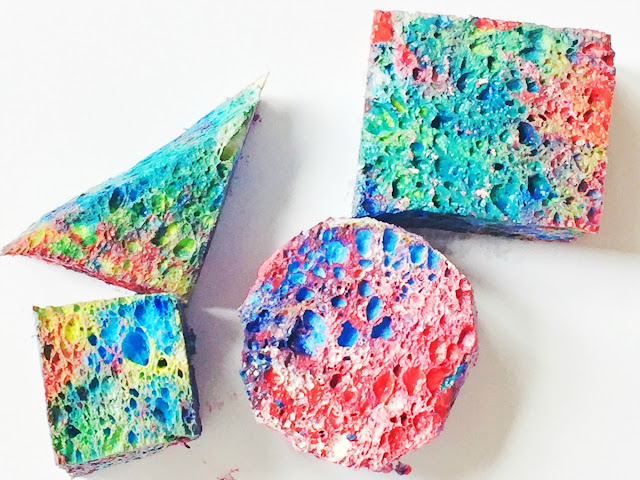
Building blocks don’t always have to be wooden or plastic. This STEAM activity proves just that! Last week we made geometric shape stampers out of kitchen sponges for paint printing (and color-mixing!). Instead of tossing the sponges out after the art activity was done, we’ll show you how your child can keep on using them.

Rainbow blocks


(This post contains affiliate links. Please see my disclosure statement for more information).

Okay, so the obvious continued use for the stampers is to reuse them. Stash them in a container and take them out to use next time your child wants to make some art. But, we’ll show you another way that your kiddo can play with them.

How? This is where the building blocks come in. After the painting is done (and completely dry), your child can turn the sponges into rainbow-colored blocks. This activity isn’t just artsy, it helps your child to build fine motor and math skills. She’ll also have to use her critical thinking skills to balance the shapes and stack them – without everything falling down.

Even though I just said that you should wait for the paint to dry, you can turn this activity into (very) messy play. Instead, start building with the paint still wet! Not only is this messy play, but it's a completely creative STEAM activity too.

Here’s What You’ll Need:

·        Kitchen sponges

·        Tempera paint

·        Wax paper

·        Scissors

Here’s What to Do:

1. Create geometric shape stampers. Read this how-to for more information. If you haven’t made the stampers already, you’ll need to cut the sponges into shapes, and then…

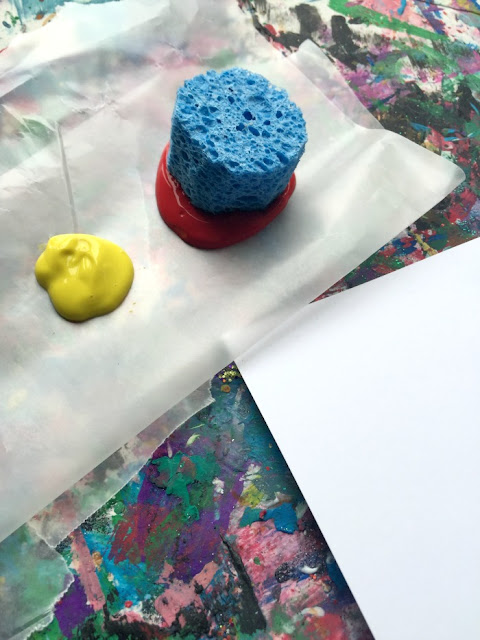
2. Pour the paint into pools on the wax paper. The wax paper protects your work surface and acts as a palette (just less expensive). Try the primary colors (red, yellow and blue) and white. Your little artist can mix them into a rainbow of hues with the sponges. Coat the sponges completely. Your child can press the sponges down to make a few prints now too!

Kids' art

Children's art
 

3. Let the paint dry. Or, don’t – if you want a messy art play activity!

Sponge stampers
 

4. Start stacking. Your child can build a tower, a wall or anything else she can think up. Add more sponge shapes to the mix to create an entire pretend play world.
Paint project

5. Take the sponges down and repeat – but, with different designs (in other words, encourage your child to build something different).

Keep in mind, your child doesn’t necessary have to build upwards. She can keep the design flat, and put the sponges together in patterns or puzzle-style on a piece of cardboard too!

Friday, June 17, 2016

Kids' Art: Painting with Sponges

Painting with sponges? It’s not exactly breaking news in the world of kids’ art activities. That said, you don’t have to go out and buy fancy materials and you can use this easy-to-do lesson to add in other learning areas (such as shapes and colors).

Color-mixing art

(This post contains affiliate links. Please see my disclosure statement for more information).

Do you have a kitchen sponge sitting around? I mean a clean one, and not the one sitting on the side of the sink covered in last night’s spaghetti sauce (we all have one of those). You can use a nice clean (and completely inexpensive) sponge to make shape stampers. Not only can you create DIY stamps, but you can add on a color mixing activity as well. How? Read on to find out…

Here’s What You’ll Need:

·        Kitchen sponges

·        Scissors

·        A marker

·        Tempera paint (in the primary colors – red, yellow and blue – and white)

·        Card stock paper

Here’s What to Do:

1. Draw a few shapes (triangles, rectangles, squares, circles) on the sponges. Use the whole sponge for one shape or divide it into a few.


2. Cut the shapes out. You can print the picture below out for your child to match the shapes and the words.

Kids' lesson
 

3. Pour the paint into pools on a palette (or use a sheet of wax paper).

Kids' art
 

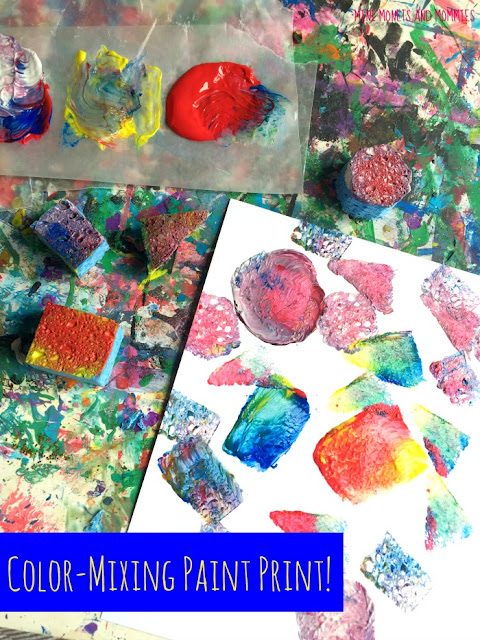
4. Start painting with sponges! Dip the sponge into the paint. Press it onto the paper. Repeat, making multiples. Your child can make a random abstract design, create a pattern of shapes and/or colors or make a larger design that’s made up of smaller shapes (such as a cat with circles for the face and triangles for the ears).

Shape project

Kids' art

Shape sponges
 

Now for the color mixing:

Blending colors
 

Your child already has paint on the shape sponge stampers, so don’t worry about wiping it off. Have her dip one of the paint-covered sponges into another color. Now the mixing begins. She can continue on with this process making green from yellow and blue, purple from blue and red and orange from red and yellow. Your little artist can also add white to any of the colors to make them lighter.

Painting prints
 

Thursday, December 31, 2015

Glitter Handprint Art for Kids

Handprint art seems like it’s part of childhood. Right? You made those sweet little paintings when you were young, and now your tot totes home handprint butterflies, hearts, hugs and bugs from pre-k almost every day.

Hand Print

If you’re looking for a printing art activity that doesn’t involve paint (and is super sparkly), this glitter art activity is a twist on the traditional project. Yes, it’s messy. But, don’t the kiddos always enjoy making an ooey, gooey, glittery project anyway?

You can change up the basics of this activity, fitting it into different ‘themed’ needs. For example, it’s New Year’s Eve, so use gold glitter, cut out the handprint, pierce it with a straw or wooden dowel and make your own ‘ball drop’. For other holidays, try themed glitter colors (such as red and pink for Valentine’s day, orange and black for Halloween, green and red for Christmas or red, white and blue for July 4th). Along with the sparkles, your child can try pairing a themed paper color (such as black paper with orange glitter for Halloween).

And on to the art-making …

Here’s What You’ll Need:

·        Clear-drying school glue

·        Card stock paper (or another thick paper – the glue will soak through thin printer types of papers)

·        A paintbrush

·        Glitter

Here’s What to Do:

1. Squeeze a nice-sized dollop of glue into the palm of your child’s hand. Use enough to coat the entire (palm side) of her hand.
Glue art

2. Spread the glue out with the paintbrush.
paintbrush glue

3. Press your child’s hand down on to the paper, leaving the glue print behind.
Kids' crafts

Handprint art

4. Sprinkle the sparkles over the glue.
Sparkle art

5. Shake off the excess.
Kids' art

6. Decorate the handprint in any way your child wants. She can add another handprint, use paint or markers to make a glittering animal or add words to it. She can also arrange a few handprints to make a shape or create a larger picture such as a two handprint butterfly.
Glue crafts

Encourage your child to paint the glue on different parts of her hand or move her hand into different positions in order to print. For example, three fists stacked vertically can make a snowman or two fists next to each other can become wheels on a glittering truck. Your child can also repeat the art activity using finger prints instead of entire handprints. She can create glitter finger print people, make a finger print rainbow or design sparkling lady bugs.

Are you looking for more glitter art? Follow my Pinterest board for ideas!
Follow Mini Monets and Mommies's board Kids' Glitter Art on Pinterest.

Monday, November 30, 2015

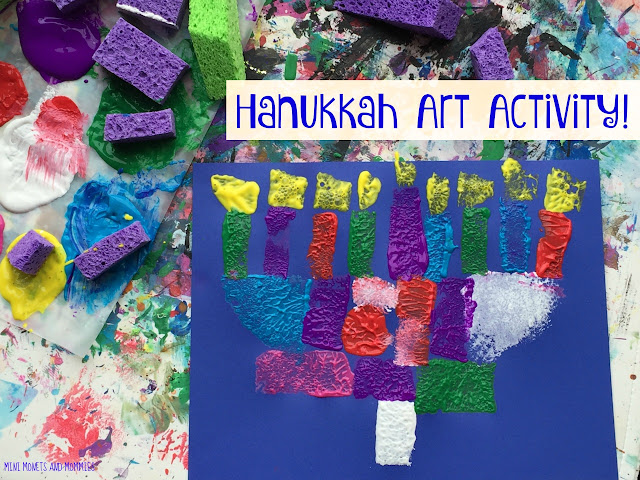
Hanukkah Kids' Craft: Sponge Print Menorah

There are eight great nights for Hanukkah crafts for kids! The other day I was cutting apart a kitchen sponge. Not just for fun, but to make a stamper. After I coaxed the shape out of the sponge, I had all of these little bits left over. Not wanting to waste them, I put them to work in a menorah print project.

Kids' crafts

Not only does this children’s art activity teach your young artist about print-making, but it also acts as a holiday lesson. Sure, your preschooler can’t light the menorah by himself. But, with this printing project he can paint on a new flicker every night. Your child can also explore shape, texture, pattern and color!

Add some math to this activity too. Your child can cut out and print basic shapes, create patterns and count up to eight (actually nine, with the central ‘helper’ shamash candle).

Here’s What You’ll Need:

·        A sponge

·        Tempera paints

·        Card stock paper

·        Scissors

Here’s What to Do:

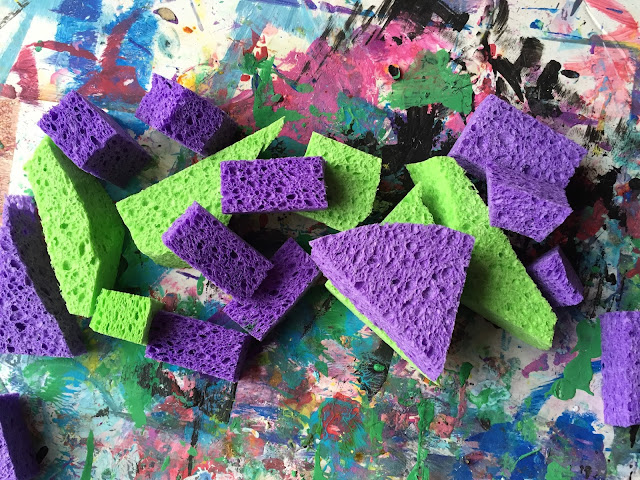
1. Cut the sponge. Make geometric shapes (and have your child name them) or cut apart free-flowing forms.
Kids' art

2. Pour a few pools of paint. If you don’t have a palette, use a piece of wax paper or a paper plate.

3. Dip a sponge piece into the paint, coating one side completely. Press it onto the paper to make a print.
Sponge paint

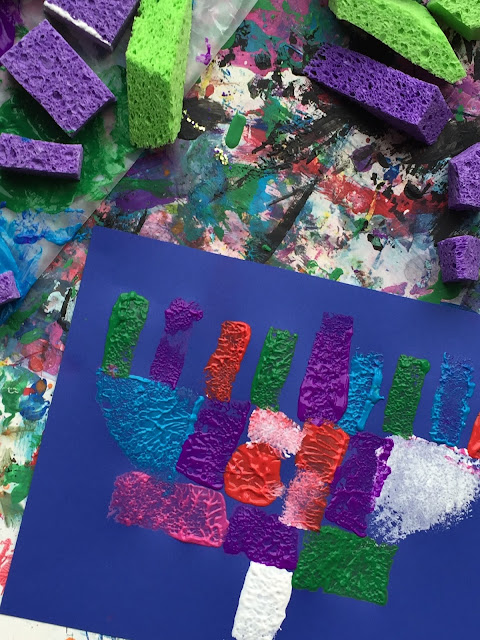
4. Repeat the paint print step, making a menorah. Your child can design whatever type of menorah he can imagine! He can also create color or shape patterns with the sponge printing.

5. Add nine candle to the top of the menorah. Use a thin rectangle-shaped sponge to do this. The middle candle (the shamash) is used to light the others. This one can be a bit taller than the rest of the candles.
Chanukah candles

6. Paint print a flame on for each night of Hanukkah. Go back to the art activity each night, adding a new yellow top to each candle with yellow tempera and a small sponge piece.
Painting print-making

Are you looking for more kids’ crafts? Follow my Pinterest board for ideas!
Follow Mini Monets and Mommies's board Creative Kids Crafts on Pinterest.

Friday, August 28, 2015

9 Awesome Autumn Art Activities for Kids!

Fall is right around the corner. Ok, so I’m not jumping to get the summer over with just yet. But, pretty soon those leaves will begin turning and it will once again be sweater weather! In honor of the impending autumn season, I’m looking back to some of my favorite fall leaf kids’ art activities.


kids' crafts

Even if it’s not fall yet (or you live in a climate that is constantly warm – and the leaves never change shades), you can still do plenty of these children’s crafts. There are green leaf activities and a few that use paper versions of the real thing.

Tissue Paper Prints: If you’ve ever accidentally gotten non-colorfast tissue paper wet, you know what happens. The color runs everywhere. Use this principle to make autumn-hued prints on paper leaves.

Paint Splatter: Jackson Pollock lover’s will get a kick out of this autumn abstract art activity! Your child can use the real deal or draw and cut out paper leaves for this project.
Abstract art

Leaf Mobile: Take those paint splatter leaves (or make other artsy paper ones) and add some physics to your child’s art-making.

Fall Tree: Use leaves (either colorful ones or those leftover summer green ones) to paint print a seasonal tree.

Color Change Clay: This is one of my favorites! I used to teach a preschool art class in a museum’s galleries – that means no paint. So, we’d use clay to ‘finger paint’ with. This activity lets your little artist change a green paper leaf into a colorful concoction, minus the mess.

Water Colors: Pretty paints plus a leaf or two makes a fantastic fall craft.

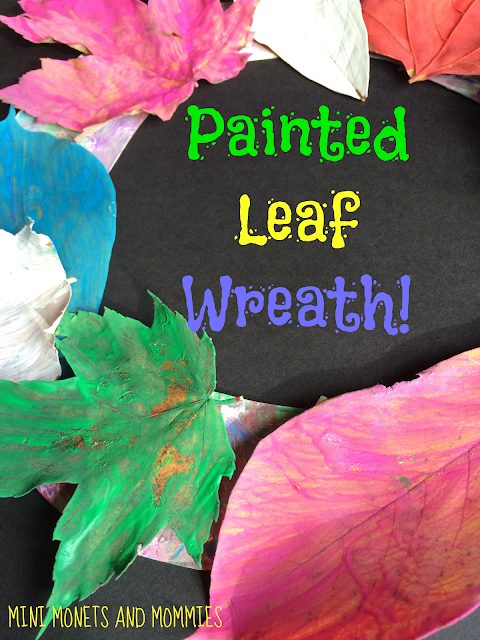
Fall Wreath: I originally made this one for Thanksgiving, but the kids can create it any time of the year.

Abstract Art: Paint, paint and more paint makes this abstract activity fall fun for the kids!

Finger Paint: Perk up those dull brown leaves with some finger paint sensory process art.
Fall art-making

Are you looking for more fall kids’ activities? Follow my Pinterest board for ideas galore!
Follow Mini Monets and Mommies's board Fall Activities for Kids on Pinterest.