Mini Monets and Mommies

Friday, September 11, 2015

Black and White Cookie S'mores

The black and white cookie. Every time that I eat one in brings back very specific memories of getting the half-and-half dessert treats at a deli in Florida with my grandparents. So, when my dad sent me a gift basket with more of these little gems than my hips can afford for me to eat, I decided to dress them up a bit.

Dessert treats

Sure, the black and white cookie is pretty perfect on its own. But, why not dress it up a bit? With a few marshmallows and some chocolate, you’ve got cookie-rific s’mores! These dessert really couldn’t be much easier to make – and, they’re fun for both kids and adults to eat.

Here’s What You’ll Need:

·        Black and white cookies

·        Chocolate – When paired with the marshmallows, you’ll get the whole theme thing going. Or you can do what I did and choose a cookies and cream chocolate bar (this includes traditional and white chocolates).

·        Marshmallows
 
Easy treats

Here’s What to Do:

1.     Turn one cookie upside down and put it on a plate.

2.     Line the cookie with a layer of cholate pieces.

3.     Put a marshmallow on top.

4.     Microwave the s’more stack for about 15 seconds. Microwaves vary in strength, so you may need more or less time. If you don’t want to make indoor s’mores, toast a marshmallow the traditional way (over a campfire) and add it to the sandwich.

5.     Put another cookie on top.
 
Kids' desserts

That’s it! Super easy, right?

Are you looking for more sweet treats? Follow my Pinterest board for ideas!
Follow Mini Monets and Mommies's board Sweet S'mores on Pinterest.

Wednesday, September 9, 2015

Caramel Apple Cookie Truffle Balls

Caramel apples scream, “It’s fall!” I’d love to say that we make our own every autumn, but we always get them at a local farm’s harvest festival. That said, this year I’m making a batch of very special caramel apples – they’re actually Oreo balls!

Apple Desserts

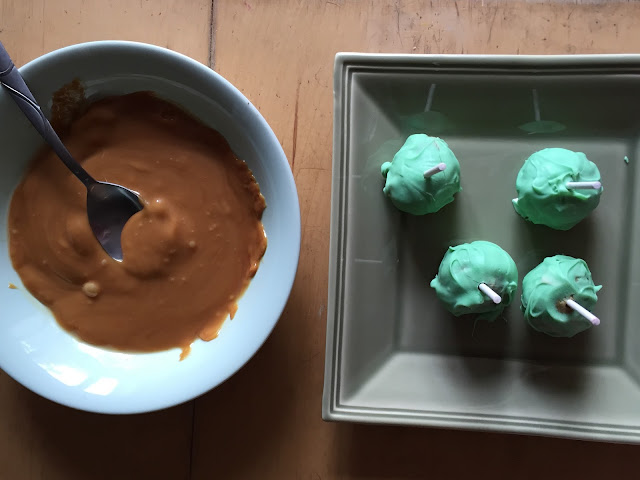
Cookie truffles really couldn’t be much easier to make. I’m not the best baker, and even I have mastered these little cheesecake-tasting bites. When I saw the special edition caramel apple Oreos I thought why not turn them into cute little fall treats? So, I did. I have to admit, the first try didn’t come out so well. I coated the cookie balls in white chocolate that I colored green (to make them look like mini apples). When the hot caramel hit the barely dried chocolate it all melted into a mess. I started over and tried the recipe, minus the chocolate. It worked much better. I’m not saying that you can’t get it all to work out – just wait for the chocolate to cool completely.
Fall desserts

Here’s What You’ll Need:

·        Caramel apple Oreos

·        Caramel candies

·        Lollipop sticks (we reused the sticks from already-eaten lollipops)

·        4 oz. cream cheese

·        Optional: White chocolate and red or green food coloring

Here’s What to Do:

1.     Crush the Oreos in a food processor until they are the consistency of chunky sand.
Dessert

2.     Mix 4 oz. of softened cream cheese with the cookie crumbles.

3.     Roll the mix into balls (approximately the same size as golf balls – or slightly smaller).
Cookie recipe

4.     Put the rolled mix into the freezer for one hour.

5.     Optional: Melt the chocolate in the microwave. In a microwave-safe bowl, pop the chocolate in for 30 to 60 seconds (different microwaves vary in strength). Be very careful the chocolate, and the bowl, will be hot. Use a pot holder and don’t touch the chocolate with your hands. Mix in a few drops of either red or green food coloring. Using a spoon, dip the balls into the colorful chocolate and coat them completely. Refrigerate the candy-covered cookies until they are completely cool.


Chocolate
 
Oreo balls
 

6.     Unwrap the caramel and put it into a microwave-safe bowl. Add one tablespoon of water. Microwave the caramel for about 35 seconds (or until it is melted). Like the chocolate, it will be very hot.

7.     Poke a lollipop stick through each cookie ball.

8.     Dip the cookie into the melted caramel.

9.     Let the caramel apple cookie truffles cool.
 
Cookie Truffles

You can also make ‘apples’ by adding a cut up piece of green candy (we used Dots) on top as a stem.

Are you looking for more cookie ball truffle recipes? Follow my Pinterest board here for ideas!
Follow Mini Monets and Mommies's board Oreo Truffle Balls on Pinterest.

Monday, September 7, 2015

Alphabet Book-Making Kids' Craft

Who wants to make a fine motor skill-building alphabet book? Here’s the inspiration behind this kids’ craft: When my son was in kindergarten his teacher made him (and the other students) sit and write letter after letter as a way of building fine motor skills and learning the alphabet. When he got home from his brief half-day of school he had homework. To sit and write more letters – over and over and over and over again. It wasn’t fun. It wasn’t anywhere near fun. It wasn’t even in the same zip code as fun.
Kids' art

I’m not saying that all learning has to be fun. But, why go only with rote work at such a young age? Yes, I get the educational rationale behind what my son’s teacher was doing. That said, the end result wasn’t that he learned his letters (he had actually mastered the alphabet in preschool) or that his penmanship grew to become perfect. What was the result? He began to hate school. At 5-years-old he hated school. That just shouldn’t happen. If your child isn’t into the rote work, you can always add a bit of creativity into his home learning. This doesn’t mean that you have to home school. Just add a few extra lessons during the course of your day, week or month.

Book-making is a favorite kids’ art activity of mine. This one helps your child to build fine motor skills and learn letters – all without writing them over and over again. It’s also reusable, so it’s not a onetime deal. It’s built out of other school supplies. If you happen to have some extra folders (or other school supplies) left over, you can use these for this project.

Here’s What You’ll Need:

·        A plain manila folder – It can be any color of paper folder.

·        Clear/clear colored folder dividers

·        Construction paper

·        Pipe cleaners

·        Scissors

·        A hole punch

·        A marker

·        Felt/fabric scraps

·        Modeling clay

·        Optional: Other ‘building’ materials such as twigs, pebbles, beads or anything else that can shape a letter.

Here’s What to Do:

1.     Line the clear dividers up with the folder – making the left edges even.

2.     Punch three holes in the folder where the holes are in the dividers (if your dividers don’t already have pre-made holes, punch them out now).
 
Hole Punch

3.     Repeat with the construction paper. You need one clear divider and one piece of paper for each letter.

4.     Stack the alphabet book together with a clear divider on top of each piece of paper.
Alphabet art

5.     Cut the pipe cleaner in half. Your child needs three halves.

6.     Thread a pipe cleaner through each set of holes, twisting it together at the ends to bind the book.
 
Children's craft

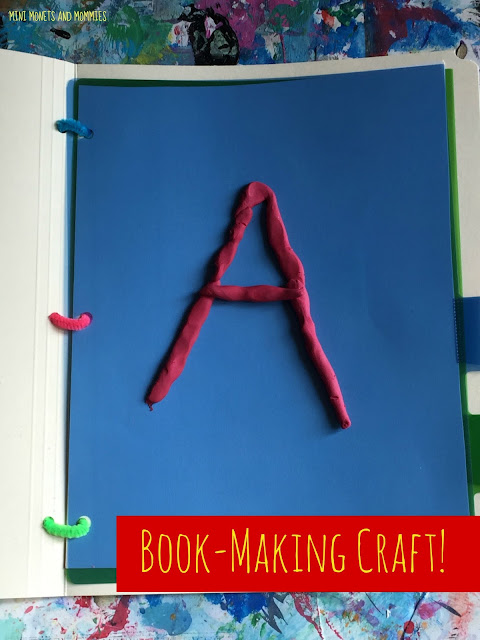
7.     Starting with the first piece of construction paper, write the letter A. Either you or your child can write the letters, depending where he is with his writing. Make the letters large size and legible.
 
Letter lesson

8.     Use the book! Start with the A. Flip the clear sheet over the letter. Your child can build the letter on top of the drawing, with the divider separating it. Use clay, put pieces of felt/fabric together or use another building material. Clear the letter off and repeat for the other ones.

Book art
 
Kids' crafts

Are you looking for more kids’ crafts? Follow my Pinterest board for ideas!
Follow Mini Monets and Mommies's board Creative Kids Crafts on Pinterest.

Saturday, September 5, 2015

Fizzing Paint Fall Art Activity

Fizzing paint is a favorite of mine. Combining art and science is an easy way to get your child to explore, experiment and make his own discoveries.

Science Art

The baking soda and vinegar volcano is a much-loved science activity that I’m fairly certain every preschooler has done. When I pulled out the two ingredients, even my 14-year-old said, “Oh, you must be making a volcano.” He made many of these fizzing, bubbling concotions in his earlier years. This artsy adventure turns the basic idea into a painting project.

This science and art activity also doubles as a fall art experience. Your child can celebrate the autumn leaves, turning plain white paper into bright orange, red and yellow (all while fizzing way).  There are two different ways to try this one out. Your child can do one, the other or both! The materials are the same for both. Before beginning, ask your child to predict what will happen when the baking soda and vinegar meet up. You can also him what will happen when he adds the food coloring. As you go through this activity, have him make observations (and tell you what they are) about what the ingredients are doing. When he’s done, ask if his predictions were true or not.

Here’s What You’ll Need:

·        White card stock paper

·        A marker (preferably a permanent marker, so that it doesn’t run when your child paints)

·        A paintbrush

·        Food coloring (in red and yellow)

·        White vinegar

·        Baking soda

Fizzing Fall Art Activity 1-

Here’s What to Do:

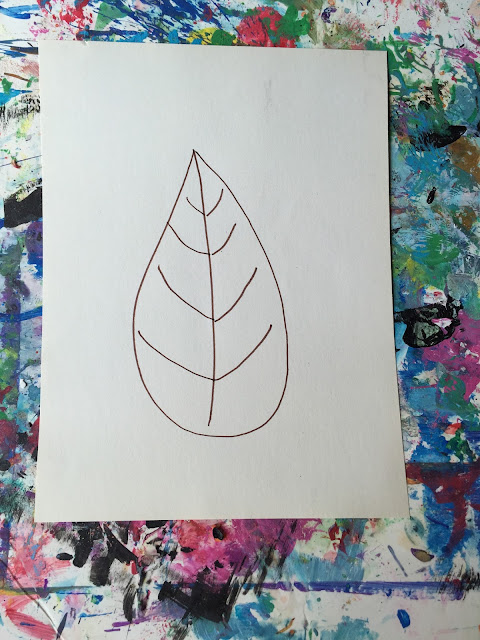
1.     Draw a few leaves onto the paper with the marker.


Kids' art

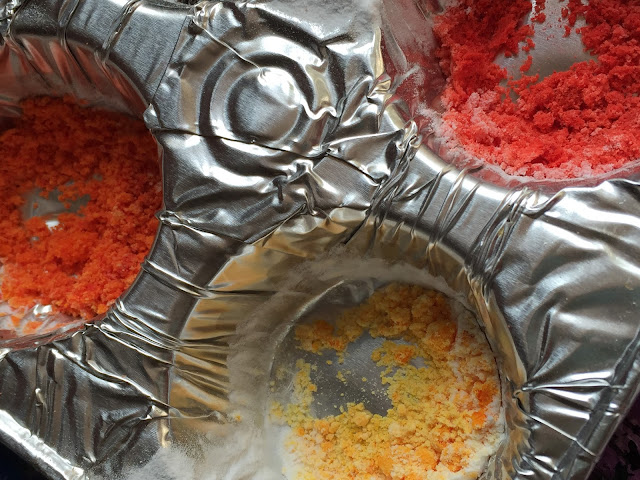
2.     Mix the fizzy paint. Scoop one to two tablespoons of the baking soda into a bowl, dish or cupcake tin. Using a cupcake tin lets your child make multiple colors, but keep them all in the same place.
 
Science Project

3.     Add a few drops of food coloring into the baking soda. Use red, yellow and red and yellow – to make orange.

4.     Mix the baking soda and food color with the paintbrush.
 
Baking Soda

5.     Pour a small amount of vinegar into the baking soda. Watch it bubble! If the paint fizzes over the top of your container, use less vinegar next time. Experiment with how much your child needs to create bubbles, without making the paint ooze out onto the paper below.
 
Science Art

6.     Paint the leaves.

Fizzy Paint
 
Fizzing Fall Art Activity 2-

Here’s What to Do:

1.     Draw a fall leaf (or a few) on the paper with a marker.
 
Children's crafts

2.     Sprinkle a thin layer of baking soda onto the paper – only over the drawing.
 
Leaf activity

3.     Drip a capful or vinegar onto the baking soda. Watch it bubble!
 
Kids' art

4.     Add the food coloring. Choose one color or mix red and yellow to make orange.
 
Fall activity

5.     Spread the paint over the leaf with the brush.
 
Kids' art

Are you looking for more autumn art activities? Follow my Pinterest board for ideas!

 
Follow Mini Monets and Mommies's board Fall Activities for Kids on Pinterest.

Sunday, August 30, 2015

Make Mock Stained Glass with Tape and Glitter!

Combine a ‘coloring page’ and a mock stained glass art activity for kids into one pretty cool project. I’m all for coloring outside of the lines, and this takes it to a new level. Instead of the traditional print and fill pages, make your own with double-sided tape! It’s super-simple, so much fun and a tactile sensory activity that gets the kiddos creative.
Sensory project

I bought a roll of double-sided tape the other day. This turned in to glitter art, sand sensory activities and even a tissue paper collage. It’s less of a mess than glue is, but still perfect for process explorations. Initially, I wanted to use black glitter to create a faux stained glass painting (we had leftover black glitter from last Halloween). As it turns out, the black glitter leaked all over my ‘art basket’. So, that was out. Instead, I swapped in colorful glitter – but, you can use whatever shade you have on hand. The original idea was also to make each ‘color block’ its own shade (similar to a coloring page). I quickly realized that it was much more fun to try different finger paint techniques – and it all added to the sensory experience!

Here’s What You’ll Need:

·        Card stock paper

·        Tempera paints

·        Double-sided tape

·        Glitter

Here’s What to Do:

1.     Create a design with the tape on the paper. Your child can outline the card stock, and then make a geometric pattern, abstract design or even a simple figure.

Kids' art


2.     Sprinkle the glitter onto the tape. Shake off the excess and save it for another art activity.
Kids' crafts

Sparkle art

3.     Pour the paint into pools. I like to use wax paper or kitchen foil instead of a pricey palette.
Tempera project

4.     Paint each section. Your child can go with solids, mix and blend or create points with the paint.
 
Stained glass

That’s it! One of the reasons why this kids’ art exploration is so simple is that you don’t need to wait between steps two and four. If you use glue and glitter you need to wait a few hours for everything to dry before your child can paint. With the double-sided tape option there’s no waiting!

Are you looking for more kids’ craft? Follow my Pinterest board for ideas!
Follow Mini Monets and Mommies's board Creative Kids Crafts on Pinterest.

Friday, August 28, 2015

9 Awesome Autumn Art Activities for Kids!

Fall is right around the corner. Ok, so I’m not jumping to get the summer over with just yet. But, pretty soon those leaves will begin turning and it will once again be sweater weather! In honor of the impending autumn season, I’m looking back to some of my favorite fall leaf kids’ art activities.


kids' crafts

Even if it’s not fall yet (or you live in a climate that is constantly warm – and the leaves never change shades), you can still do plenty of these children’s crafts. There are green leaf activities and a few that use paper versions of the real thing.

Tissue Paper Prints: If you’ve ever accidentally gotten non-colorfast tissue paper wet, you know what happens. The color runs everywhere. Use this principle to make autumn-hued prints on paper leaves.

Paint Splatter: Jackson Pollock lover’s will get a kick out of this autumn abstract art activity! Your child can use the real deal or draw and cut out paper leaves for this project.
Abstract art

Leaf Mobile: Take those paint splatter leaves (or make other artsy paper ones) and add some physics to your child’s art-making.

Fall Tree: Use leaves (either colorful ones or those leftover summer green ones) to paint print a seasonal tree.

Color Change Clay: This is one of my favorites! I used to teach a preschool art class in a museum’s galleries – that means no paint. So, we’d use clay to ‘finger paint’ with. This activity lets your little artist change a green paper leaf into a colorful concoction, minus the mess.

Water Colors: Pretty paints plus a leaf or two makes a fantastic fall craft.

Fall Wreath: I originally made this one for Thanksgiving, but the kids can create it any time of the year.

Abstract Art: Paint, paint and more paint makes this abstract activity fall fun for the kids!

Finger Paint: Perk up those dull brown leaves with some finger paint sensory process art.
Fall art-making

Are you looking for more fall kids’ activities? Follow my Pinterest board for ideas galore!
Follow Mini Monets and Mommies's board Fall Activities for Kids on Pinterest.

Wednesday, August 19, 2015

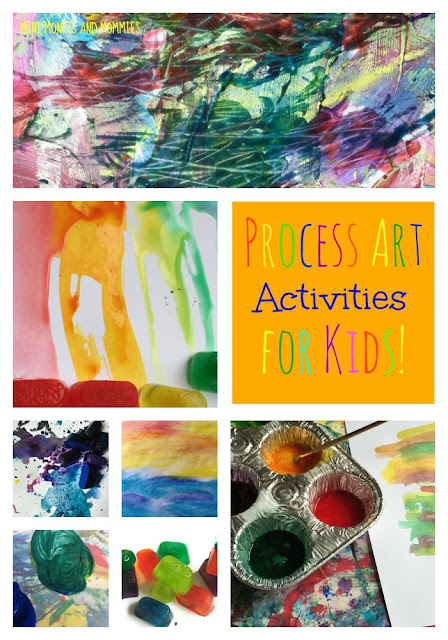
12 Must-Do Process Art Activities for Kids

I’m all about process art for kids. Don’t get me wrong, I’ve done my fair share of craft ‘projects’ while teaching, creating lessons and with my own son. But, it always seems like it’s so much more fun to get into the art in a totally exploration-driven way.

Kids' art
(This post contains affiliate links. Please see my disclosure statement for more details).

What’s This Process Stuff Anyway?

It’s pretty much exactly as it sounds – your child is exploring the process of art-making. She’s creating, discovering, experimenting and working with the materials in a way that lets her learn and grow. Instead of an end result (i.e., product), the goal here is to play with the materials or to see what they can do.

There isn’t just one type of ‘process’ activity. These art-making sessions can include paint, clay, crayons, markers, pencils, paper, scissors, glue, paper mache, yarn, ribbon or any other material. The difference between this type of art and product-based activities lies in what’s expected in the end. In a process exploration of water colors your child might play with how much of the liquid she adds to the paint or mix and mingle colors on the paper. In a product-oriented version (again, using water colors) you might expect her to paint a landscape or create a portrait. There’s nothing wrong with these types of projects. If your child needs structure or is having trouble getting the feel of exploration-based art, the framework of a project may get the ball rolling. Focusing on making ‘something’ may help her to feel more comfortable using the materials or get her into the actual process in a more defined way.
Why Process Art?

Why not? But, seriously – it’s fun! It also helps your child to build creativity, critical-thinking and problem-solving skills. It may look like she’s just slapping paint down on a piece of paper or simply rolling clay around. In reality, she’s figuring out how to use the materials, making predictions, testing those predictions and deciding what works and doesn’t.
Paint Activity

What Art Activities Count a Process-Based?

There are too many to list here, but a few favorites include:

Frozen art: Color some ice and explore what happens as it melts!

Shaving cream paint: Why not toss in some glitter for a super sensory experience?

Finger painting: Try it with fall leaves.

Paint with something unexpected: Maybe gauze?

Glue: Add some food coloring and watch what happens.

House paint: Not really, but your child can use rollers and other ‘wall painting’ tools.


Make an art buffet: Set out an array of materials for your child to pick and choose from.


Paper mache: Make a sculpture or just play with it.

Finger paint plus: Add to the paint with sand or anything else that you want.

Are you looking for more ideas? Follow my process art Pinterest board for exploration creations!


Follow Mini Monets and Mommies's board Process Art for Kids on Pinterest.