Mini Monets and Mommies: play dough
Showing posts with label play dough. Show all posts

Saturday, December 24, 2016

6 New Year's Eve Activities that the Kids Will Absolutely Adore!

New Year’s kids’ activities anyone? Um, yes please! You’re celebrating “Noon Year’s Eve” at, well – noon. Or, maybe you have your fave families coming over for an evening get together. Whatever your plans are, having plenty of arts and crafts (along with some tasty treats, of course) on hand is a must-do.

Kids' art


(This post contains affiliate links. Please see my disclosure statement for more information).

Before going crazy with crafts, start simple. You have plenty to do around the holidays. So, why add to it with complicated art projects or overly complex recipes? Yeah, yeah, Pinterest is bursting with an over-abundance of seemingly awesome ideas. You scroll down your feed and think, “Well, I could do that.” Maybe. But, keep in mind, the middle of your New Year’s Eve celebration isn’t the time to find out that what looked oh-so-easy on Pinterest (and, don’t they all?) was actually super-complicated.

Pour the Paint

Kids' crafts
 

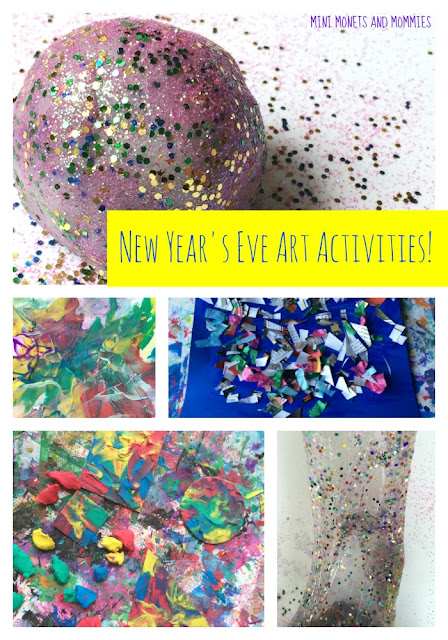
Okay, so if you want something beyond simple to keep the kids busy (and keep them totally happy too!) put out some paints. Is it mess-free? Nope. But, all you really need are four colors – the primaries (red, yellow and blue) and white. They can mix their own hues and then paint a holiday masterpiece. Add in some glitter (yes, this multiplies the mess exponentially) for a festive sparkle.

Try Clay Play

Modeling clay
 
If your goal is to keep the mess to a minimum, one of my favorite kids’ art activities is finger painting with clay. The secret for this one is that there’s no actual finger paint involved. Instead, your kiddo can pull apart soft modeling clay into dime-sized pieces. She can then spread it out over a cardboard surface, finger paint style. It’s a fab fine motor activity and you can adapt it for any occasion. Have your child use the clay to make New Year’s fireworks or just make abstract art.

Confetti Art

Craft activity
 

Let’s say you have tons of magazines hanging out in the basement, garage or attic. Maybe you don’t. But, given that Christmas and Hanukkah were just last week, you might have some extra gift wrap odds and ends stashed around. Cut those up and use as confetti. The kids can paint a piece of card stock paper with clear-drying school glue. Toss the confetti, and watch it stick. Yay!

Glitter Ball Drop

New Year's Eve
 

10-9-8-7-6-5-4-3-2-1! The ball’s dropping in NYC, and at home too. Make your own with some sparkling playdough. Follow this recipe to whip up some DIY dough. Add a drop of food coloring in or don’t (the glitter will create a cool color). Sprinkle tons and tons and tons of glitter in (hey, it has to sparkle like the Times Square ball, right?) and mush it around. Your child can make the midnight drop ball and then take it apart for more playdough fun.

Glitter Gunk

Kids' art
 

As if playdough isn’t fun enough, try some New Year’s glitter slime! Follow these directions to mix up a batch of slime. Add in the sparkles and you’re ready for some festive science fun. The more glitter your kids use, the more solid the color will look.

Kids’ Cookies

Holiday sweets
 

When the kids tire from the crafting, try these easy no-bake cookies (here's the recipe). They’re sparkly (like the glitter) and look like mini New Year’s Eve balls. Oh yeah, and they’re super tasty too!

Friday, December 9, 2016

Make Your Mark With This Awesome New Kids' Activity eBook!

I’m so excited to be part of an amazing new book, Make Your Mark! Seriously, I’m not just saying it’s amazing because I’m in it. It really, truly is. Make Your Mark is a book about creative writing, confidence, compassion and caring – and all for kids! Okay, so it’s you (the adult) who is going to read it. But, it’s your little one who will totally benefit from the activities inside.

Kids' book


(This post contains affiliate links. Please see my disclosure statement for more information).

What kinds of kids’ activities will you find? Make Your Mark is filled with 30+ projects. These will help your child to develop a love of writing early on. From creative storytelling to building self-confidence and compassion, this book goes deep and helps your child to learn on many different levels.
Early literacy


Buy Now

The activities are an array of ideas, featuring play, art, language, writing and more. Whether it’s making a first mark through art, using pens and brushes to make more complex marks or igniting inspiration through storytelling, you’ll find plenty of ideas and activities for your young child to try out. These include:

·        Art

·        Writing trays

·        Finger gyms (and other fine motor play ideas)

·        Interview activities

·        Kindness activities

·        Collaborative projects

·        Printables

Kids' projects
 

This is a perfect way to help your young child develop early literacy skills, build social abilities and improve her emotional awareness. One of the things that I enjoy most about this book is that there’s an awesome array of ideas included. There isn’t just one “right way” to help your kiddo to develop early literacy abilities. Some kids learn by keeping their hands busy, while others like to look at pictures and print (and these are only two examples of the many ways in which people learn). Giving your child choices and having a variety of activities on hand makes it easier to match your little learner’s individual development with educational options.

Art activitiesKids' activities

Buy Now
 

Make Your Mark is for sale starting Friday December 9th. There is a special launch price for the month of December – in other words, buy it this month to save your hard-earned money! The launch special price is $11.25. That’s a 25% savings, no discount code needed (all you have to do is buy the book before December 31, 2016). After December, the ebook will available for the regular price of $14.99. So, why wait? Get your copy right now!

 
Kids book


Buy Now

Buy it worldwide for instant download


This is an ebook, which means you will be sent a link that allows you to download a PDF containing the ebook and all the resources. You can save it to your computer or iPad* and then either read it on screen or print some/all of the pages, as you prefer.

You can buy the ebook wherever you are in the world. You pay via PayPal, which will take care of any currency conversion for you. The ebook costs US$ 14.99.

*You can buy the ebook now, on any device, and then download it when you are ready. Depending on the apps you have installed and your operating system, you might be able to download the ebook on your mobile device. However if you have any doubts or problems, I recommend you use a computer to download the book and then share it to your mobile devices. You will be sent download instructions when your purchase the ebook.

The Make Your Mark ebook is published and sold by Cathy James at NurtureStore.co.uk. Please direct any customer service queries regarding purchases of the ebook to support@nurturestore.co.uk or refer to the NurtureStore FAQ.

The Make Your Mark ebook is protected under copyright © 2016. All rights reserved.
 
Buy Now

Buy Now

Monday, December 28, 2015

10 Awesome Indoor Art Activities for Crafty Kids

“Mommy, I’m bored!!!!” How many of us have heard this over and over again? The weather’s too wintery to play outside, it’s school break or you just haven’t planned anything ‘special’ for the day (you can’t be the on-it-mom 24-7 after all). What’s the solution? A few kids’ artsy adventures to the rescue!
Children's art


(This post contains affiliate links. please see my disclosure statement for more information).

Ok, so you aren’t exactly the crafty kind. Maybe you don’t have an extra few hours in your day to plan out Pinterest-worthy art projects or you just aren’t exactly sure what to do? If you’re looking for a solution to your child’s boredom woes, these art activities don’t require a PhD in arts education to set up, are super-fun for the kids and even include a lesson or two.

1. Slime. Yeah, so it’s not technically ‘art’. But, it’s ooey, gooey and your child can add an artistic element to it. We’ve added glitter and even craft feathers to this glue-based recipe.
Slime recipe
 

2. Bubble Painting. You could probably do without yet another sink-load of dirty dishes. That said, you’ve stocked your kitchen closet with something that looks like a soap buffet. Take some of that soap, add a pinch of paint and get ready for a bubbly good time!

Science art
 
3. Craft Sand and Tape. Like glitter, craft sand is messy to the billionth degree. We know this, but we still use it. Why? It’s colorful and a super sensory experience for the kiddos. Typically your child would use glue to hold the sandy stuff in place. This, of course, adds to the mess. Using double-sided tape gives you the same look, but does cut down on the mess factor. I’m not saying this activity is neat and tidy. But, it’s a bit easier to control.

Tape art
 
3. Frozen Glitter Paint. It’s icy outside. And now it’s icy inside too! Capture the sparkles in a cube, combine science and art and try this frozen indoor activity.

Glitter art
 
4. Chalk Paint. Make it yourself!

Kids' paint
5. Star Wars Art. You know you’ve got a ratty, old paintbrush hanging out in the bottom junk drawer. Add some kitchen foil, spill out a pool of paint and make some lightsaber art.

Lightsaber painting
 
6. Blue Raspberry Playdough. It smells good enough to eat. Well, technically you could – but, it won’t taste very good.
Scented playdough
 

7. Clay Finger Paint. Less mess, and possibly even more fun. I started doing this one when I had to teach a group of 10 3 and 4-year-olds art. Did I mention that we were making art in an art gallery, in a museum? So, we couldn’t get the Monet’s and Van Gogh’s messy. That meant no paints. Swap in the clay and you’ll see just how much it mimics finger paints.

Finger paint
 
8. Finger Paint Fun. Let’s say your little artist doesn’t want to stop at the clay paint. Now what? Add in these extra-special mixers and get to the art-making.
Art activity
 

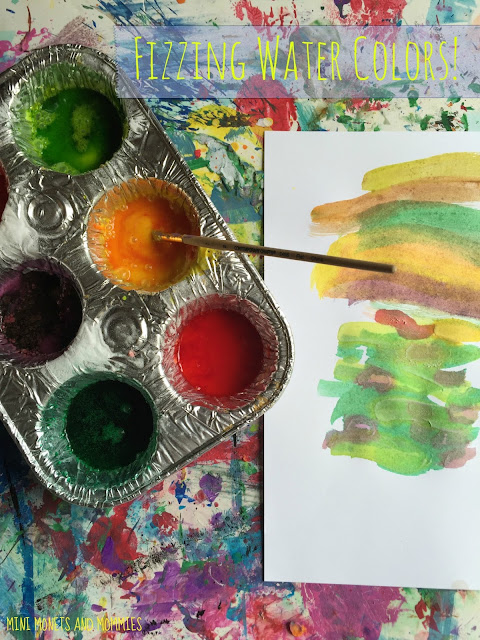
9. Fizzing Paint. Turn a palette into a volcano. There’s really not much more to say – it’s amazing!
kids' paint
 

10. Felt Board. Make your own felt board. Storyboard favorite books, puzzle together pattern and reuse this project for activity after activity.


Kids' craft
 

Are you looking for more awesome art ideas? Check out my Pinterest board for activities galore!
Follow Mini Monets and Mommies's board Creative Kids Crafts on Pinterest.

Thursday, October 15, 2015

Rainbow Pumpkin Seed Mosaic Kids' Craft

Are you carving pumpkins? Getting in the Halloween spirit maybe? Now you’ve got a slew of seeds in what seems like a gallon of goop. What can you do with them? Make a mosaic, of course!

Kids' mosaic

(This post contains affiliate links. Please see my disclosure statement for more information).

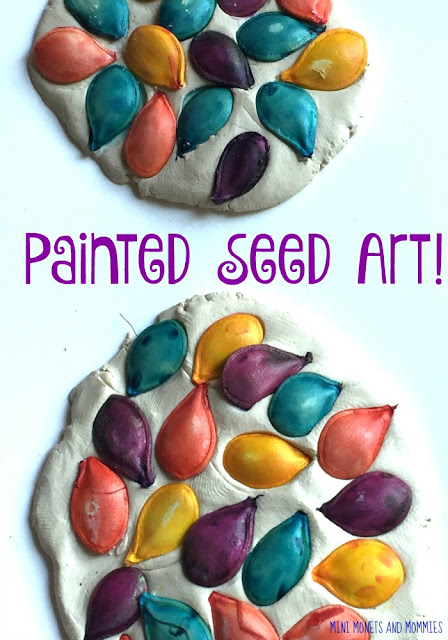
Coloring pumpkin seeds is a super-simple kids’ art activity that also doubles as a sensory exploration (just pop them into a rainbow sensory bin!). If you’ve never turned regular seeds into colorful creations, take a look at our how-to color pumpkin seeds post for an easy step-by-step how-to.

Moving on to the mosaic… Yes, mosaics are typically made with some kind of cut or broken glass or ceramic material. This one is much more kid-friendly. Your child can put those seeds to use and craft a mosaic (also using Model Magic).
Fall art

Here’s What You’ll Need:

·        Colored pumpkin seeds (use food coloring)

·        Crayola Model Magic – Use white and keep it as is or paint it any other hue.

 
Mosaic craft

Here’s What to Do:

1.     Roll the Model Magic into a ball, tube or any other 3-D shape.

2.     Squish the modeling compound so that it is almost flat. Your child can use her palms to press down on the clay or push it flat with her fingertips. Ask her how many other ways she can think of to press, push and squeeze the clay so that it’s flat.
 
Clay compound

3.     Push the pumpkin seeds into the Model Magic. Create a pattern, picture, design or let your little artist spread the seeds out randomly.
 
Clay mosaic

Try a few different shapes of clay and seed creations. You can choose a theme, color or even play a game with this art activity. For example, spread out all of the seeds (in the different colors). Ask your child to make a monotone mosaic. She must pick out seeds that are only one color. Add another learning level to this one by painting the Model Magic. Have your child paint each flattened pieces a different color (make sure that the colors all correspond to the pumpkin seeds). Match the seeds to the painted clay.


Are you looking for more kids’ crafts? Follow my Pinterest board for ideas!
Follow Mini Monets and Mommies's board Creative Kids Crafts on Pinterest.

Wednesday, August 19, 2015

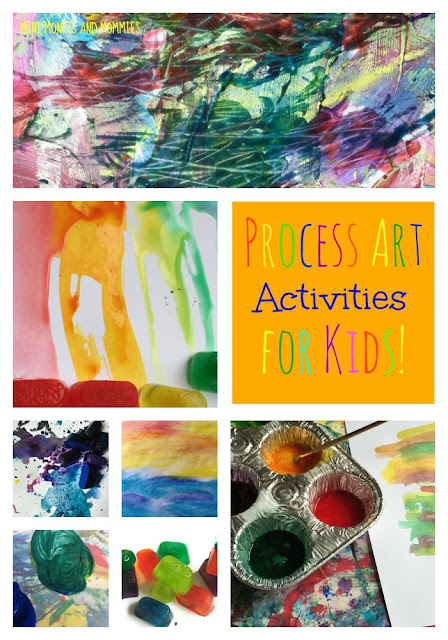
12 Must-Do Process Art Activities for Kids

I’m all about process art for kids. Don’t get me wrong, I’ve done my fair share of craft ‘projects’ while teaching, creating lessons and with my own son. But, it always seems like it’s so much more fun to get into the art in a totally exploration-driven way.

Kids' art
(This post contains affiliate links. Please see my disclosure statement for more details).

What’s This Process Stuff Anyway?

It’s pretty much exactly as it sounds – your child is exploring the process of art-making. She’s creating, discovering, experimenting and working with the materials in a way that lets her learn and grow. Instead of an end result (i.e., product), the goal here is to play with the materials or to see what they can do.

There isn’t just one type of ‘process’ activity. These art-making sessions can include paint, clay, crayons, markers, pencils, paper, scissors, glue, paper mache, yarn, ribbon or any other material. The difference between this type of art and product-based activities lies in what’s expected in the end. In a process exploration of water colors your child might play with how much of the liquid she adds to the paint or mix and mingle colors on the paper. In a product-oriented version (again, using water colors) you might expect her to paint a landscape or create a portrait. There’s nothing wrong with these types of projects. If your child needs structure or is having trouble getting the feel of exploration-based art, the framework of a project may get the ball rolling. Focusing on making ‘something’ may help her to feel more comfortable using the materials or get her into the actual process in a more defined way.

Why Process Art?

Why not? But, seriously – it’s fun! It also helps your child to build creativity, critical-thinking and problem-solving skills. It may look like she’s just slapping paint down on a piece of paper or simply rolling clay around. In reality, she’s figuring out how to use the materials, making predictions, testing those predictions and deciding what works and doesn’t.
Paint Activity

What Art Activities Count a Process-Based?

There are too many to list here, but a few favorites include:

Frozen art: Color some ice and explore what happens as it melts!

Shaving cream paint: Why not toss in some glitter for a super sensory experience?

Finger painting: Try it with fall leaves.

Paint with something unexpected: Maybe gauze?

Glue: Add some food coloring and watch what happens.

House paint: Not really, but your child can use rollers and other ‘wall painting’ tools.


Make an art buffet: Set out an array of materials for your child to pick and choose from.


Paper mache: Make a sculpture or just play with it.

Finger paint plus: Add to the paint with sand or anything else that you want.

Are you looking for more ideas? Follow my process art Pinterest board for exploration creations!


Follow Mini Monets and Mommies's board Process Art for Kids on Pinterest.

Thursday, September 11, 2014

Brain Dough: Halloween Play Clay


A few months ago I posted a DIY scented play dough activity. I love art. I love making art, sharing it, helping kiddos to create. That said, it doesn’t always go right for me. The first try for this activity was honestly so gross that it made me shudder. But, my son didn’t think so. He’s not the crafty type of kid. He’s rather do just about anything than sit and draw. When I pulled out my precious homemade play dough, he immediately volunteered to try it out. What? Who is this kid? What’s different about this art activity than any other one? The answer (in his words): “Mom, you made BRAIN DOUGH!”

Play Dough
 
What a perfect Halloween activity. While ooey, gooey brain dough is kind of creepy 11 months out of the year, during October it’s festive, fall fun.

Here are the original directions for putting it all together:

Mixing up a batch of homemade play dough is hardly reinventing the wheel. At the beginning of my first experience working in early childhood education (as a teacher’s assistant in a preschool) the lead teacher tasked me to make play clay for out 3- and 4-year-olds. She sent me off to the school’s kitchen with a recipe that looked something like this:


1.      Boil 1 ½ cups of water.


2.      Mix in 2 cups of flour.


3.      Add 2 tsp. of cream of tartar.


4.      Add 2 tbsp. vegetable oil.


5.      Add ½ a cup of salt.


This recipe (or any of its slight variations) is fairly standard. Basically, I’m saying – it’s not new news. Even though I thought the lead teacher must be a creative genius to have come up with such as rocking recipe, I quickly realized that almost every preschool teacher knows this one. Even though you’ll find more play dough recipes online than stars in the sky (really, there are pages and pages and pages of them), I still wanted to explore some fun things to do with this soft clay-like compound.

Halloween crafts
 

Obviously the first thing to do is make the dough. You can follow this recipe or any other one (some of them have variations of ingredients or don’t involve cooking). If you’re looking to try something new, I highly recommend having your child help you to experiment. The only exception to this is with hot water. Never let your child near the hot stove and never give your child play dough with hot or boiling water to stir, mix or otherwise play with. Let your little one help by adding new cold (or room temperature) ingredients. I let my son pour different amounts of vegetable oil. He’s 12 and thought it would be hilarious to pour half a bottle of oil into the mix. Needless to say – it didn’t work. He certainly enjoyed it though.

Now it’s time to make it brainy:

Holiday Crafts
 
Grab a couple of raspberries (by now they aren’t in season, so you can thaw out some frozen ones). Mash them into the dough. It’s totally sensory and will turn the mixture into a brain-like pink. The little lumps from the berries also give the dough that special “Ewwwwwww!!!!!!!” factor. On the plus side (for you), it will now smell super sweet.

Kids art

Your child can now monster mash, mush and mix the play dough. Squeeze it, let it drip like slime or use it to fill the top of a crafty Halloween skull project!

Are you looking for more fun fall crafts? Follow my Pinterest board for ideas!

 
Follow Mini Monets and Mommies's board Fall Activities for Kids on Pinterest.

Sunday, July 13, 2014

Play Dough Mat with Pictures or Printables

A play dough mat is super-easy to make. Follow these simple how-to art activity steps and download the printable templates for hours of crafty creations! Make your own recipe, buy a batch from the arts and crafts store or follow easy-to-whip up instructions. It doesn’t matter how your child gets her play clay; what does matter is what she does with it.

Dough mat
I’m all for experimenting when it comes to art. Process art – exploring the actual creation and materials – can inspire and engage your child in an almost scientific way. That said, sometimes kids want to make “something”. Just to be clear here, I’m not advocating that you create “art assignments” for your kiddo or tell her what she has to make (she will get enough of that at school). What I am saying is that it’s perfectly ok to let your little artist make a flower with her play dough as she discovers what happens when she pulls, pushes, mushes and squishes it in her hands.

So, your child makes a clay tree, but then wonders what would happen if she re-makes it in orange instead of green (maybe it’s fall and she sees that the leaves are changing colors). A play dough mat lets her try out these simple changes within an easy-to-follow framework. As a bonus, you can save these art-making tools, reusing them time and time again. After making the mat, simply pull the dough of, wipe it down with a wet cloth as needed and start over again!

Here’s What You’ll Need:

·        Card stock paper, poster board or cardboard – Pick any size that fits your needs. You can make a mini mat that is index card-sized or a giant mega version using the side from a large appliance box.

·        Clear plastic cling wrap – Ok, so to make a formal version of this project you should use a piece of paper that you laminate. If you go to a commercial site or store and buy one of these as a ready-made art item, you’ll find that it’s expertly laminated. My first year teaching preschool I had some major meltdowns (literally, I was pretty sure that I would catch the machine on fire) with a laminating machine. That put an almost instant end to my desire to laminate anything. You can pay to have an office supply store or copy center laminate your mat for you, but this modified version can save you some cash.

·        Permanent markers or crayons

·        Clear drying school glue

·        Optional: Computer, printer and printer paper or photo

·        Play dough

Here’s What to Do:

1.     Pick a design. Choose a picture that the dough can add to. For example, a stem and leaves with a blank spot at the top equals a flower when your child adds her play clay. You can also use bubble letters that your child fills in with clay. This is an easy way to add some later learning to the mix.

2.     There are four options when it comes to actually putting the design on the paper:

·        Work as a pair. Your child picks a design, you draw it with permanent markers and then she adds the dough later on.

Nature clay


·        Your child picks and draws the design with crayons.

·        You choose a printable or make your own using clip art and print it onto regular printer paper. Glue this to a thick stock or cardboard. here are a few examples that only took minutes to make. The first one helps your child to learn shapes (she can match colors or pick her own). The second one lets your child create letters on top of the printable and then use the blank space to make her own clay picture that matches the word.
 
geometry for kids

Letter printable


·        Print an 8x10 or larger photo of a face (use your child’s picture, your own or a friend’s). Glue this to the cardstock or board. Your child can add a play clay mustache, hair, glasses and more to the photo on the mat!
Photo craft

3.     Unroll a piece of plastic wrap onto a flat surface. Make sure that the wrap is bigger than the paper a few inches on each side. If your mat design is larger than the wrap, use a few pieces, overlapping them at the edges. Place the mat (face down) on the plastic wrap.

4.     Cut or tear the wrap so that there’s enough left over to push around to the back.
Kids' art

5.     Dab dots or lines of glue along the border of the back of the mat. Fold the loose plastic wrap over and on top of the glue.
Play DoughKids craft
 

Yay! Your child has a play dough practice sheet to use and reuse. Are you looking for more artsy ideas? Follow my Pinterest board for creative crafts that your child can do!
Follow Mini Monets and Mommies's board Creative Kids Crafts on Pinterest.