Mini Monets and Mommies: spring
Showing posts with label spring. Show all posts

Sunday, April 16, 2017

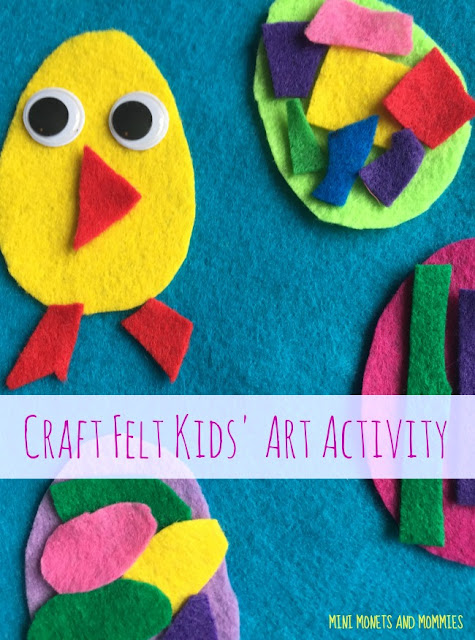
Kids' Craft Felt Easter Eggs


Are you looking for a last-minute kids’ Easter art activity? Well, this one is super-simple – and tons of fun too! With some craft felt scraps, and a few googley eyes, your kiddo can get artsy and make these textured eggs.

Craft felt

2D Easter Eggs


Okay, everyone knows that making those colorful eggs is a major part of Easter. At least, for kids. Even if you’ve got the food coloring, glitter, stickers and anything else you need to make the eggs (try dyeing them with jelly beans), your child can still try this two-dimensional craft.

Your child has a few different options when it comes to these eggs. There’s a permanent craft, in which she’ll use glue. Or, you can take a DIY felt board approach. To make the felt board, simply glue a paper-sized sheet of craft felt to a piece of cardboard. Reuse the front of a cereal or cracker box instead of buying new board. The felt eggs will stick to the felt on the board, making it a completely reusable craft.

Learning and Development


So, what will your kiddo learn?

·         Fine motor skills – scissor skills, eye-hand coordination

·         Color recognition and identification

·         Math – shapes, counting, patterns

·         Creative thought

·         Problem-solving

Materials


·         Craft felt – use craft felt sheets (paper-sized) and/or leftover scraps

·         Scissors

·         Googley eyes

·         School glue

How-To Activity Steps


1. Cut the felt into egg-shaped ovals.
Childrens crafts

2. Create smaller-sized shapes. Your child can cut apart scraps that are left over from other projects. Ask your child to name the shapes she’s cutting out and name the colors.
Kids crafts

3. Press the smaller shapes onto the eggs. Add in an extra math lesson, and have your child count the pieces as she’s putting them on the eggs. If she’s making this a permanent piece of art, glue the pieces on. Your child can make patterns, stack the shapes (creating new textures) or even make an Easter chick.

4. Glue the googley eyes on top of the felt pieces. If your child is making this a reusable activity, make sure she glues them directly onto the egg.

Kids art
 

Are you looking for more artsy activities? Follow Mini Monets and Mommies on Instagram for creative kids’ crafts!

Friday, May 15, 2015

Pipe Cleaner Art Activity: Flower Sculptures

Pipe cleaner art activities have been on the agenda lately. There have been pipe cleaner flowers and gift baskets made with the bendy craft material. We’re going back to the flower art, but with a twist this time -- making a soft sculpture.

Art activity

A few weeks ago a bought a mega-stock of thick craft sticks. I usually reuse popsicle sticks, but being that it’s only spring – I haven’t been buying summer-time treats. So, instead of a random few leftover sticks, I now have a giant bag of them. What to do? Last week the craft sticks became caterpillars (which then became butterflies!). This week I’m going back to the flower idea.

This is an easy kids’ art activity that has almost no mess (unless the cat gets ahold of the pipe cleaner pack – then you’re in trouble). It also works out your child’s fine motor skills in a relatively stress free way. The looping and twisting motions require eye-hand coordination, but aren’t so intricate that your child will easily frustrate. You can also do this craft almost anywhere. Pack up the materials in a bag and take them off to the park for some outdoor art-making or bring them on a trip away from home (grandma will probably appreciate the less-mess pipe cleaners over finger paints and glitter).

And now on to the art...

Here’s What You’ll Need:

·        Pipe cleaners

·        Craft sticks

Here’s What to Do:

1.     Wrap a green pipe cleaner around the craft stick, starting at the bottom. Your child will likely need several of them to cover the stick completely.
 
Pipe cleaner

2.     Bend a pipe cleaner into a loop.
 
Fine Motor

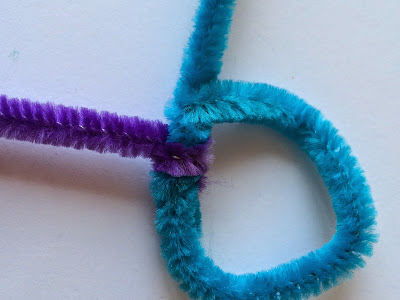
3.     Wind another pipe cleaner around the first.
Kids' art

4.     Make a loop, twist it (your child is now making the flower petals) and repeat.
 
Kids' crafts

5.     Keep on repeating with different colors to make more petals.
 
Children's art

6.     Twist the end of the flower around the top of the green stem.
 
Kids' crafts

7.     Curve, bend and twist another green pipe cleaner around the stem to make leaves.

And that’s it!!! Your child has a flower sculpture.
Spring activity

Are you looking for more creative kids’ crafts? Follow my Pinterest board for ideas!
Follow Mini Monets and Mommies's board Creative Kids Crafts on Pinterest.

Saturday, May 9, 2015

Butterfly Life Cycle Kids' Art Activity

The butterfly life cycle is a favorite when it comes to kids’ science themes. In my other-then-blogging job, I spend a lot (I mean a lot) of time talking to preschool teachers about their science and art lesson plans. I would say that a good 98 percent do some sort of life cycle project at some point (usually the spring) during the school year. Whether you’re a teacher, mom or dad—you can get artsy with the child in your life, creating this caterpillar to butterfly kids’ craft!
Science project

We’ve done those circular drawings with the arrows pointing from stage to stage since my son could pick up a pencil. So, after years of doing drawings I thought, “Why not try something a bit different?”. This is super-simple, and so much fun.

And, on to the art-making…

Here’s What You’ll Need:

·        Thick craft sticks

·        Model Magic

·        Clear-drying school glue

·        Googley eyes

·        Pipe cleaners

·        A marker

·        Scissors

Here’s What to Do:

1.     Wrap a few different pipe cleaners sound the craft stick. Start at the bottom, leaving a little room for the caterpillar’s head.

2.     Continue wrapping until your child covers the whole stick.

Kids' crafts
 
3.     Roll a piece of Model Magic into a ball.

4.     Press the ball onto the top part of the craft stick, making a head. If it doesn’t stick on its own, your child can dab a dot of glue under it.

5.     Glue on two googley eyes and draw a mouth with the marker.

6.     Cut a pipe cleaner into thirds. Bend it into a ‘V’ shape. Glue the bottom of the “V’ to the back of the caterpillar’s head to make antennas.

Pipe cleaner art

Life Cycle
 
Your child has a caterpillar! Now it’s time to grow into a butterfly. Wrap it up in tissue paper to make a chrysalis.


Kids' art

Now the caterpillar can turn into a butterfly…

Here’s What You’ll Need:

·        The caterpillar craft

·        Clear-drying school glue

·        Craft feathers

Here’s What to Do:

1.     Position the craft stick vertically.

2.     Dot glue onto the back of the craft stick.

3.     Press craft feathers onto the glue to make wings.
 
Kids' crafts

The caterpillar has now magically transformed into a butterfly and your child has gotten to explore the life cycle.

Are you looking for more kids’ crafts? Follow my Pinterest board for ideas!
Follow Mini Monets and Mommies's board Creative Kids Crafts on Pinterest.

Monday, May 4, 2015

Mother's Day Crafts for Kids: DIY Wallet

My son has never been one for Mother’s Day crafts. He made the obligatory handprint, “Mommy I love you” clay plaque in kindergarten and the handprint hearts in preschool. But, when he didn’t have a teacher standing over him, he stopped crafting cute little gifts for me. So, when he was in sixth grade (for those of you who only have little kids, by middle school the handmade creations are nixed by teachers) he went shopping with my husband for a gift. He got to pick anything he wanted – which apparently was a day-glow peach wallet that was actually somewhat bigger than the teeny tiny purse I usually carried.

Kids' art

Not that I don’t adore anything my son picks out (yes, I still carry the wallet with me – just in a much bigger purse), but I’m kind of partial to the DIY Mother’s Day gifts. I’m also partial to ‘no-sew’ kids’ projects. Combining the wallet idea with no-sew crafting, I got an artsy little activity. If your child is still into all things crafty, try this out. It’s simple enough for a preschooler to create, and helps to build fine motor skills!

Here’s What You’ll Need:

·        Craft foam

·        A hole punch

·        Yarn

·        Scissors

·        Clear-drying school glue

·        Craft felt

·        A marker

·        Optional: Self-adhesive velcro

Here’s What to Do:

1.     Cut the craft foam to the size that you and your child choose. Remember, your child will be folding this in half. Size it so that it is twice as large as your child wants to make the wallet.

2.     Fold the foam in half.
 
Kids' crafts

3.     Punch holes along the top half of the foam.
 
Mother's Day

4.     Mark the holes through to the bottom half with a marker.
 
Children's crafts

5.     Punch matching holes.
 
Lacing Art

6.     Repeat for the other side.

7.     Cut two pieces of yarn.

8.     Thread the yarn through the bottom set of holes on one side. Help your child to tie it in a knot. Have him ‘sew’ the yarn through all of the holes.

9.     Repeat on the other side, and secure the yarn at the tops with knots.
 
Lacing Activity

10. Create a design on the front of the wallet with felt shapes. Your child can cut out the felt and glue it onto the foam.
 
Flower art

11. Optional: Press self-adhesive velcro onto the inside top of the foam to make a seal for the wallet.
 
Wallet Activity

Are you looking for more kids’ Mother’s Day crafts? Follow my Pinterest board for ideas!
Follow Mini Monets and Mommies's board Mother's Day Crafts for Kids on Pinterest.

Friday, April 17, 2015

Easy Earth Day Art Ideas for Kids

Earth Day art activities anyone? Did you know that in 2012 Americans created 251 million tons of trash (according to the U.S. EnvironmentalProtection Agency)? Yikes! Of that, we recycled only about 34%, or 87 million tons, of the stuff we tossed. While there are some things that you just can’t reuse, I bet you’ll find plenty around the house that you can magically transform into artsy items.

Recycled art

I’m big on reusing everyday items as art materials. I’ll admit, much of it has to do with me being somewhat cheap. But, my husband is super into recycling. So, when the green can in our garage overflows with plastic and paper, I tend to find other ways of using those items.

With Earth Day coming up, here’s a list of some of my favorite everyday items that the kids can turn into art (I’m including a few activities below, but you can also let the kiddos get creative and make their own ‘junk’ sculptures with the addition of some school glue and tape):

·        Popsicle sticks: Why go out and buy brand new craft sticks when you can save onto these wooden beauties all summer long?

·        Egg cartons: Depending on where you get your eggs, there are two types of cartons – the cardboard and the styrofoam kinds. Your child can use both for art activities (she can also use them to store glitter, sequins or beads, or to sort crayons pieces. The top of the foam type works well for printing projects.

·        Yogurt containers: Not only can your child use these to make art, but she can also use them as water tubs for water coloring painting.

·        Cardboard boxes: So many possibilities. Make a pretend play car, boat or airplane. Or, cut the box up and use the cardboard pieces for painting and drawing on. or make a train table mat!

·        Soda bottles: Cut them or leave them as is to make sculptures with.

·        Glass jars: Cover them with glue, add a layer of tissue paper pieces (collage-style), go for a second coating of glue and get a handmade vase. I also like to use the little ones (baby food –size) to hold paint or my favorite DIY glitter glue!

·        Wash cloths and other assorted fabric: Fabric scrapes make fantastic sensory collage materials. Cut and glue them onto cardboard to make textures galore.

·        Old worksheets: Your child’s teacher sends home more worksheets and random fliers from school. Instead of tossing them in the trash, turn them over and draw on the backs.

·        Holiday cards and gift wrap: Your child can use these to make collages.

·        CDs and DVDs: Transform these into wind chimes!

That’s just a few of my favorites. There are so many more ways to reuse and recycle your would-be trash into art materials.

If you’re looking for a few more Earth Day art ideas…

Try these egg carton ideas!
Egg Carton

Or

Make a cardboard tube mobile.
Earth Day

Or

Create painted stamper letters with this foam print-making project.
Kids' crafts

Or

Stamp with flip-flops!
Children's art

Are you still looking for more creative crafts? Follow my Pinterest board for ideas!

Follow Mini Monets and Mommies's board Creative Kids Crafts on Pinterest.

Friday, April 3, 2015

Hide the Afikomen Pouch: Passover Craft for Kids

Searching for the afikomen is one of my favorite memories of Passover as a child. We always had the Seder at my parents’ friends’ house. They had two children who were slightly older than me. That meant I rarely found the afikomen. But, on occasion I managed to find the paper towel-covered piece of matzah under a pillow, behind a stack of books or squirreled away somewhere else that looking back, seems fairly obvious. Not only was the win a joy in itself, but there was also that magical prize of one whole dollar (back then a dollar could you a lot more than it can today).

Afikomen Activity
Even though I never had a problem with the plain paper towel that hid the afikomen, why not make its own special little pocket? This is a super-simple Passover craft for kids that you can use after the holiday is over. As a bonus, it includes a mini money holder—so that dollar bill has somewhere to sit until your little seeker finds it!

Here’s What You’ll Need:

·        Craft felt—One 8x10-inch piece, a second in another color and a few scraps in different shades.

·        A hole punch

·        Yarn

·        Scissors

·        A marker

·        Clear-drying school glue

Here’s What to Do:

1.     Fold the felt in half, book style.

Kids' art

2.     Punch three or four holes along one of the open sides (not the top). It’s likely that your hole punch won’t make it through both layers. If that’s the case, have your child use a marker to color a dot three the hole to the other side of the felt. Punch the felt out on the marker marks.

Children's craft
 
3.     Repeat the hole punch steps for the other side.

4.     Cut two pieces of yarn. Tie the first one through the bottom set of holes.

Passover Project
 
5.     Sew the side together. Tie the yarn in a knot at the top.

6.     Repeat for the other side.

Kids' crafts
7.     Cut a rectangle out of another piece of felt to make the pocket. Size it so that it is smaller than the pouch as a whole.

8.     Glue the pocket to the front of the afikomen carrier.

Felt art

Matzah activity
 
9.     Put the matzah inside the main pocket and a dollar in the little one on the front!

Kids' art
 
Passover Craft
 
After Passover is over, reuse the pouch as a felt shape caddy. Stuff the pocket with cut out shapes.

Kids' art
 
Your child can take them out and puzzle them together on the front or back of the pouch to make her own changeable pictures.
Kids' Crafts
 

This post is part of the Passover for Kids series from Multicultural Kid Blogs. Check out the main page for a full schedule of posts that share recipes, crafts and much more.

Holiday Passover