Mini Monets and Mommies

Saturday, October 29, 2016

Use Those Felt Scraps: Totally Not Scary Monster Puppets for Kids

Halloween monsters! Spooky! Um, now your 4-year-old is in tears. She’s not exactly ready for the fill-on ghoulishly scary experience that comes along with this holiday. That’s okay. This kids’ craft felt art activity is far from the walking dead, vampires and chainsaw-wielding maniacs that spook their ways through horror flicks.

Craft felt


(This post contains affiliate links. Please see my disclosure statement for more information).

So, this started with scraps. We’ve got crazy amounts of craft felt. I’m a fan of DIY felt boards, so the leftovers tend to pile up. Actually, I stash them away in a baggie, tuck them into the craft bin and usually forget all about them. What happens? I end up with a ridiculous number of felt-filled baggies.

The problem with using the scraps is that they tend to be oddly shaped. There were no circles to add on as faces or roof-shaped triangles to make houses. What to do with these bits and pieces?

Well, instead of tossing them (awfully wasteful, right?) they became sweet—not scary—monsters. Yep, your child can turn a bag, handful or a few felt scraps into perfectly adorable Halloween monster puppets. Oh yeah, you might need a few other things too.

Here’s What You’ll Need:

·        Felt scraps

·        Scissors

·        Clear-drying school glue

·        Googley eyes (I prefer a variety of sizes)

·        Thick craft sticks

Here’s What to Do:

1. Trim the scraps. Or not. It depends on what your child wants to do. She can use the scissors to create any sizes and shapes she wants.

Puppet art
 
2. Glue the scraps onto the tops of the craft sticks. Layer and overlap them to create hairy-looking Halloween monsters!
 
Kids' art
 

3. Glue the eyes onto the felt. Your child can use one giant eye or glue a group of differently sized eyes on.
Kids art
 

That’s it. Well, of course, your child needs to let the glue dry. After it’s completely dry, she can play with the monster puppets. She can create her own stories or act out a monstrous tale. Don’t stop at one puppet, make a few too!

This is also an easy option for a Halloween or birthday party. Simply set out the scraps on a table and let the kiddos glue away. Use a permanent marker to write each child’s name on their puppet’s craft stick (a washable marker will run when your child holds the puppet by the handle).

You can also pack up the very few materials (felt, eyes and sticks), and put them into baggies to use later on. Easily stash the kids’ craft in your bag and bring it to grandma’s, on vacation or anywhere else!

Monday, October 17, 2016

Halloween Monster Kids' Peg Doll Art Activity

Your kids are all about crafting for Halloween. But, those super scary monsters aren’t exactly a great match for your preschooler. Neither are spooky spiders or ghoulish ghosts. That’s okay. These peg doll monsters are cutely creative—without any of the “Boo!” factor.

Painting crafts


(This post contains affiliate links. Please see my disclosure statement for more information).

Honestly, this kids’ art activity came from the fact that we had an awful lot of pegs sitting around. After making a batch of peg dolls with removable modeling clay hair (and simple pipe cleaner clothes), I just put the unused materials (pegs) away.

Now that it’s almost Halloween, those plain ‘ol pegs are getting some use. This art activity lets your child learn about colors (and color mixing!), explore the artistic process, get creative and create a totally usable toy.

Holiday crafts
 

Here’s What You’ll Need:

·        Wooden pegs (peg dolls)

·        Tempera paint

·        Clear-drying school glue

·        Googley eyes

Here’s What to Do:

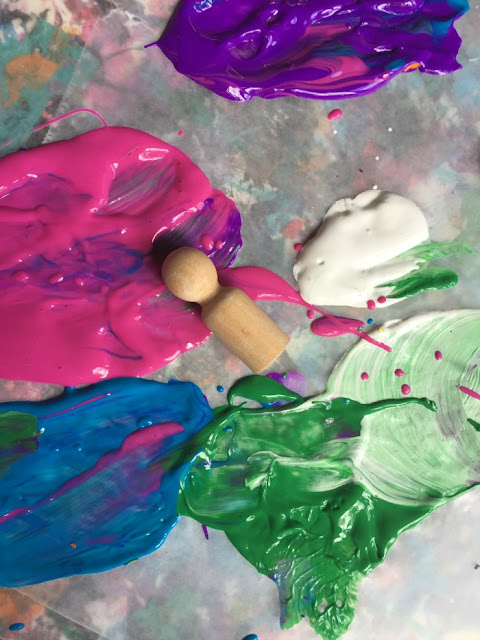
1. Pour the paint into pools on a palette. You can also use thick cardboard or do what I do and use wax paper. The wax paper is inexpensive (and you probably already have it in your kitchen) and provides a barrier in between the paint and your table. Use as many colors as your child wants. You can choose a rainbow of hues or just go with the primaries (red, blue and yellow) for a lesson in color-mixing.

Children's crafts
 

2. Roll the pegs through the paint. That’s right—your child is just going to roll them! As she rolls them from color to color the peg dolls will get coated. What’s the result? A rainbow-like swirl. Let your little artist keep going until she wants to stop. It’s okay if the colors mix so much that they turn into a muddy brown or tan. The important part of this is that your child gets to have fun exploring the color-mixing process. And bonus, she’s also building fine motor skills too!
Kids' art

Art activity

3. Let the paint dry completely.

Painting craft
 

4. Glue the googley eyes on. Your child can glue one pig eye on each doll’s head or glue a monstrous number of eyes all over the doll. Let the glue dry before your child plays with the dolls.
Monster art

This also makes an easy (and creatively fun) addition to a kids’ Halloween party. Set up paint stations, hand out the pegs and let the kids roll away! If you don’t have to time during the party, make a few beforehand to hand out as favors or use as decorations.

Friday, September 30, 2016

Finger Paint with Clay and Temperas

Finger paint plus clay equals a pretty awesome art activity! So, you’re looking for kids’ art explorations and you want something that lets your little one get creative and play with some crafty materials. Then, this might be what you’re looking for.

Finger paint


(This post contains affiliate links. Please see my disclosure statement for more information).

Okay, this activity is definitely what you’re looking for. It’s clay paint, finger paint, process art-making fun! And, your child gets in a fine motor workout. Bonus points if you connect to science too (which you very easily can). How?

Well, first let’s start the art-making itself. Your child is going to start with a layer of clay ‘paint’. We’ll get into the specifics in just a moment. This is one of my absolute favorite artsy ideas. I started using it when I taught gallery-based museum art classes for preschoolers. Obviously, I could bring real paints into the art galleries. Imagine your 3-year-old, some temperas and a real Monet. Not exactly a match-up. So, instead of real paint, I used soft modeling clay. It spreads well, the colors mix and it creates a pretty cool texture.

This activity also adds on actual finger paint. Why? Mostly, because you probably aren’t making this in an art museum. In that case, why not make a mess? And, here’s where you can add in some science. First, ask your child to make a prediction. What will happen to the clay when she spreads it out? Or, what will happen to the clay when she mixes the paint in? Next, make observations. How do the clay and the paint mix—or how don’t they? During the art activity your child can experiment with mixing colors (both with the clay and with the paint).

Now, let’s get back to the art-making…

Here’s What You’ll Need:

·        Soft modeling clay

·        Tempera paints

·        Card stock paper (or cardboard)

Here’s What to Do:

1. Pull the clay apart into dime-sized balls.

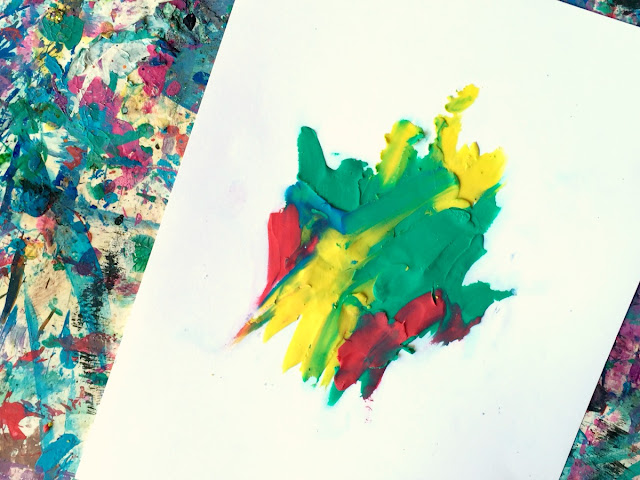
2. Spread the clay. Your child can push the clay down and spread it across the paper (in a finger paint-style motion). She can layer the clay, mix it together or spread it out in her own design (or, she can make an abstract art piece).

Clay art
 

3. Pour the paint onto a palette. I like to use a simple piece of wax paper. It’s easy. It’s inexpensive. And, it keeps the paint from getting on your table.

 
4. Finger paint—with the paint! Your child can paint on top of the clay, adding new colors and textures to her artwork.

Craft project


Friday, September 16, 2016

Up! eBook Launch: Creative Kids' Building Activities

Everything is looking Up! Yeah, I know – that was super cheesy. But seriously, I’m super-excited to be part of a brand new eBook. And yes, it’s called Up!

Kids' book


(This post contains affiliate links. Please see my disclosure statement for more information).

So, what is this eBook and why do you need it? Up! has 30+ projects that include math, literacy, science art and play – with hands-on activities that help your child to make connections, get creative and ask questions. These activities have been carefully chosen to give you a wide range of explorations, across a variety of content areas, while incorporating play, imagination, math, literacy, sensory experiences and art!

Up book
 

Buy Now


Up! Includes activities from some of my favorite bloggers (and myself too!), and comes with 100 printables. The projects included are intended for children ages 4 to 10 years. This isn’t just a resource for moms and dads, it’s also a fantastic lesson planning reference book for early childhood educators. Each activity includes a materials list, step-by-step instructions and fill color photos (for some extra guidance).

What kinds of activities will you find in Up!? Well, there are plenty. You’ll find ideas to set up and develop block play, using blocks for math lessons, shape-building challenges, construction play invitations, art projects (Calder-inspired kinetic models and even upright weaving) and science projects (rockets, airplanes, parachutes, pulleys and more).
Kids' art

Up! launches September 16th, and is available worldwide for instant download. You pay via PayPal – which means that you can use any currency (and they’ll do the conversion). The price is $14.99. We have a special launch price for you. You’ll receive a 25% discount, that’s $11.25, for the first two weeks (until September 30). This is an eBook, meaning you’ll be sent a link that allows you to download a PDF file containing all of the resources. You can save the file to your computer or iPad. Read it from your device or print out the pages.

Building activities


While you can buy the eBook and download it onto some mobile devices, you may need special apps to do so (and to read it). If you have any doubts as to if your mobile device can handle the PDF, download the file to your computer first and then share it with your smart phone.
Buy Now


The Up! eBook is published and sold by Cathy James at NurtureStore.co.uk. Please direct any customer service queries regarding purchases of the eBook to support@nurturestore.co.uk or refer to the NurtureStore FAQ.


The Up! eBook is protected under
copyright © 2016. All rights reserved.


Sunday, September 11, 2016

Monster Slime for Halloween

Monster slime! Halloween is coming up and you’re looking for kids’ activities that help your little one learn, explore, develop and best of all – have fun. And, that’s exactly why I love making the ooey gooey slimy stuff so very much.

Kids' science

(This post contains affiliate links. Please see my disclosure statement for more information).

I’m all about slime-making activities. In the past, we’ve made underwater, solar system, feather and disco versions. One of my favorite things about this art-science activity (other than it combines art and science) is that my teenager still actually enjoys it! Even though my teen still thinks it’s cool (he might not ever admit it to his friends), this is a creative way for young children to build critical-thinking skills, explore science concepts and create.

So, you’re starting to think, “Eww! Slime? Isn’t that awfully messy for the kids to make?” Um, not really. This recipe is surprisingly simple, and impressively not messy. I’m not saying it’s completely clean. Come on, that wouldn’t be any fun at all, right? But, it’s not something that’s going to flow all over your family room. Okay, it’s completely possible that those itty bitty shreds of glitter will manage to embed themselves into every crease and crevice in your home. Does that really matter in the grand scale of things? Let’s just say this – don’t mix your slime up in the middle of your white living room rug, on your favorite dining room linen or anywhere that you’ll freak out if your kids get a few sparkles on.

Before starting, ask your child what she thinks will happen (in other words – make a prediction) when she mixes up the ingredients. As you go through the creation process, encourage your child to make observations (basically, she’ll tell you what she sees as it happens). When she’s all dine making the Halloween monster slime, sit back and let her play. One note: Let’s not give your very young child total freedom on this one. It is NOT taste safe. That means it should not go in, on or anywhere near your child’s mouth (nor should it go in your mouth, her brother’s or the cat’s). Always supervise your child while creating and playing with this monster-themed goo.

Here’s What You’ll Need:

·        Fine black glitter

·        Purple glitter

·        Water

·        Liquid starch

·        Clear Elmer’s glue (do not use the white school glue, it will give the black glitter a gray look)

·        Googley eyes

Here’s What to Do:

1. Mix equal parts of the glue and water. I like to use ½ cup of each. You can use more or less, depending on how much you want to make.

2. Add the liquid starch. Mix in the same amount that used for both the water and glue. I used ½ cup, because I also used ½ cup for each of the other ingredients. Now the slime is getting – well, slimy!

3. Sprinkle the black glitter in. Keep pouring it in, and mixing it, until the slime is completely colored with it. Okay, so you can use a spoon or your child can sue her hands. I find that the hand-mixing option is the easiest – and most fun.
Science activity

Goop recipe

4. Mix a few pinches of purple glitter in too!
Sparkle project


5. Drop a handful of googley eyes in to make the slime monstrously fun.
Halloween crafts

You can store the play goo in a plastic ware container (with the lid tightly closed) or in a zipper baggie.

Thursday, September 8, 2016

Halloween Finger Painting with Clay Kids' Art Activity

Finger painting? In your house? With your ivory walls and bone-colored carpet? Hardly. You want your child to explore and experiment with art. But, honestly, the mess scares you.

Halloween craft

(This post includes affiliate links. Please see my disclosure statement for more information).

Hey, there’s no shame in the fact that you want to run the other way, screaming, when your little artist says, “Mommmmmmy! I want to paint. Now!” Seriously, who has time to wipe paint-covered finger prints from their walls, tables, chairs and floors?

Okay, so you’re thinking, “But, aren’t I supposed to let my child explore all things process-based?” Yep. I’m completely for it. I spent the better part of a decade bringing process art activities to parents and children as a museum-based arts educator. That said, as a mom, I totally understand the, “I don’t want that mess in my house” mentality. There were plenty of moms who brought their kids to our museum classes for that exact reason.

Sometimes you really don’t mind the messy art projects. But, even if it’s okay in your house – when you travel to grandma’s or take the kiddos to your in-laws, it might not be. That’s where painting with clay comes into play. Your kids can get a fine motor workout, explore different textures, blend colors and create a ‘finger painting’ without ever actually touching paint. Instead of the typical temperas, you’re going to swap in modeling clay!

Your child can try this art activity on its own. Or, you can add another layer to it and create Halloween art. How? Check out the easy (and almost mess-free) process…

Kids art
Here’s What You’ll Need:

·        Soft modeling clay – I’m not saying you should go into the craft store and unwrap every box of clay. But, I have been known to feel a box or two (or more) of clay. I’ve also returned clay for being way too hard. It shouldn’t feel like a rock. If it does (or won’t spread at all) being it back.

·        Card stock paper or cardboard (cut the side off of a box)

·        Googley eyes

Here’s What to Do:

1. Pull the clay apart into dime-sized pieces. This makes it easier for your child to spread.

2. Finger paint! Your child can press the clay (piece by piece) onto the board. Then, she can use her fingers to spread it out. Add more colors to mix and blend them.

Kids' crafts
3. Press googley eyes into the clay, making a monster masterpiece for Halloween.

Children's art
Call it a monster, a ghost or whatever you want – it’s artsy Halloween fun!

Sunday, August 28, 2016

Kids' Painting Art Activities: Without a Brush!

Kids’ painting art activities require a brush, right? Not always! Sometimes it’s entirely possible to help your child get as crafty as she wants, without a store-bought ‘painting tool’.

Kids' art


(This post contains affiliate links. Please see my disclosure statement for more information).

Okay, so you went out and bought a crazy-big pack of paintbrushes. You’re set! Or not. In something like 30 seconds your preschooler turned those brand new brushes into much-covered, crusty, sticky things that barely resemble anything that could be used for art-making. The bristles are bent and matted together, making it awesomely difficult to actually use them for anything at all.

It happens. A lot. When I taught children’s art classes, I was constantly helping the kids to keep their brushes in working order (obviously the museum where I worked frowned upon buying a constant stream of new ones). But, younger children always seem to have the desire to mash, smash and generally smush brushes onto paper. And, sometimes you’d rather let your little artist explore and experiment with painting art activities than sit next to him and say, “Please don’t break the brush.”

So, if you don’t have a brush left (and your child really wants to paint) or you’re just looking for something different to do – try this easy recycled option! Seriously. It’s low-cost and helps your child to get even more creative. He’ll have to figure out how to use the items that you’re giving him to create his artsy masterpiece! Your child will also get a fine motor workout (using the different materials to paint requires him to move his fingers and hands in different ways). If you do have one of those super-sticky brushes, you can also toss that into the mix. Why? Your child can use the other end (the handle end) to create paint-covered point prints or even roll the entire length of the brush (the handle and all) through the paint to make lines.
Child's art

Now, on to the art activity…

Here’s What You’ll Need:

·        Paper (we used card stock, but you could also use construction paper or poster board)

·        Scraps (really, any left-over art item—such as fabric, felt, tissue, cut pipe cleaners, cardboard, paper)

·        Tempera paint

·        Scissors

Here’s What to Do:

1. Gather the scraps together. Your child can cut some of them into smaller sizes (if needed). He can also crumble pieces of paper or bend pipe cleaners, making new shapes to paint with!
Felt pieces

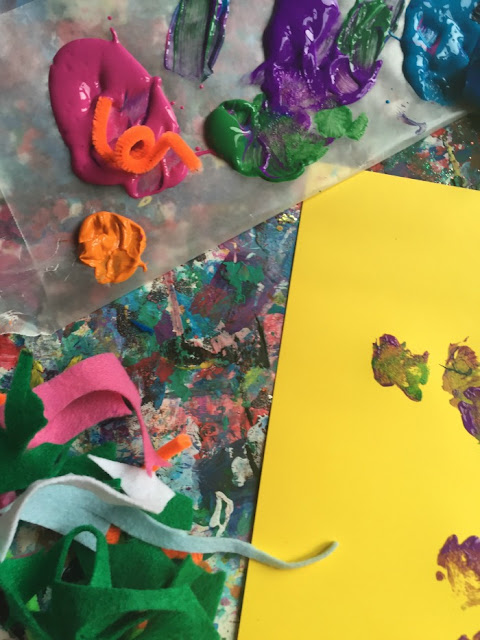
2. Pour the paint onto a palette. If you don’t have an actual palette, use a piece of thick cardboard or wax paper as an easy (and totally affordable) alternative. Use a rainbow of colors or create a color-mixing kids’ art activity by choosing only the primaries (red, blue and yellow).

Kids' crafts

3. Give your child a piece of paper to paint on. He can dab the scraps into the tempera, and then press them down onto the paper. He makes ‘brushstrokes’ with fabric, prints with pipe cleaners or anything else he can think up!
Kids' paint

Don’t worry if your child isn’t painting ‘something’. Encourage him to explore the process of painting. Doing so lets him make his own discoveries, while getting creative!

Children's art