Mini Monets and Mommies

Tuesday, February 17, 2015

Dr. Seuss Art Activity: Color Mixing for Kids

Dr. Seuss’ birthday is March 2. Since that’s right around the corner, why not stock up on kids’ art activities that feature Seuss favorites? One Fish Two Fish Red Fish Blue Fish is a kids’ classic that can help your little learner with her colors, numbers and more!
Color Mixing

(This post contains affiliate links. Please see my disclosure policy for more information).

Mixing colors is an easy process art activity that lets your child explore and experiment. Many (many) years ago on my first day of work as a museum art teacher my co-worker asked me to pour some paint on a tray for the children to use. I grabbed a rainbow of temperas, only to be met by a restrained look of disgust. “No. We ONLY use the PRIMARY COLORS and white,” said my co-worker. She explained that making the kids mix the colors added another layer to the art-making process. They weren’t just painting a landscape, creating a portrait or coloring an animal. They were also coming up with their own unique blend of colors.

That brings me back to the activity at hand…
Dr. Seuss Art

Here’s What You’ll Need:

·        White card stock paper

·        Red and blue tempera paint (you can also use white)

·        A paintbrush

·        Scissors

·        A marker or crayon

Here’s What to Do:

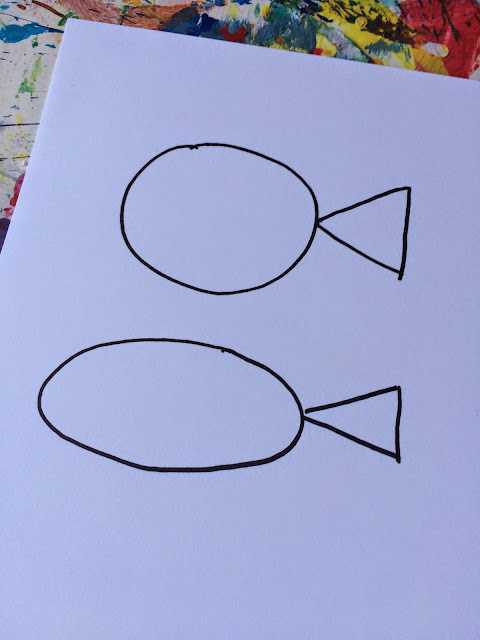
1.     Draw two fish onto the card stock. This is the perfect opportunity to talk about shapes and the part-to-whole relationship. So, add in some math and ask your child what shapes can make a fish (an oval and a triangle or a circle and a triangle both work well as combos).
Kids' art


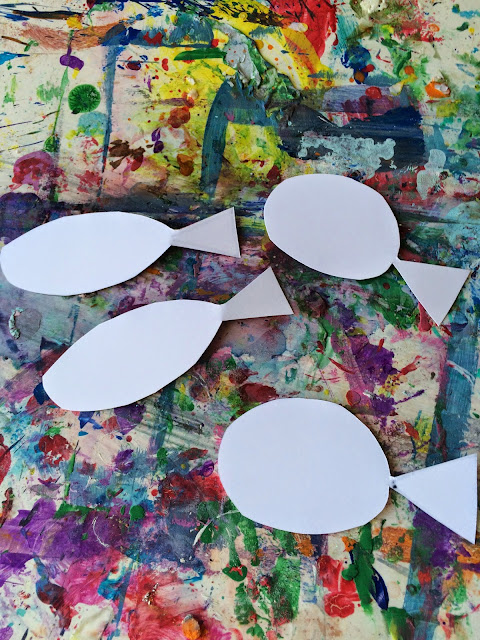
2.     Cut the fish out.
Children's crafts

3.     Pour two pools of tempera – one red and one blue – onto a palette or piece of wax paper. Wax paper makes an easy (and inexpensive) disposable palette.
 
Kids' paint

4.     Paint one fish red and one fish blue.
 
Fish theme Kids' project


5.     Mix the colors. Your child has one red and one blue fish. She can smoosh the fish together or use one as a paintbrush for the other. Any way that she does it, she’s transferring one paint color to the other to make purple.
 
Paint Project

Make more fish and repeat the color mixing activity. Try different amounts of each color, and see what happens. For example, if your child globs on a ton of blue paint, but only uses a teeny tiny amount of red – what color is the result? Try adding white to the mix to see how the color changes.

Don’t forget to include the actual Dr. Seuss book into the activity. Read One Fish Two Fish Red Fish Blue Fish before the art-making begins!

Are you looking for more Dr. Seuss themed activities for kids? Follow my Pinterest board for ideas!
Follow Mini Monets and Mommies's board Dr. Seuss Children's Activities on Pinterest.

Monday, February 16, 2015

Famous Artist Printable Art Viewing Activity for Kids

Art viewing with kids is one of my favorite things to do. One of the most memorable (and most adorable) things my son said when he was younger happened while viewing art. We were walking through the museum, looking for art works that I was going to use for a summer art camp that I was teaching. The theme was ‘food’. My son was 4 and I asked him to point to paintings that had food in them. He immediately pointed to a grassy landscape. Hmmm? Not really food. When I asked him why he picked that particular painting he said, “Because mommy, it’s food for cows!” And that is how a child thinks.

Famous Artist
 
I know, not everyone has a museum at their disposal for kids’ art viewing activities. With that in mind, I’ve created my first printable. It’s got the art work, some fun facts and 10 questions that ask your child. Because we’re Mini Monets, I chose one of my favorite artworks by …. Monet!
Here it is:
Free Download
 

I was lucky enough to have one of Monet’s Water Lilies at the museum where I taught. From toddlers to teens (yes, I really did take a class of toddlers into the museum’s art galleries) I’ve used this artwork to teach children of different ages and skill levels.

When your child is done with the art-viewing, try out some Monet themed art-making.

Instead of using paint (like Monet did), use modeling clay. Your child can finger paint her own water lilies. This art activity lets your little artist create a textured look and helps her to better understand the noticeable brush strokes that she’ll see when she looks at the real deal.

Monet art
Or

Try cupcakes as a canvas. Why not combine art with sweet treats? Make your own Monet in frosting.

Kids cupcakes
 
Did you enjoy the printable? So, this is my first printable that I’m offering. I’d love to read your feedback. Was it useful? Did your child enjoy it? Is there something else that you would like to see? Feel free to respond in the comments section.

Are you looking for more famous artist themed activities? Follow my Pinterest board for ideas!
Follow Mini Monets and Mommies's board Famous Artist Kids' Activities on Pinterest.

Sunday, February 15, 2015

St. Patrick's Day S'mores

St. Patrick’s Day s’mores are here! I’m always a fan of the ooey gooey graham treats. That said, I’ve done the traditional s’more stack so many times that I sometimes want something ‘more’ than a chunk of chocolate and a marshmallow.

St. Patrick's
 
I’ve made s’mores for Christmas, Hanukkah, Valentine’sDay, Halloween and Thanksgiving (those even had yams in them!). So, now it’s time for a St. Patrick’s Day treat. I recently made chocolate-mint cookie truffle balls. I was planning on carrying that theme onto the s’mores. Then I happened to buy a box of Lucky Charms (they were on sale and do have shamrocks in them). And this is what happened…

Here’s What You’ll Need:

·        Lucky Charms – Ok, you don’t actually need the cereal (does anyone eat that part?). Pick out the marshmallow pieces. You know that’s what you were going to do with it anyways.

·        Mini marshmallows – We used green and yellow.

·        Graham crackers

·        Mint-chocolate candies

·        1 banana – Why not add something nutritious to this very sweet snack?

·        Shamrock sprinkles

·        Vanilla wafer cookies

Here’s What to Do:

1.     Blend the vanilla wafers into a fine dust using a food processor. Set them aside for later.

2.     Line the first graham cracker with chocolate.

Mint chocolate
 
3.     Add a layer of Luck Charms marshmallows.

St. Patrick's Day
 
4.     Cover the St. Patrick’s Day themed marshmallows with a layer of green and yellow mini ones.

Mini marshmallows
 
5.     Microwave the stack for 15 seconds. It’s March and it’s unlikely that you’re going outside to toast the marshmallows over a campfire. The microwave is a quick, easy way to melt the marshmallows. Microwaves vary in strength, so you may need more or less time. You’ll melt the chocolate and mini marshmallows, the other rainbow and shamrock ones aren’t likely to change.

6.     Cover the stack with another graham cracker.

St. Patrick's Day
 
7.     Slice one banana to make ‘gold coins’.

8.     Cover the top graham with the slices.

Holiday Treats
 
9.     Sprinkle the shamrocks and vanilla wafers (it looks like gold dust) onto the bananas.

St. Patrick's Day
 
Are you looking for more s’mores? Follow my Pinterest board for ideas galore!

 
Follow Mini Monets and Mommies's board Sweet S'mores on Pinterest.

Dr. Seuss Kids' Felt Board Color and Number Art

One fish, two fish, red fish, blue fish! The Dr. Seuss classic is perfect for teaching your child about numbers and colors.

Felt Board

(This post contains affiliate links. Please see my disclosure statement for more information).


This kids’ art activity isn’t just a cute craft. It also helps your child build her fine motor skills, practice number recognition and learn color words. As a bonus, you can pack it up when your child’s all done playing (or starts to lose attention) and wait until another day to play.

Start by reading One Fish Two Fish Red Fish Blue Fish by Dr. Seuss. Focus on color and number words. You can continue with the vocabulary development after reading the book (but, before starting the activity) by playing an easy I-spy game. Look for objects that are one solid color. Say, “I spy something blue” and point to the object (for example, your blue couch). Your child has to look for something blue and point to it.


And now for the art-making …
Kids' counting

Here’s What You’ll Need:

·        Red, blue and two other colors of craft felt sheets

·        Scissors

·        A marker

Here’s What to Do:

1.     Draw a fish onto the blue felt. If your child is struggling to draw a ‘fish’, break it down into shapes. For example, an oval with a triangle at the end makes a fish.

Felt crafts
 
2.     Repeat the drawing, and make two more using red felt.

3.     Cut the fish out.

Dr. Seuss Project

Felt Board
 
4.     Cut a thin strip of felt in another color to make a one. Repeat this, making a two (you can add more fish and more numbers as your child builds her math skills).

5.     Press the fish and numbers onto a plain sheet of felt. Your child must match the correct numbers of fish with the numerals.

Color Art
 
 
Are you looking for more Dr. Seuss themed crafts for kids?

Check out our Cat in the Hat collage

OR

Follow my Pinterest board for ideas galore!
Follow Mini Monets and Mommies's board Dr. Seuss Children's Activities on Pinterest.

Thursday, February 12, 2015

St. Patrick's Day Felt Shamrock Art

Are you looking for an easy St. Patrick’s Day art activity for your child? Does the thought of pulling out palettes of paint out or spreading sparkles upon sparkles over goopy glue make you cringe?

Shamrock crafts

I’m always all for messy art—but, sometimes it’s just not possible. While I’d love to say that you can always make shaving cream finger paints or get glittery, there are instances when messy explorations just won’t do. Maybe you’re visiting grandma for the weekend and her perfect white carpet isn’t beginning for painted hand prints. Maybe you’re on day 7 of the cold that just refuses to go away and can’t stomach the thought of the prep and clean up involved in a more extensive art project. Or maybe you’re just looking for a low-key way to spend the afternoon with your child.

Whatever the reason that you want a virtually mess-less art activity, this St. Patrick’s Day shamrock felt project is an easy answer. As a bonus, it helps your child to learn about shapes while providing a textured sensory experience!

Here’s What You’ll Need:

·        Green felt

·        Felt in one non-green color

·        A marker

·        Scissors

Here’s What to Do:

1.     Fold a sheet of green felt in half.

2.     Draw half a heart onto the felt, starting at the fold. If you’re asking why you would draw a heart when this is a St. Patrick’s Day activity, take a look at a shamrock. Ask your child what shapes she sees. Each leaf looks like a heart!

Kids' crafts
 
3.     Cut the heart half out. Unfold it to make a whole heart.

4.     Repeat the drawing and cutting steps to make two more hearts.

Math crafts
 
5.     Cut out a few other shapes, such as squares, circles and rectangles. Make one of the rectangles long and skinny. This will become the shamrock’s stem.

6.     Put the shapes into a pile on another piece of felt.

Kids' art
 
7.     Ask your child to puzzle together the shapes into a shamrock. She needs to figure out which shapes (the hearts) she needs, and which ones she doesn’t. The felt shapes will stick to the other pieces of felt.
 
St. Patrick's Day

8.     Optional: If you want to make it permanent use a few dabs of school glue to hold the shamrock in place.

Are you looking for more St. Patrick’s Day activities? Follow my Pinterest board for ideas!
Follow Mini Monets and Mommies's board St. Patrick's Day Fun and Food on Pinterest.

Wednesday, February 11, 2015

St. Patrick's Day Mint Chocolate Cookie Balls

Mint cream Oreos? These are beginning to be made into St. Patrick’s Day cookie truffles. I’m a mega-fan of the cookie ball. Yes, I am well aware that cookies are good enough on their own. A friend of mine pointed out on Facebook one day that she didn’t get why people keep making cookies into cookie balls. Here’s my answer: Because I can’t bake!

St. Patrick's Day
 
Ok, so I technically can bake. I can read a recipe, follow it and take what might in some way resemble cookies out of the oven. That said, my son always cringes and not-so-politely declines my baked goods. So, when I can no-bake a holiday treat I do.

Even though I can’t cook my way onto the PTA’s bake sale scene, I do like putting together various concoctions that make up themed sweets. Not only are these cookie balls St. Patrick’s Day green, but they are also packed with minty goodness. Imagine a shamrock shake condensed into a small sphere and you’ve got a picture of the taste.

Here’s What You’ll Need:

·        Cool Mint Oreos

·        Chocolate mint candies

·        6 oz. cream cheese, softened

·        Green sprinkles or crystal sugar

·        Optional green frosting

Here’s What to Do:

1.     Crush the cookies in a food processor. Blend them until they are the consistency of sand.

Mint Recipe
 

2.     Mix the cream cheese with the cookies in a large bowl.

Holiday Recipe
 
3.     Form the mix into balls.

4.     Place the balls on a wax paper-covered plate. Pop them into the freezer for an hour.

5.     Melt the chocolate. I tend to take the easy route and do the melting in the microwave. Break the chocolate into pieces, put them into a microwave-safe bowl and heat them for about a minute. Microwaves vary in strength. Yours may take a longer or shorter time. Keep an eye on the chocolate to make sure that it doesn’t burn. The bowl will be very hot when you take it out.

Chocolate Recipe
 
6.     Take the cookie balls out of the freezer. Roll them in the chocolate. Use a tooth pick or spoon to avoid burning yourself on the hot chocolate.

7.     Optional: Coat the chocolate with green frosting.

8.     Dip the St. Patrick’s Day cookie balls in green sprinkles or sugar crystals.

Holiday cookies
 
Are you looking for more cookie ball recipes?

Check out:

Pretzel Cookie Truffles

Oreo Balls
 

Pumpkin Pie Truffle Balls

Holiday Cookies
 
Red Velvet Valentine’s Truffles

Red Velvet
 
If you want more St. Patrick’s Day ideas, follow my holiday Pinterest board!

 
Follow Mini Monets and Mommies's board St. Patrick's Day Fun and Food on Pinterest.

Tuesday, February 10, 2015

Purim Kids' Craft: Queen Esther Costume Crown

Looking for a Purim art activity for kids? When I was a child I don’t remember doing any. I do remember doing lots and lots of fuzzy Easter bunny crafts at school, hearing my friends go on and on and on about decorating eggs and feeling a bit jealous that the other kids got to eat marshmallow-center chocolate eggs and jelly beans, and all I got was hamantashen. Poppy seed or fruit filling instead of chocolate and marshmallows? While I’ll gladly eat them now, as a child I just didn’t think it was fair.

Kids' Crown

But, alas – while my friends were forced to spend the afternoon waiting in line to get their pictures taken with a guy dressed in a bunny suit, I got to go to the Purim carnival. It was like having two Halloweens in one year! Getting to dress up in costumes and play games- I was alright with that. So, in honor of the upcoming spring holidays, let’s not forget about Purim. Not everyone celebrates Easter. And while I have plenty of bunny-themed crafts in mind, this Queen Esther crown is artsy fun for all kids (no matter what faith they are).

Here’s What You’ll Need:

·        Card stock paper – You can use construction paper, but I feel that card stock stands up better.

·        Clear tape

·        Felt

·        Scissors

·        Glitter

·        Clear-drying school glue

·        A marker

Here’s What to Do:

1.     Draw the triangle-type crown shape on the paper. It should go across the bottom half of a horizontal sheet. Your child can use an over-sized piece of paper, or two 8x10-inch sheets that she tapes together.

Kids' crafts
 
2.     Cut the crown out.

Cutting Project
 
3.     Tape the Queen Esther Purim costume crown at the center (if your child is using two pieces of paper).

Kids' art
 
4.     Cut diamond shapes from the felt to make mock gems.

Fabric crafts
 
5.     Draw glue designs on the felt shapes.

Holiday crafts
 
6.     Sprinkle glitter over the glue. Shake off the excess. If the glitter is coming loose and falling into your child’s face, you can skip the sparkle step and substitute sequins. You can also buy ready-made glitter-covered felt sheets. This is a more expensive option (and not nearly as much fun to make).

Kids' projectsSparkle project

7.     Glue the sparkly gems onto the Purim crown. We covered the tape in the front with a felt rectangle first.

Jewish art

Holiday costume
 
8.     Measure the crown around your child’s head. Tape at the ends to make a circle.
 
Holiday crown

Want to try another option? Check out this foil-covered kids' crown craft!
Are you looking for more kids’ art and crafts? Follow my Pinterest board for ideas!
Follow Mini Monets and Mommies's board Creative Kids Crafts on Pinterest.