Mini Monets and Mommies

Friday, June 19, 2015

Colorful Ice Building Blocks for Kids

Building blocks made from ice? Why not? I love using ice. You can add color, sparkles, toys to be excavated or even chalk to it! Now the kids can explore the intricacies of architecture (or, at least the basics) through it.

Building activity

(This post contains affiliate links. Please see my disclosure statement for more details).

After making a batch of color-infused ice cubes to paint with, I thought, “Why not do something different with them?” Sure, letting the cubes melt into flowing water colors is artsy fun, but it isn’t the only thing the kids can do with cubes. Stacking them into towers or making mini forts combines art with science and math.  Your child is the engineer, figuring out what patterns and structures allow the icy building to stand. At the same time he needs to predict what the ice will do (in terms of changing states of matter – i.e., melting). As the ice begins to melt, the structure will change. This means your child needs to make a few adjustments.

When he’s all done building he can move the cubes to find the colorful prints left behind or just use them to create his own masterpiece!
Ice art

Here’s What You’ll Need:

·        Ice cube tray

·        Food coloring

·        Water

·        Paper or cardboard

Here’s What to Do:

1.     Drip a few drops of food coloring into each compartment of the ice cube tray.

2.     Carefully mix water in. Pour it slowly or use a dropper so that the colors don’t spill.

3.     Freeze the cubes.

4.     Pop the ice out.
Colorful art

5.     Place a piece of thick paper or cardboard on a sturdy surface, such as a table.

6.     Start stacking! Your child can create any type of stack that he wants with his building blocks made from ice. Make a single tower, a pyramid or a more elaborate piece of architecture. You can also freeze different sizes or shapes of cubes (we used larger square cubes and standard-sized ones).
Kids' art

Before the ice melts try out a few different building techniques. Alternate colors or size of ice.
Kids' activity

Are you looking for more icy art? Follow my science and art Pinterest board for ideas!

 
Follow Mini Monets and Mommies's board Preschool Art and Science Activities on Pinterest.

Thursday, June 18, 2015

Banana Split S'mores Summer Dessert Delight

Banana split s’mores? It’s soooooo summer, isn’t it? Yes, it melts almost immediately. But, shouldn’t part of eating the ooey gooey marshmallow treat be getting messy? If you want a calorie-conscious, dainty little snack – this isn’t for you.
S'more Recipe
 
On the other hand, if you’re saying, “Hey, it’s summer vacation. I need a treat! The kids need a treat!” then go right ahead with this. This completely kid-friendly recipe is also an easy (and super-fun) addition to a summer birthday party, family reunion or July 4th holiday celebration.
Here’s What You’ll Need:
·        Chocolate ice cream
·        Graham crackers
·        Marshmallows
·        Sprinkles
·        Bananas
·        Strawberries

Here’s What to Do:
1.     Get the marshmallows for your banana split s’mores ready. If you’re stuck inside you can microwave them (I used 10 seconds, but microwaves vary- so you may need more or less time) or you can bake them on top of graham crackers in the oven. I set the oven at 350 and kept checking back to see when they puffed up and started browning on top. If you’re outside, use the campfire or your fire pit instead (for that crusty brown goodness).
2.     Spoon a scoop of ice cream on to the graham cracker. The chocolate ice cream is the substitute for the traditional chocolate bar.

Ice cream
 
3.     Stack on sliced bananas and strawberries.
Summer fruit
 
4.     Add the marshmallow.
5.     Sandwich the s’more with another graham cracker.
6.     Squish a second marshmallow on top. If you’re really daring, add a generous heaping of whipped cream.
7.     Cover the top with sprinkles.
Kids treat
 
Finish the banana split s’more with a cherry on top. If the kids (or you) don’t feel like a cherry, add a few more sprinkles or even a second scoop of ice cream!
Are you looking for more s’mores? Follow my Pinterest board for ideas!
Follow Mini Monets and Mommies's board Sweet S'mores on Pinterest.

Sunday, June 14, 2015

DIY Disco Playdough

Playdough plus glitter equals sparkly fun for the kids! Mixing up a batch of the mashable, stretchy dough hasn’t always come easy to me. There’s no real magic secret to the ‘world’s best playdough’. The majority of recipes look at least somewhat like what you’ll see here. It’s what you add to it that makes it different!

Glitter art
 
Many years ago (before I had a child of my own) I had my first dough-making experience. It was also my first time teaching (3- and 4-year-olds). My supervisor teacher handed me the recipe and sent me off to the school’s kitchen to cook it. Let me just say, it did not come out very well. I added enough glitter to it that the kids didn’t mind the not-so-smooth texture (after all, they were in awe of the sparkles).

My play dough skills did somewhat improve since then. Honestly, the more you make the stuff, the more you can experiment with what works for you. Some people like to add more oil, less oil, no oil, coconut oil, food coloring, powdered tempera, and so on.

Why do I love this dough activity? Because it truly sparkles like a disco ball. And, if you’re afraid of glitter (which is completely normal and rational, given that the sparkly stuff sticks everywhere), don’t worry. The play dough’s mushiness grabs the sparkles and does a pretty good job of holding them in!

Here’s What You’ll Need:

·        2 ½ cups water

·        2 ½ cups flour

·        3-5 tablespoons of vegetable oil

·        1 ½ tablespoons of cream of tarter

·        1 cup of salt

·        Glitter – In several different colors

·        Optional: Food coloring

Here’s What to Do:

1.     Mix all of the ingredients in a big bowl. Personally, I prefer to mix them in the pot that I will use to cook the dough. That eliminates one more dish to wash later on.

Kids' cooking
 
2.     Cook the mixture on the stove, stirring often. Do not allow the dough to come to a boil. If it starts bubbling, turn down the heat immediately. Continue stirring until it looks like dough. If it looks like watery cake batter, keep going.

Children's recipe
 
3.     Spoon the play dough into another bowl to cool.

Kids' clay
 
4.     Optional: Add color, after it has cooled enough to touch. Drop a few drips of food coloring in and mash the dough as much as you can. Your child can knead it, fold it over and press the color through.

5.     Sprinkle glitter onto the dough. I put a piece of paper underneath the catch the excess glitter. You can dump the leftover sparkles into a baggie for later.

Kids craft
 
6.     Roll it into a ball. Sprinkle more glitter (in different colors) over the ball for a disco effect! Hint: Use a mix of fine and course glitter. The fine glitter coats the outside of the dough, giving it a metallic sheen, while the course stuff really stands out. Your child doesn't have to keep the playdough in a ball. She can spread it out and see how the sparkles shine.

Disco ball
 
Are you looking for more playdough recipes for kids? Follow my Pinterest board for ideas!
 
Follow Mini Monets and Mommies's board Slime, Play Dough and Goo on Pinterest.

Wednesday, June 10, 2015

On Becoming a Freelance Writer

I rarely write about writing. Actually I never do. I’ve thought about doing it. For a day or so I actually toyed with the idea of starting a whole other blog dedicated to it. But, then I realized two blogs, freelancing, being a mom and having a life is just way too much for me right now. Plus, there are so many absolutely fabulous blogs about writing/the freelance world already out there – why add another one?
Writing Career
That said, I’ve been getting paid to write since 2009, and wanted to share some of my insights. I know, I know – who really cares? Everyone on the Internet is an expert about something or another, and they all think that what they have to say is the most important thing ever. I don’t. So, why am I writing this? The other day I was reading a post on places to start out as a freelance writer. I rarely comment on articles, but this time I felt the need to. My little addition to the post in the comments section started to take on a life of its own, so I thought, “Why not just write my own post?”

Then came the ideas. There’s a scene in the movie “Baby Mama” where Tina Fey is talking to Greg Kinnear about her somewhat-genius-/somewhat-crazy/mostly-moronic ideas that strike her in the middle of the night. When she wakes up she has little notes stashed near her bed that she’s written things such as, “electric toilet” and “make everybody be twins.” I don’t go as far as writing them down (I probably should), but I do tend to have these types of ideas in plenty. Sometimes I actually act on them (like the time when I bought a super-fancy photo printer from amazon when I had the idea that everyone I knew could send me their digital baby photos and I’d make personalized scrap books – yeah, I have lots of nice photos of my child and the dogs hanging around the house now, but no scrap books) and sometimes they just stay in my brain (like the time I decided that my dogs should have their own blog). So, when I imagined what writing about writing looked like, it took on a life of its own.

This brought me to one question, “Where to start?” I suppose the beginning would be the logical place.

Why did I start writing? I actually started writing for money when I had a brief, but amazingly interesting, job helping to organize a research project for the Child Life department in a children’s hospital. That writing couldn’t be more different from what I do now. It was all academic, totally not relatable and very journal-y. The grant for that job ended, and I was working as a museum-based art teacher. So much fun, but not much money. I, like just about every other mom, wanted to put some balance back in my life (and have enough money to afford the fancy shampoo, after paying for diapers, wipes and a zillion little baby socks) by working from home. I kept my museum job, but looked into writing for money too. I started a blog. It lasted for all of one day before I deleted it. I found a revenue share site. That lasted for years.

If you’re wondering what a revenue share site is—it’s a website that allows you to contribute content, and then get paid by splitting the ad revenue. At the time (these were the pre-Panda days) SEO seemed simple and with some targeted keywords I was off and making a few hundred dollars a month just by writing down my lesson plans and sharing what I knew about early childhood arts education. Some of top writers at this site made full-time incomes (mind you, this was a very few). Then Panda came, and Google effectively killed my (and many other revenue share writer’s) income. That’s ok. At this point I was still learning how to write online, and the community message boards on this site were what I really needed to get a grip on what I was doing.

What next? Armed with my ‘published’ articles, I headed off to one of the biggest content mills out there. If you don’t know what a content mill is – it’s a website that ‘hires’ (you’re never a real employee, so they have no obligation to give you any work) writers to create lots and lots of content for typically very little money. They want everything to be uniform, so there are usually truckloads of rules, editorial guidelines galore and various ways to make you into a crazed lunatic while making what amounts to less than minimum wage. For quite some time I made a very nice living off of a content mill. Then I was basically fired (technically they couldn’t fire me, as I wasn’t a real employee). I don’t really blame them. What I wrote for them sucked. The titles were ridiculously inane and my heart just wasn’t into it. Seriously, I wrote articles with titles such as “Places to Put Your Purse” and “Is that a Beaver in My Backyard?” Guess what? No one should ever, ever, ever google “Where can I put my purse?” If you can’t figure out where to put your purse without Internet instructions, there’s a bigger problem than not knowing where your bag goes. I spent months churning out sometimes as many as 10 600 word articles a day while watching the Real Housewives of somewhere or another. If you’re considering applying for a ‘job’ at a content mill, go ahead. You’ll make easy money, get paid possibly two times a week and build up a resume. While I have less-than-great things to say about the mill where I worked, it did pay the bills and in many ways it jump-started my career.
Working Writer
 
Now what? I’ve got to say that I’m not a fan of the uber-lengthy article. I usually lose interest, so I don’t blame you if that’s what you’re doing about right now. With that in mind, you’ll have to wait until my next installment to see what happens next. Ok, so it’s not exactly a cliff hanger (no I did not pretend to be pregnant with the content mill’s baby just to win back my place, nor did my evil identical twin start writing under my name – yes, I watch way too much Days of Our Lives). But, it may help you out a bit if you’re a beginning freelance writer.

Tuesday, June 9, 2015

Kids' Math Activity: Beach Ball Felt Fractions

I never liked math. There, I said it. It was boring. There were worksheets, tests and enough equations to give me little hands major cramps. So, why should I create a math activity for kids that’s just as ho-hum as I remember from way back when?

Math for kids

Getting hands-on and letting kids create is an easy solution to the math blahs. It’s summertime (or you’re reading this in December, wishing it was the summer), so I thought I’d go with a beach ball theme. This kids’ craft really couldn’t be much easier. It’s a super simple fraction activity – and a beach ball felt ‘board’ (technically, it’s more of a circle than an actual board). You can also use this as a math game with younger kids to build counting skills and color recognition!

Here’s What You’ll Need:

·        2 8x10-inch pieces of craft felt in different colors

·        Scissors

Here’s What to Do:

1.     Fold one piece of felt in half.

Kids' activities


2.     Cut half a circle out.

Children's crafts
3.     Open the circle.

Kids' art
4.     Fold the other piece of felt inside of the circle.

5.     Cut a second circle, using the first one as a template.

6.     Cut one of the circles into four equal pieces.

Math art
7.     Place all of the pieces onto the circle to make a whole.

8.     Remove one piece. Have your child to count how many are left. Ask what the fraction is (3/4 or three out of four).

9.     Take away another piece to make ½, and then another to make ¼.

10.   Add pieces, making fractions that build up to a whole. Your child can vary the positions, exploring how she creates the same amounts even though the beach ball looks different.
 
Fraction activity

Are you looking for more kids’ crafts? Follow my Pinterest board for ideas!
Follow Mini Monets and Mommies's board Creative Kids Crafts on Pinterest.

Friday, June 5, 2015

Slime Paint Kids' Messy Art Activity

Slime paint! Combining kids’ science and art is a favorite pastime of mine. I also enjoy creating ‘famous artist’ activities (probably from too many years of teaching children’s museum art classes). So, when I started making slime all of the time (even my 13-year-old son enjoyed it, and anything that takes him away from the Xbox is a-ok in my world) I wanted to do something a bit more artistic with it.

Kids' science

In the past I’ve painting with shaving cream, clay and textured finger paint. For this one, we took the famous artist theme and re-created Monet’s Water Lilies – in slime!

I tried a few different recipes that failed in majorly miserable ways. The first ended up looking something like wiggly string floating in water, the second was basically putty and the third was a bit too jello-like. I’m not saying that I’ve perfected the recipe, but I did finally get a consistency that worked as a finger paint. By adding more (and some more) glue, I eventually got a slimy paint that could spread, but also spread apart into fringy strings (like a spider web). When you try this with your child, encourage him to experiment with the amounts. Trying to make different consistencies is half the fun of this activity.


Here’s What You’ll Need:

·        School glue

·        Water

·        Liquid starch

·        Food coloring

·        Card stock paper or cardboard

Here’s What to Do:

1.     Combine the glue and water. We used ½ cup of water and roughly 1 ½ cups of glue. You can change the quantities, but try to keep the water-to-glue ration at 1:3.
 
Kids' math

2.     Measure and mix in ½ cup of liquid starch.
 
Kids' activity

3.     Separate the slime. I chose to use cupcake tins. They have the perfect size of compartments.

4.     Drop a few drips of food coloring into each compartment. Mix it thoroughly. You can add a few drops of water as well. This makes it easier to mix the colors.
 
Kids' art

5.     Spread the slime onto the paper. It kind of looks like melty cheese or something that came out of an alien's nose (i.e., it's not pretty). But, it sure is fun!
 
Paint play

Your child doesn’t have to create a Monet painting with the slimy stuff. He can make an abstract work of art or whatever design he imagines!

Are you looking for more kids’ art activities? Follow my Pinterest board for ideas!
Follow Mini Monets and Mommies's board Creative Kids Crafts on Pinterest.

Thursday, June 4, 2015

Pop Rocks Painting for Kids

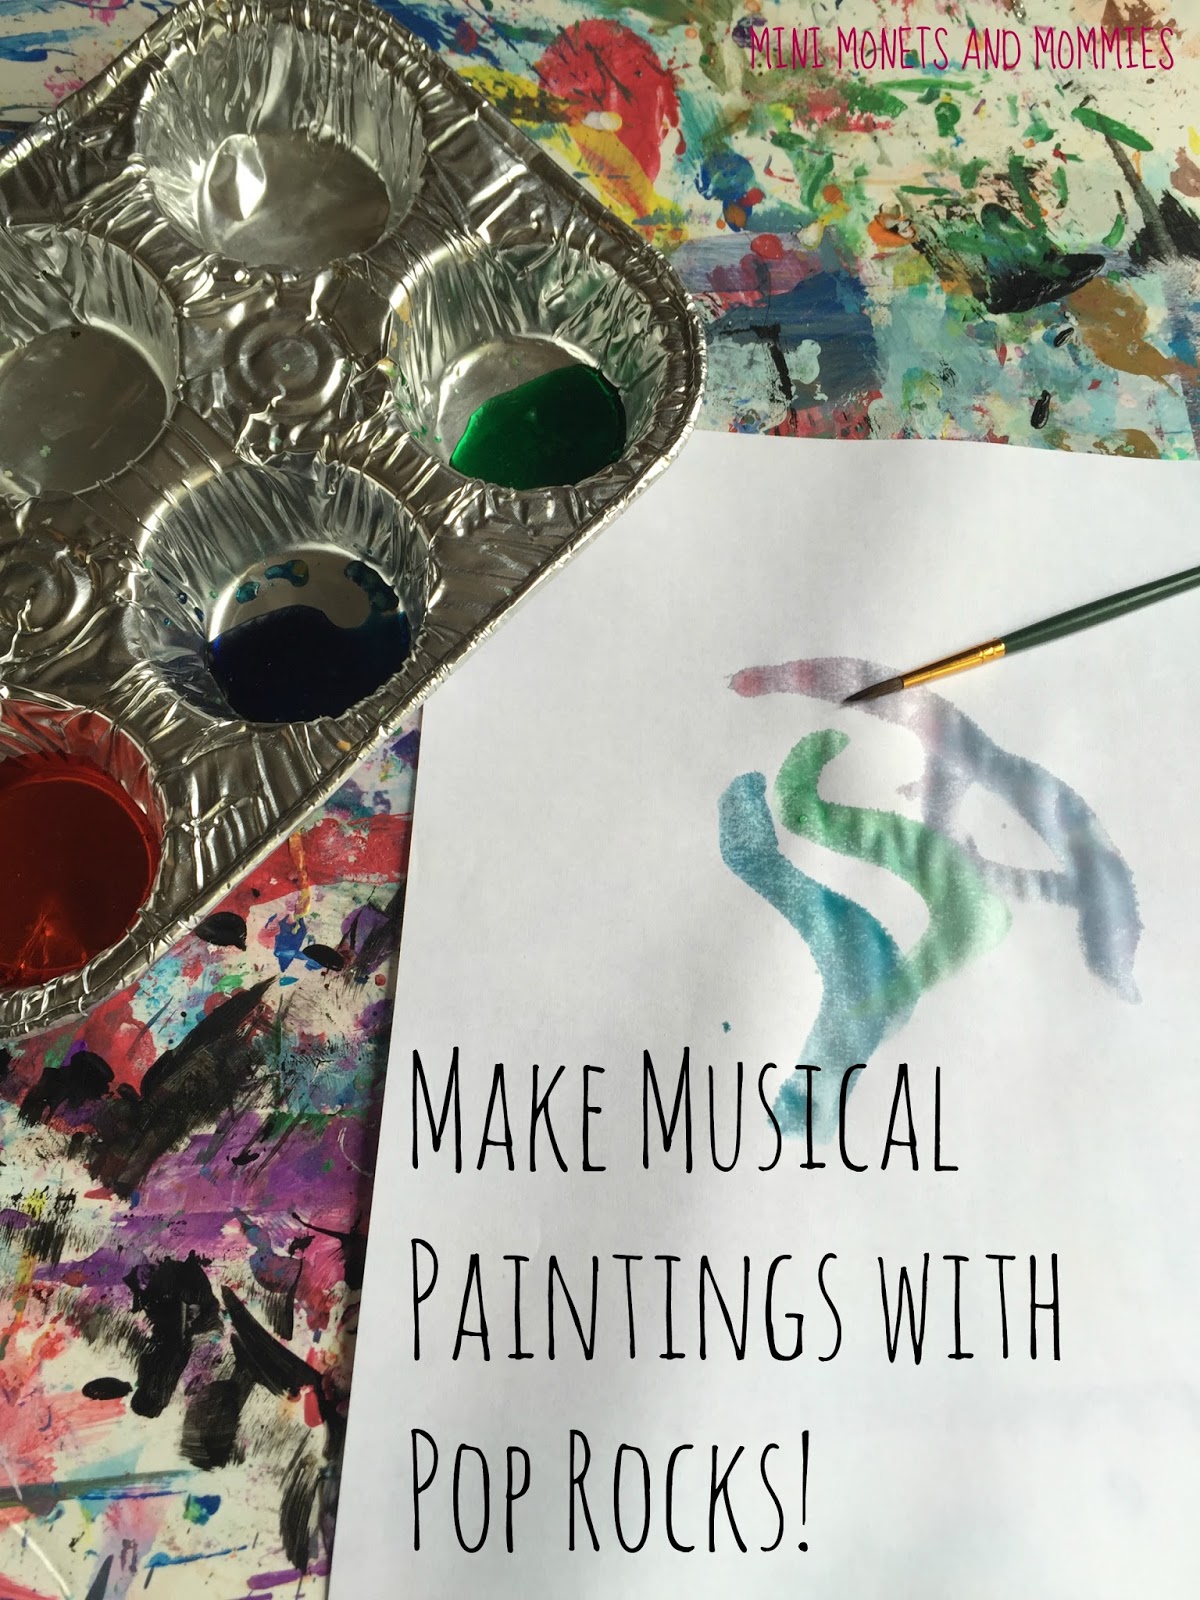
Pop rocks and kids’ painting? Yep. I made fizzing water colors the other week and was looking to up the artsy ante on bubbling, gurgling paint projects. So, I thought, “Why not paint with pop rocks? That’s sure to be like the fireworks of art projects!”

Musical paintings

Ok, so not really. Hey, not every crafty idea works out. If you’re looking for paint that bubbles out of control, try the fizzy water colors. Really. It works much better. While the popping candy explodes in your mouth, it certainly doesn’t on paper. But, what it does do is make a musical noise (at least if you mix it with water in a foil cupcake tin). Instead of ditching the activity and marking it off as a failed art experiment, I went with a sensory approach.

Sensory, when used in reference to an art project, typically means getting tactile and exploring textures. You know, adding sand to finger paint, playing with squishable clay or some other hands-on play project. This time we’re going with a different sense – hearing. Other than the almost-silent swish of the brush or splat of a little hand pressing into finger paint, art is often very quiet. While the pop candy doesn’t really add to the visual look of the painting, it does make it sound anything but silent. You know the noise that it makes inside of your head when you eat the candy? It’s that same noise, but in water color paint.

Here’s What You’ll Need:

·        Pop rocks candy

·        A foil cupcake/muffin tin (or line cups with kitchen foil)

·        Water

·        Food coloring

·        A paintbrush

·        Paper

Here’s What to Do:

1.     Put a pinch of pop rocks into each section of the muffin tin. You can also use foil-covered cups. Why foil? The stiff metallic nature of it makes a perfect sounding board for the rocks to pop against—i.e., it makes it noisier.
 
Candy art


2.     Drip a few drops of food coloring onto the rocks. Use one color per compartment.
 
Water colors

3.     Add water and listen for the noise!

4.     Paint onto the paper. This is just like using regular water colors.
 
Pop rocks

Explore and experiment with different surfaces instead of the foil. Compare the noises that the rocks make. You can also try dropping the candy onto a foil-covered piece of cardboard, and then add the water onto to it to make the fizz.

Are you looking for more art and science activities? Follow my Pinterest board for ideas!
Follow Mini Monets and Mommies's board Preschool Art and Science Activities on Pinterest.