Mini Monets and Mommies: October 2015

Friday, October 30, 2015

Colored Salt Painting: It's Art and Science!

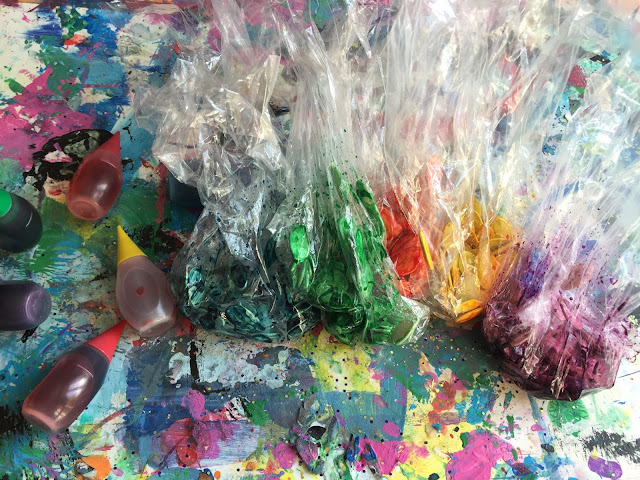
Not long ago I was making colored salt for another activity. I had a few bags left over and decided to use them for a water color painting exploration.

Art activity

Ok, so this is messy. I’m not going to say that it’s not. But, the mess is worth it. Not that kids’ art activities aren’t fine and dandy on their own. But, add in a touch of science and it makes learning extra-fun.

What can this activity teach your child and what skills does it help to build?

·        Color mixing: As the water hits the salt and the colors release, they mix and mingle – making new hues!

·        Sensory exploration: The course salt provides plenty of texture for your little artist to explore.

·        Absorption: As the salt absorbs the colors, your child can see the changes that are happening.

·        Fine motor development.

Along with these, your child’s also getting the chance to explore the artistic and scientific process. Start by making predictions. Have your child tell you what she thinks will happen when she mixes the food coloring with the salt. Later on, as she adds water to the colored salt, ask her to predict what will happen to the paper underneath. As you go through the activity, your child makes observations. Encourage her to tell you what she sees, smells, hears and feels. After the activity is over, she can tell you what happened and decide if her predictions were indeed correct (if they weren’t, ask her why or what happened that was different than her first thoughts).

Now on to the colored salt art…
Science activity

Here’s What You Need:

·        Coarse salt (sea salt or kosher salt)

·        Food coloring

·        Sandwich-sized baggies (the zipper kind work best)

·        White card stock paper

·        A paintbrush

·        A cup of water

Here’s What to Do:

1.     Pour a few tablespoons of salt into a baggie. Repeat, making three or four different bags.

2.     Add one to two drops of food coloring into each baggie. Use a different color in each one.

3.     Close or zipper the bags. Shake them, mixing the food coloring and salt. Your child may need to mush the bag together with her fingers, spreading the color on through the plastic.

4.     Open the bags and let the salt dry for a few hours. You can also pour the salt onto wax paper.
 
Colorful craft

5.     Sprinkle the salt onto the card stock paper.

6.     Drip water on top, let your child use her fingers to spread the water on or paint it on with a brush.
 
Kids' art

Try a few different ways of painting with the colored salt. Your child can add it to cups of water before painting it on, put water on her finger tips and then squish the salt on or come up with her own creative idea.

Are you looking for more art and science activities? Check out my Pinterest board for ideas!


Follow Mini Monets and Mommies's board Preschool Art and Science Activities on Pinterest.

Saturday, October 24, 2015

Pumpkin Seed Fall Tree Kids' Art!

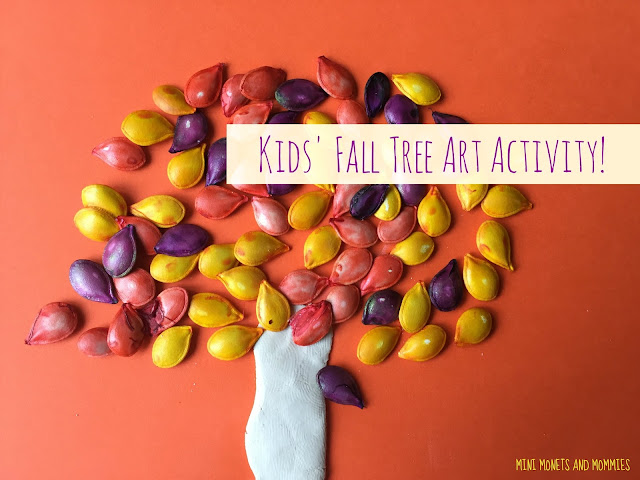
Fall is pumpkin time! Pumpkin spice, coffee, cookies, cakes, cupcakes and of course crafts. My favorite thing to do with the seeds that we scoop out after carving out Halloween jack o’ lantern is coloring them (of course, that comes in a close second to eating them). While the colorful seeds are fun enough on their own, we added a little glue and made a textured fall tree!

Fall tree

(This post contains affiliate links. Please see my disclosure statement for more information).

This isn’t just an autumn art activity. Instead of coloring the seeds with fall hues, your child can go with green and make spring or summer trees. In the winter, try some white tempera and make snow-covered seed-leaves.

What can the pumpkin seed art activity teach your child? A lot! Aside from the artsy aspect, there’s color recognition, math (count the seeds or make patterns with them), science (explore the seeds through the senses and discover the wonders of the fall season) and it also builds fine motor abilities.

Here’s What You’ll Need:

·        Pumpkin seeds

·        Food coloring (in fall colors)

·        Sandwich baggies

·        Card stock paper

·        Modeling clay

·        Clear-drying school glue

Here’s What to Do:

1.     Color the seeds. Put them in baggies. Add a drop or two of food coloring into each bag. Shake, and then pour the seeds out onto a piece of wax paper. Let them dry. For more detailed steps, check out my pumpkin seed coloring how-to.
 
Colorful craft

Pumpkin art


2.     Sculpt a trunk. Spread the clay out on the card stock in the shape of a trunk. Think of it like your child is finger painting with clay. Unless the clay is very old, it should stick. If it doesn’t, use a few dabs of glue.
 
Kids' craft

3.     Glue the dried colorful seeds on top of the trunk as leaves. Make patterns or just attach them in a random fall spread. Your child can also add a few to the bottom of the paper to look like fallen leaves.
 
Autumn art

That’s it! It’s a super-simple fun fall craft for kids.


Are you looking for more autumn activities? Follow my fall Pinterest board for ideas!
Follow Mini Monets and Mommies's board Fall Activities for Kids on Pinterest.

Wednesday, October 21, 2015

Pumpkin Cranberry Granola Fall Breakfast Treats


This shop has been compensated by Collective Bias, Inc. and its advertiser. All opinions are mine alone. #FlavorsOfFall #CollectiveBias

 
It’s that pumpkin everything time of year! Not just those jack o’lanterns, put pumpkin foods of all kinds. With a now 14-year-old I feel like I’m buying food two or three days a week – growing from as tall as much shoulder to bigger than me in a year pretty much means that my son is hungry 24/7. So, we wind up at Giant Eagle every few days (really, that’s not an exaggeration). Among the various pumpkin-y products I’ve been eyeing up is Giant Eagle’s Pumpkin Cranberry Granola (seriously, I feel like I’ve been stalking it at the store).

Cranberry granola


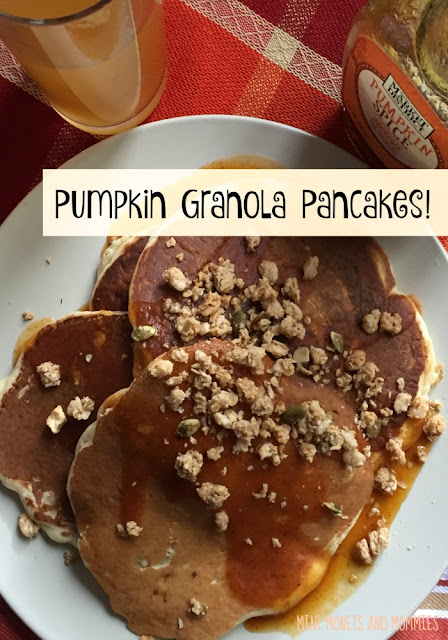
After picking up a few pumpkin products (the granola and the pumpkin spice syrup) I think I have a new absolute favorite fall breakfast. Honestly, we’re usually a pour a bowl of cereal and add a splash of milk kind of family. It’s easy, it’s fast and it doesn’t require me to turn on the oven. But, on occasion I do oblige my son’s requests to make pancakes on the weekends. With the pumpkin products in mind, I figured, “Why not add them to those special Saturday pancakes?” With the leftover granola and syrup I decided to try out a no-bake (this does involve a little bit of ‘cooking’, but no baking time) breakfast bar.

What was the result of my fall breakfast-making binge? After no-baking the bars I had to go out for a few hours. When I got home my husband had pretty much polished off all of them!

Even if you’re not exactly Top Chef material, this recipe is totally do-able. Instead of just serving these soon-to-be fall favorites up to the kiddos, get them involved in the making process. They can measure, mix and plate the pumpkin breakfast treats!

Here’s What You’ll Need:

·        Giant Eagle Pumpkin Cranberry Granola – If you’re looking to add an extra zip to the recipes, mix in a cup of the Ginger Snap Granola as well.

·        Giant Eagle Pumpkin Spice Syrup

·        Creamy peanut butter (I used the natural, unsalted variety, but you can also use the regular salted kind) – You could also swap in almond butter or a chocolate hazelnut spread.

·        Pancake mix – Follow the manufacturer’s directions. You’ll probably need milk and eggs to go with this as well.

·        Butter

·        Optional: Giant Eagle Orange Spice Cider – To serve on the side, as an alternative to the typical orange juice.

Here’s What to Do:

To make the pancakes:

1.     Mix the pancake batter (again, follow the directions on the box – or use your favorite recipe).

2.     Add one cup of the pumpkin cranberry granola.
 
Cereal pancakes


3.     Stir the granola in, mixing it throughout the batter.

4.     Coat the skillet in the thin layer of butter and cook the pancakes.

5.     Plate the pancakes, add a generous drizzle of the pumpkin spice syrup.

6.     Crumble a handful of granola on top of the syrup and serve!
Pumpkin pancakes

To make the granola breakfast bars:

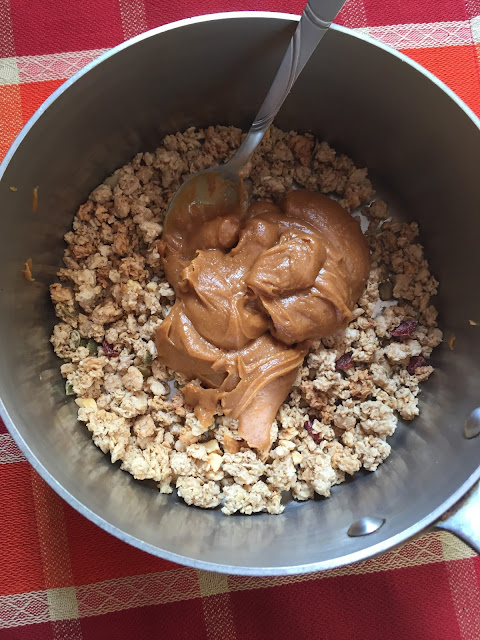
1.     Mix ¼ cup of the pumpkin spice syrup with ¼ cup peanut butter in a saucepan, heating on a low setting. Stir the mix continuously (so it doesn’t stick) until it is liquid-like. If you need a little extra liquid (or id the peanut butter is too thick), add in a one to two tablespoons of the orange spice apple cider.

2.     Try not to eat the mix yet – it smells more amazing than you’re imagining!

3.     Pour the syrup-pb mixture over 1 ½ cups of the pumpkin cranberry granola.
Cereal bars
 

4.     Stir thoroughly.
Breakfast bars

5.     Again, try not to eat it all just yet.

6.     Cover a baking dish with plastic wrap. This keeps the bars from sticking.

7.     Spoon the mix onto the pan, making a thick rectangle. I made the bars about 1 1/2 –inch thick.

8.     Cover the top of the bars with another layer of plastic wrap.

9.     Pop the dish into the freezer for at least 30 minutes. You might be tempted to take the bars out early and try them. If you can wait, doing so makes them much sturdier.

10.  Take the dish out of the freezer. Peel off the plastic wrap.

11.  Using a spatula, remove the giant rectangle of breakfast bars from the dish.

12.    Cut the granola mix into square or rectangle bar shapes.
Cereal bars

That’s it! So super-simple. The bars are a yummy on-the-go breakfast option, while the pancakes are more of a family sit down deal. In either case, they’re both sure to become fall favorites with your family (at least, they did with mine)!

Grocery store

Tuesday, October 20, 2015

How-To Craft a 3D Boat Model for Kids

When my son came home from school telling me that he had to build a 3D boat model for social studies class I have to admit I was a bit giddy. Why? Because he’s 14-years-old now and anything having to do with art or crafting is apparently majorly uncool in his teenage brain.
Ship model

After spending the last decade or so teaching children’s art programs it sometimes pains me that my son is so uninterested in anything having to do with art. I miss those days when he’d come to work with me, look at artwork on view at the museum and actually enjoy all of the painting, gluing and clay play that we did. But, not every child enjoys art – and so I let it go. As you can imagine, getting to spend a Sunday afternoon with my Xbox-playing teen doing anything that involved art was super-fun for me. Even though he’d never admit it, I know he had fun too!

So, here’s the art-making. His goal: To make a ship. Our materials: Reused paper products (mostly). You don’t have to have a teen to make this kids’ ship craft. It’s not difficult, and you can easily adapt it to other ages.

Here’s What You’ll Need:

·        Two cardboard juice pouch boxes – We chose these boxes because they are the perfect shape and have ready-made folds and perforations that are just-right.

·        Markers

·        Card stock paper

·        Popsicle sticks

·        A plastic bendy straw

·        Scissors

·        Thick packing tape

·        Clear-drying school glue

Here’s What to Do:

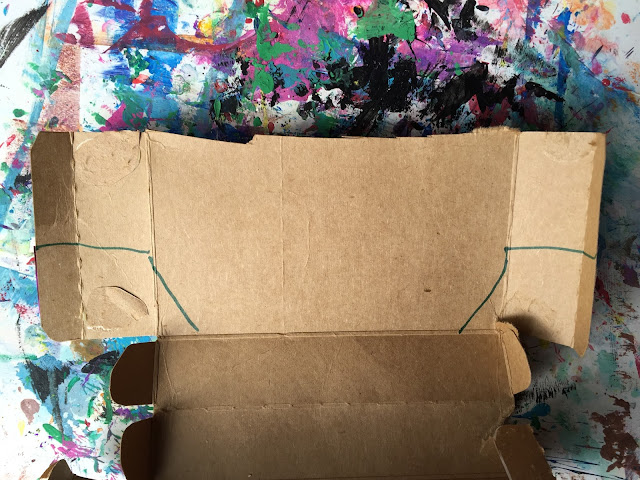
1.     Open one of the boxes and flatten it on your work surface.

2.     Draw the ship shape onto the top panel. Make the bottom of the boat the fold.

Ship Craft
3.     Flip the cardboard around (not over) and draw the ship shape again on what is now the new top panel.

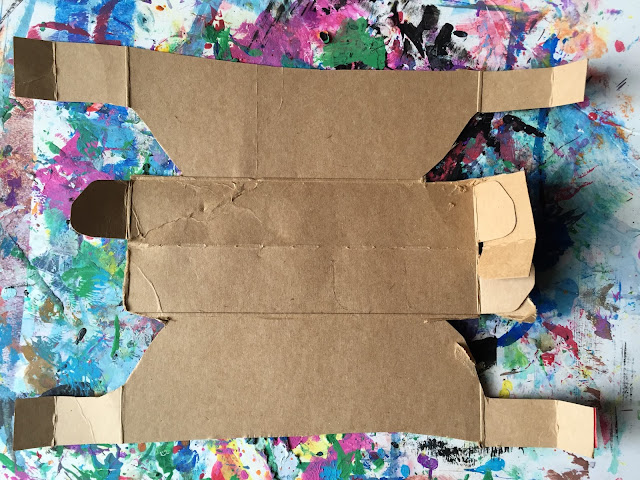
4.     Cut out the drawing. You’ll need to leave the top and bottom ship shapes connected by what was the bottom of the box. When your child gets to the sides he can cut tabs in the cardboard.

Cut-out craft
5.     Fold the ship. Basically, your child is just reassembling the box (but, inside out).

Ship art
6.     Tape the tabs together on the sides.

Boat instructions
7.     Make a second layer to use as the ship’s deck. Cut the bottom of the other box out. Because the boxes are the same size, if your child cuts the cardboard slightly thinner it will fit perfectly. Leave the sides attached to make tabs.

Cardboard art
8.     Push the deck into the boat. Wrap the tabs around the sides of the boat (the first tabs that your child taped). Tape them together.

9.     Cut sails from the card stock paper. Tape them to craft sticks (we made two).

10. Push the craft sticks through the deck’s cardboard. The boxes that we used had perfectly sized perforations. If yours doesn’t, use the scissors to make slits. Your child can also glue a few left over craft sticks to the sides of the boat.

Popsicle sticks
11.   Tape the straw to the front of the boat (you can also add one at the back too). Cut the straw a few inches down. Bend it and tape the bendy part under the ship’s deck.

Ship Model
12.   Add flags and sails to the straw to complete the 3D boat model!

3D Model
Are you looking for more kids’ crafts? Follow my Pinterest board for ideas!
Follow Mini Monets and Mommies's board Creative Kids Crafts on Pinterest.

Thursday, October 15, 2015

Rainbow Pumpkin Seed Mosaic Kids' Craft

Are you carving pumpkins? Getting in the Halloween spirit maybe? Now you’ve got a slew of seeds in what seems like a gallon of goop. What can you do with them? Make a mosaic, of course!

Kids' mosaic

(This post contains affiliate links. Please see my disclosure statement for more information).

Coloring pumpkin seeds is a super-simple kids’ art activity that also doubles as a sensory exploration (just pop them into a rainbow sensory bin!). If you’ve never turned regular seeds into colorful creations, take a look at our how-to color pumpkin seeds post for an easy step-by-step how-to.

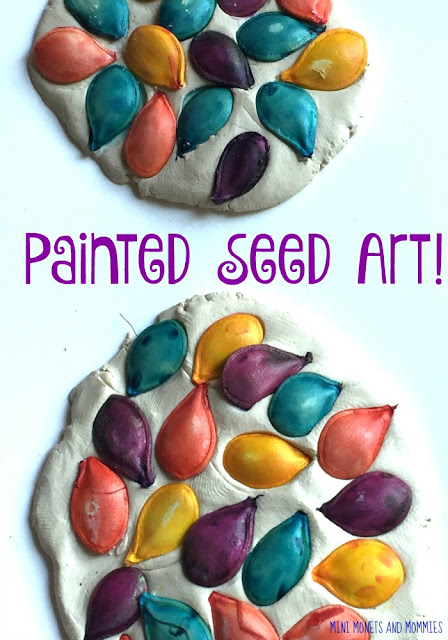
Moving on to the mosaic… Yes, mosaics are typically made with some kind of cut or broken glass or ceramic material. This one is much more kid-friendly. Your child can put those seeds to use and craft a mosaic (also using Model Magic).
Fall art

Here’s What You’ll Need:

·        Colored pumpkin seeds (use food coloring)

·        Crayola Model Magic – Use white and keep it as is or paint it any other hue.

 
Mosaic craft

Here’s What to Do:

1.     Roll the Model Magic into a ball, tube or any other 3-D shape.

2.     Squish the modeling compound so that it is almost flat. Your child can use her palms to press down on the clay or push it flat with her fingertips. Ask her how many other ways she can think of to press, push and squeeze the clay so that it’s flat.
 
Clay compound

3.     Push the pumpkin seeds into the Model Magic. Create a pattern, picture, design or let your little artist spread the seeds out randomly.
 
Clay mosaic

Try a few different shapes of clay and seed creations. You can choose a theme, color or even play a game with this art activity. For example, spread out all of the seeds (in the different colors). Ask your child to make a monotone mosaic. She must pick out seeds that are only one color. Add another learning level to this one by painting the Model Magic. Have your child paint each flattened pieces a different color (make sure that the colors all correspond to the pumpkin seeds). Match the seeds to the painted clay.


Are you looking for more kids’ crafts? Follow my Pinterest board for ideas!
Follow Mini Monets and Mommies's board Creative Kids Crafts on Pinterest.

Tuesday, October 13, 2015

BOO Someone with a Monster Themed Gift Kit

This shop has been compensated by Collective Bias, Inc. and its advertiser. All opinions are mine alone. #BOOItForward #CollectiveBias


Halloween is coming up, and we’re getting ready with to BOO a few friends with some crafty little gift baskets. My son is well past the age where getting candy thrown at him during the community Halloween parade is cool (he just turned 14, so just about everything is uncool now). That said, after spending the better part of a Saturday morning at Wal-Mart he was a bit more than ok with picking out some tasty treats. Little did he know that they really weren’t all to give away – I had planned on saving a few to BOO him with.
Halloween basket
 

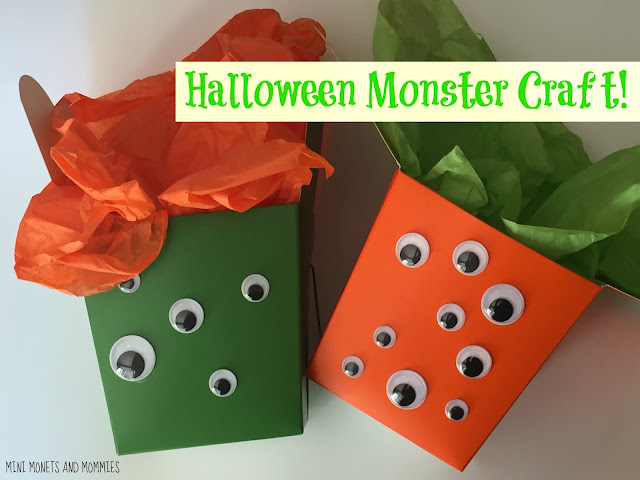
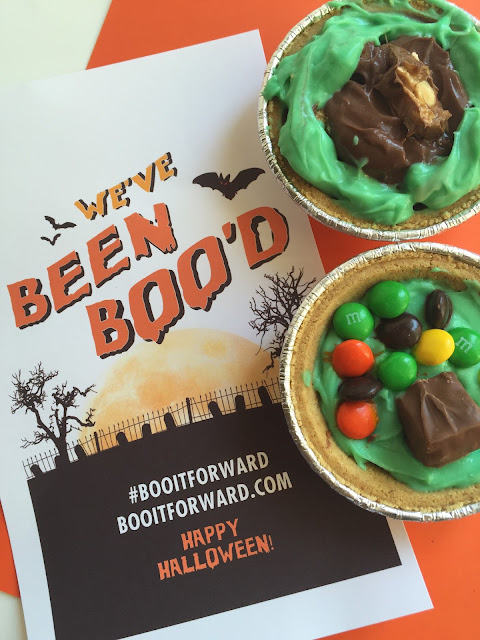
If you’re wondering how you can BOO someone (or what exactly that means), check out this free printable BOO card! After downloading and printing it, you can put together a BOO basket too. I opted for a monster-themed take-out container.

Here’s What You’ll Need:


·        Paper take-out containers – I used orange and green, but you can also use plain white and paint the outside.

·        Clear-drying school glue

·        Googley eyes – Preferably in different sizes.

·        Tissue paper

·        Candy I used a mix of TWIX®, SNICKERS®, 3 MUSKETEERS® and M&M’s®.

·        Mini soda cans – I used 8 oz. Halloween cans of 7UP® and A&W®

Here’s What to Do:

1.     Turn the container on one side.

2.     Dot between 5 and 10 dabs of glue on the container.
 

3.     Press googley eyes on the glue.
 

4.     Let the glue dry.

5.     Flip the container onto the next side and repeat.

6.     Keep going until each side has eyes on it.

7.     Stuff the container with tissue. Fluff the ends so that they stick out.
Monster box

8.     Add the soda can to the top or put it in the center and arrange the candy around it.

9.     Insert your printed BOO card into the back of the basket (or tape it behind the container as a frame).
Treat Pack

After I BOO’d my teen, we whipped up a quick batch of Halloween mini pies. These are so simple, and I don’t have to worry about cooking or lengthy bake times (these are completely no bake). To make these little Halloween treats….

Here’s What You’ll Need:

·        Mini graham pie crusts

·        Pudding – I used chocolate and vanilla.

·        Food coloring – I added green to the pudding for a Halloween look. You could also use orange as well.

·        Chocolate candy – I used a mix of TWIX®, SNICKERS®, 3 MUSKETEERS® and M&M’s®.

Here’s What to Do:

1.     Cut the candy bars into pieces.
 

2.     Crumble the candy into the bottom of the pie crust.

3.     Add a few drops of food coloring to the pudding.


4.     Scoop the pudding on top of the candy.


5.     Sprinkle some more candy/candy pieces on top.
 
Candy pie

We also took the A&W®, and made spooky ice cubes. I had a silicone bat-shaped mold left over from some holiday baking. I cleaned out all of the crumbs, filled it up with the soda and froze the cubes. I popped them in to a clear soda (such as 7UP®) to go along with the mini pies!

Soda cubes

Halloween treats

So, go ahead BOO it forward, and check out how to win an eGiftcard!

#booitforwardsweepstakes