Mini Monets and Mommies: November 2014

Sunday, November 30, 2014

Model Magic Christmas Ornament Kids' Craft

Why spend on pricey Christmas ornaments (even if they can be super-adorably cute) when the kids can make ones that become priceless memories? The holidays are still a few weeks away and we are yet to get a tree (with two new puppies, I’m kind of dreading what will happen). My lucky son gets to celebrate both Hanukkah and Christmas, but has still make his fair share of DIY ornaments. I treasure those little keepsakes.
Holiday craft

(This post contains affiliate links. Please see my disclosure statement for more information).

This week we’ve been crafting all kind of Christmas art. There’s been recycled cardboard tube glitter ornaments and paper poinsettia ones. This time it’s a Model Magic version. I love this Crayola product. I used to teach a gallery-based art class for preschoolers in a museum. As you can imagine, I had to limit the materials that the children could use. Surprisingly, several parents asked me why we couldn’t use paint. In the art galleries? In between the Monet and the Van Gogh? Not going to happen.

But, Model Magic was a great alternative. If your child hasn’t use it before – it’s in between modeling clay and play dough, and it air dries. It’s stretchy and works out your child’s fine motor skills. It also will help her to get creative and sculpt in 3-D. It sticks to surfaces such as cardboard and paper and (even though it comes in a rainbow of colors) it’s easy to color with markers. As you’ll see in this art activity, it also holds glitter fairly well (without the need for glue!).
xmas craft

Here’s What You’ll Need:

·        Crayola Model Magic – Choose a winter white.

·        Glitter

·        Cardboard – Try reusing the side of an old box.

·        A hole punch

·        Pipe cleaners

·        Ribbon

·        Scissors

Here’s What to Do:

1.     Cut out a shape from the cardboard. A circle is an easy option that looks like a traditional Christmas ornament, but your child can choose a different one. Size it to be about the same dimensions as a jar lid (if your child is making a circle). This is an excellent opportunity to brush up on her math skills. Ask her to tell you what shape she is making. If she’s creating a triangle, rectangle or square, ask her to count the number of sides.
Shape Art

2.     Punch a hole near the top of the cardboard shape.

Children's Project

3.     Cover the cardboard with the Model Magic. Your child can spread it over the surface. It should stick to the board. If it doesn’t stick it may be old or already hardening. You don’t have to toss the old stuff out. Add a few dots of glue in this case. Use the edge of the pipe cleaner to poke through the hole at the top.

4.     Sprinkle glitter onto a piece of paper. When your child is done you can make a funnel with the paper and pour the rest of the sparkles into a baggie to use later. Press the Model Magic-covered ornament in the glitter. It will stick in the modeling compound. Your child can use her hands to push the glitter into the surface to make it stick better.
Sparkle crafts

5.     Wrap a pipe cleaner (or two in different colors) around the ornament. Have your child press it into the Model Magic to stay.

Christmas Activity

6.     Thread a pipe cleaner through the hole at the top. Twist it together to make a hanger. Tie a pretty bow to the end for a cute Christmas look!

Holiday ornament


Are you looking for more Christmas themed activities? Follow my winter Pinterest board for ideas.
Follow Mini Monets and Mommies's board Winter Activities for Kids on Pinterest.

Saturday, November 29, 2014

Christmas Ornament Kids' Craft: Paper Poinsettias

There’s nothing like a homemade Christmas ornament that your child has created. I keep the ones that my son has made over the years (even one that was basically a coloring page that he scribbled two red lines on) safe in a special box – so they don’t get tangled with the other less important store-bought holiday décor.

Holiday art
 
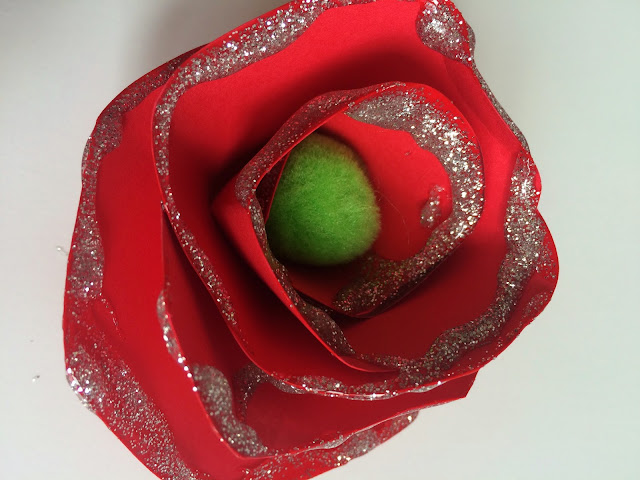
Many months ago, when the weather was warmer, I posted a spring flower paper craft. What does this have to do with Christmas ornaments? I’ve changed it up a bit, and instead of pretty pastels the flowers are now red and green. Think faux poinsettias with glitter on them! Of course, if you’re not up for the sparkles spreading throughout your house, you can try one minus the glitter.

When I first learned how to make these cute paper flowers I thought it may be too tricky for a young child. It isn’t. It really involves cutting and folding. So, let your child try it by herself (with your supervision). Don’t worry if the ornaments don’t come out looking like “Flowers”. They may look a bit abstract instead. That’s ok. Just like my son’s two scribble ornament, you’ll treasure this one too!

Kids' Christmas
 
Here’s What You’ll Need:

·        Red and green paper – Card stock or construction paper.

·        Scissors

·        A marker

·        Glitter

·        Clear-drying school glue or glitter glue

·        A hole punch

·        Thin ribbon

·        Optional: Pom poms

Here’s What to Do:

1.     Draw a curvy or bumpy circle onto an 8x10-inch piece of paper. Have your child draw it almost all of the way to the edges.

Paper art
 
2.     Cut the shape out.

Kids' art
 
3.     Starting at the top outer edge, start cutting a spiral through the paper shape. If it helps, your child can draw an outline to follow with a marker first.

Scissor art

Children's Crafts
 
4.     Roll the paper into a tube, starting at the outer edge.

5.     Glue the end to the bottom when your child gets to the most inner edge.

 
6.     Let the paper unroll to create the flower shape.

7.     Squeeze the glue around the top edges of the flower. Your child can also skip a step and just use ready-made glitter glue.

Flower Petals
 
8.     Sprinkle glitter on the glue. Let the glitter and glue dry. Optional: Your child can push a pom pom into the center of the flower, sticking it to the glue.

Sparkle craft
 
9.     Punch a hole through one of the flower’s “petals.”

Kids' art
 
10. Thread a piece of thin ribbon through the hole, tie at the ends and hang the Christmas ornament!
Paper Flowers


If you like this Christmas themed craft for kids, check out the recycled cardboard tube ornament! Click on the picture to get the full how-to instructions:

Holiday Crafts

Are you looking for more holiday arts and crafts? Follow my winter Pinterest board for ideas!
Follow Mini Monets and Mommies's board Winter Activities for Kids on Pinterest.

Friday, November 28, 2014

Holiday Gift Guide: Art Books for Children

Are you looking for a holiday gift for your young child that doesn’t light up, make near-deafening noises or take the better part of Christmas day to put together? Why not try a book? I’ve put together a list of my favorite art books for kids. These aren’t just books about art. Some of them include artistic concepts such as shapes and colors.

Holiday Gifts

(This post contains affiliate links. Please see my disclosure statement for more information).

These are easy reads with eye-catching illustrations that I’ve read about a zillion times (ok, that might be an exaggeration). But, they are some of my favorites from my son’s younger years. I’ve also read them, based all kinds of activities on them and used them as a way to view art (with the children who I’ve taught (without having to actually look at a painting hung on a wall).

So, if you decide on one of these children’s books as a Christmas, Hanukkah or holiday gift for your toddler or preschooler, consider adding in an art activity too! That’s why I’ve provided super-simple crafts and artsy adventures that go along with each great read.

Brown Bear, Brown Bear, What Do You See? By Bill Martin Jr. and Eric Carle

Eric Carle


 Colors, animals and a cool collage style. Make a simple shape collage. Cut up construction paper into shapes, ask your child to name the colors and help her to puzzle together a collage animal with them.


Love this! Let your pint-sized Picasso make a Matisse style collage using paper shapes and school glue.

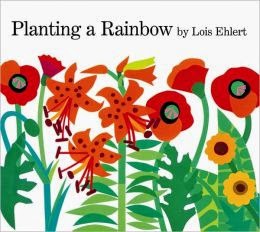
Planting a Rainbow by Lois Ehlert
Planting Rainbow

I used this with a group of preschoolers to make a mixed media color garden collage (yes, I do a lot of collages). Try something similar to the Eric Carle animal collage, but with plant shapes. Add colorful tissue paper and even a few real seeds that your child can glue on.

Mouse Paint by Ellen Stoll Walsh

Color Book
 

Paint like a mouse! Ok, maybe not. But, your child can mix the primaries (red, yellow and blue) paint together to explore the process.

Art Dog by Thatcher Hurd
Art Reading

Get out the brushes, pour a few pools of tempera onto a palette (I like to use a sheet of wax paper as an inexpensive alternative) and let your child paint on a piece of poster board.

My Many Colored Days by Dr. Seuss, Steve Johnson and Lou Fancher
Children's Book
 

Gather together paper, tissue, clay, paints, crayons, markers and pencils in a few different colors (try to find different shades of each color). Have your child separate them and then make individual color collages.


Cut out two fish shapes (using white paper). Have your child pick out a red crayon and a blue one to color the fish!

When a Line Bends a Shape Begins by Rhonda Gowler Greene

Shape Activity
 
I did this art exercise with preschoolers for several summers while teaching pre-k art classes. Give your child a piece of yarn (if you’re 100 percent sure she won’t poke herself, switch it up for a pipe cleaner). Have her bend it (like the title of the book) into shapes.

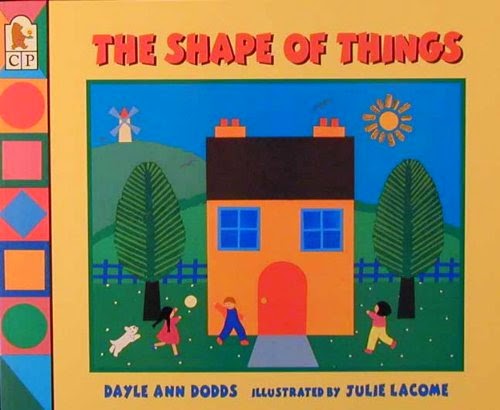
The Shape of Things by Dayle Ann Dodds and Julie Lacome

Art Book
Cut a few paper shapes and have your child collage them together to make a house or anything else that she sees.

A Color of His Own by Leo Lionni

Color Book
 
Use oil pastels to mix colors (your child can blend them with her fingers). She can make a color of her own!

Do you want to find a few more creative crafts for your child to try after reading these artsy books? Follow my Pinterest board for ideas!

 
Follow Mini Monets and Mommies's board Creative Kids Crafts on Pinterest.

Hanukkah Menorah Kids' Craft

There’s a Hanukkah story that we’ve told in our house for the past few years. We are an interfaith faith, and my very lucky son gets to celebrate both Hanukkah and Christmas. One year (when he was 6) we were lighting the menorah. I’m not exactly graceful, and somehow managed to knock one of the candles out of its holder and onto the table. Oh yeah, and it was lit. My son sprung into action. I suppose all of the birthday cakes (seriously, there have been a few years when he got three – one at home, one with his friends and one with extended family) have helped him to build excellent candle extinguishing skills. He quickly blew out the candle and as he says, “Saved the house from catching on fire.”

Kids' crafts

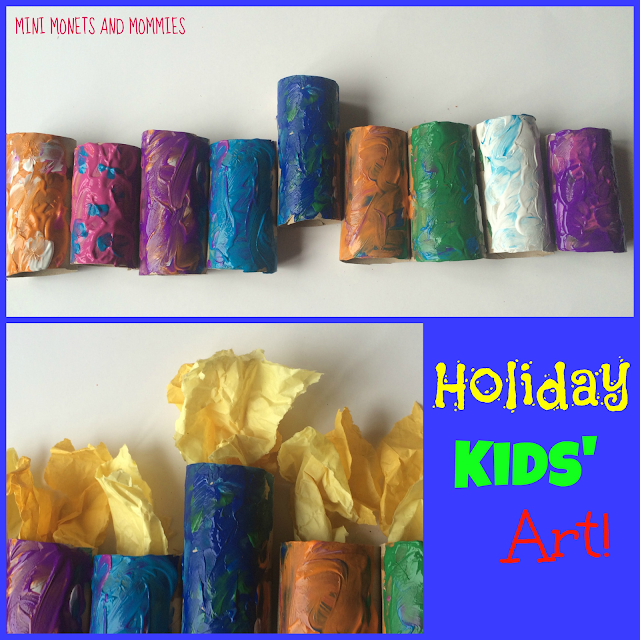
This menorah activity for kids is much less flammable than the real thing. Seeing as it’s made from reused cardboard tubes, paper and paint, it’s totally flame-free. This is a favorite holiday craft of mine. It’s bright, festive and even teaches the kids a lesson on being environmentally friendly (they will need to save and reuse cardboard paper towel tubes). As a bonus, you can extend the artsy fun for the full right days of Hanukkah. Your child can add a new tissue paper flame each night!

Here’s What You’ll Need:

·        3 cardboard paper towel tubes

·        1 piece of poster board

·        Clear-drying school glue

·        Tempera paint

·        Wax paper—It makes a great palette for the paint.

·        Yellow and orange tissue paper

·        Scissors
 
Hanukah Holiday

Here’s What to Do:

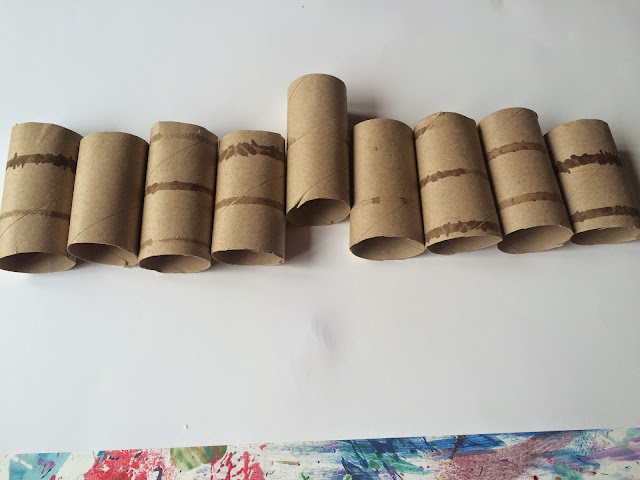
1.     Cut the three tubes into nine segments. Your child will have one for each candle, plus an extra for the Shamash (or helper middle candle that lights the other ones).
 
Reused art

2.     Line the cardboard tubes up on the paper to make sure that they fit. Because your child is dividing three tubes into nine parts, each segment will be equal (sounds like a great opportunity to do something math, right?). Your child will need to move the helper candle cardboard tube up a few inches higher than the others so that it looks taller.

Tubes art

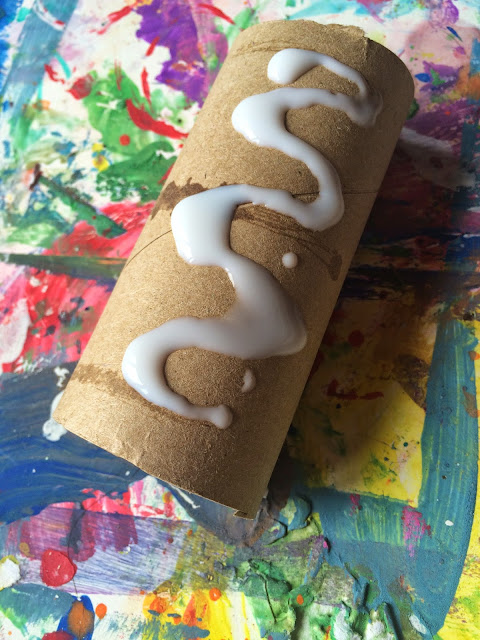
3.     Pick up the Shamash tube and have your child flatten it a bit (not all of the way, just enough to make it easier to glue onto a flat surface). Squeeze a few lines of glue on the flattest part.

Kids' crafts

4.     Press the tube down onto the poster paper.
 

5.     Repeat this step for the remaining eight candles.

Kids' art

Hanukkah art

6.     Pour the paint into golf ball-sized pools on the wax paper. At this point you may be wondering, “Why didn’t my child paint the tubes first?” Well, she could. If she wants to. I’ve found that it’s easier to glue the tubes onto the flat poster board before they’re painted. That way none of the paint flakes off or smears.
 
Kids' paint

7.     Finger paint the tubes. Your child can do solid finger prints or she can mix and blend the hues.

Pattern paint

Chanukkah art

8.     Let the paint dry.
 
Chanukah craft

9.     Tear the tissue paper into pieces that roughly 2x2-inches. There’s no need to measure, simple use the size as a guide.
 
Children's art

10.  Dab the glue onto the poster board above the cardboard tube. Press the paper onto the glue.
 
Holiday art

11.   Repeat each night for a new candle!
 
Craft Activity

Are you looking for more winter holiday activities? Follow my Pinterest board for ideas!
Follow Mini Monets and Mommies's board Winter Activities for Kids on Pinterest.

Wednesday, November 26, 2014

Winter Snowman Art Activity for Kids

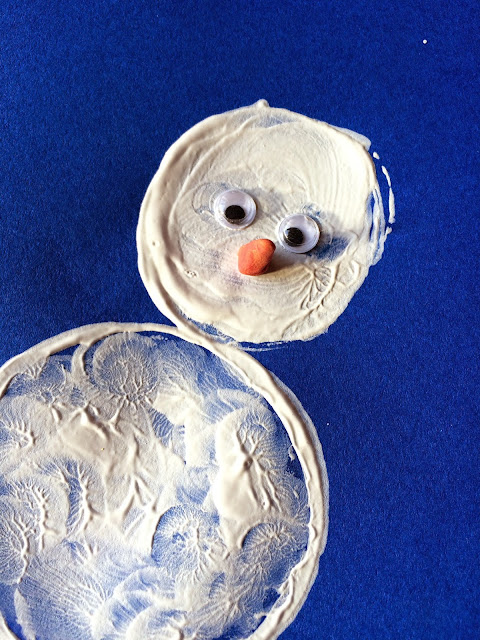
Today was our first snow of the season. What does that mean? Other than pretty winter weather, it’s time for snowman art activities! This one isn’t just a seasonal craft. It also includes a lesson in shapes and doubles as a sensory finger painting activity.
Snowy Art

Before you get started, I have a favorite little story that I like to tell when it comes to art activities. This one also happens to focus specifically on snowmen. One of my first teaching jobs was as a museum-studio arts educator. During the interview my soon-to-be boss asked me what I thought about children making art that was completely original and unique, even if it didn’t really look like “something.” I told her that I was all for it. She then told me about her first teaching job interview. It was during the winter, at an elementary school. She walked through the front door to see dozens of snowmen collages hung on the walls. Every art project looked identical. The same three pre-cut white circles, stacked in the exact same way, with perfect triangle noses all pointed to the right and little scarves all pointed to the left. She asked if this was the type of art that the school expected her to do with her students. She was told, “Yes.” She didn’t take the job.

What’s the point of the story? If your child’s paint print snowman art doesn’t turn out like the one photographed here, it doesn’t matter. Let her be an original. If she wants to make a horizontal snowman, a diagonal one or an abstract version in which the circles are all over the place, that’s ok. If the eyes are where the buttons go and the nose looks more like a squid that a carrot, that’s ok too!
Chilly weather

Here’s What You’ll Need:

·        Card stock paper – You can use blue to make a sky-like background, or choose another colorful hue.

·        Paper cups – We used those tiny bathroom-sized ones.

·        White tempera paint

·        Wax paper – It makes an excellent palette that the paint won’t soak through.

·        Modeling clay

·        Googley eyes

·        Clear-drying school glue

·        Tissue paper

Here’s What to Do:

1.     Pour a golf ball-sized pool of the white paint onto the wax paper. Don’t worry if the cup is bigger than the pool. Your child can spread it out as she makes the print.

2.     Dip the open end of the cup into the paint. Your child can push and squish it around to coat the entire edge.
 
Print Art

3.     Press the painted edge down onto the card stock paper. Ask your child to tell you what shape she is making.

Kids' crafts

Shape art

4.     Repeat two more times to make the snowman’s body and head. Your child can also turn the cup around and use the smaller bottom part to make the head.
 
Children's crafts

Snowman Shapes

5.     Coat your child’s fingers in the white paint. Have her fill the insides of the circles with snowy fingerprints.
 
Winter paint

6.     Glue two googley eyes onto the face.
 
Art Project

7.     Pull a teeny tiny piece of clay apart. Use orange or combine red and yellow to add in a color mixing aspect to the activity.

8.     Roll the clay into a carrot nose shape.

9.     Press the nose onto the face (use a little dab of glue if it doesn’t stick).
 
Winter theme
 

10. Roll a few more small-sized pieces of clay. This time your child can make them into circle buttons. Glue these onto the front of the snowman.

Snowman craft

11. Create arms. Your child can roll tube-like pieces of clay and glue them to the side of one of the circles.

12. Tear a piece of tissue paper into a rectangle shape. Glue it under the head to make a warm winter scarf.
Shape Lesson

Are you looking for more winter art activities? Follow my Pinterest board for ideas from around the web!


Follow Mini Monets and Mommies's board Winter Activities for Kids on Pinterest.