Mini Monets and Mommies: February 2015

Friday, February 27, 2015

Chocolate Bacon Maple Cupcakes

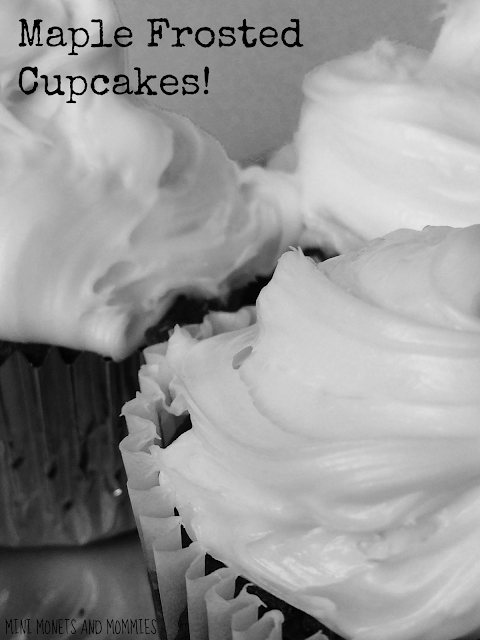
Maple chocolate bacon cupcakes! I should probably just stop right there. Either one of three things is happening right now. 1. You’re a super-healthy no-sugar added type (and I’m not saying this sarcastically, I wish I could ditch the sweets too), and you’re so grossed out by what I just wrote that you can’t possibly indulge the idea, 2. The thought of chocolate bacon cupcakes with a maple frosting makes you weak in the knees (in a good way), or 3. You’re intrigued by the idea, but not entirely sure if it’s actually edible.
Maple Cupcakes

It’s edible, and it’s amazing. I get it, most people are put off by the idea of chocolate and bacon together in a dessert. Case in point, I just texted one of my best friends to excitedly tell her what I made. Her response was, “Gross!” Of course, my 13-year-old’s response was…. well, I’ll let you know as soon as he stops munching on the cupcake. I don’t routinely feed my child fat-filled, super-sugary treats. But, it is a “treat.” Once in a while it’s ok to break out a fun dessert and indulge. That said, it is quite indulgent. Let me suggest making these a rare treat. Plus, that makes them all the more special!

P.S.: If I could bottle the smell of chocolate and bacon baking I would. There’s really nothing like it.

Here’s What You’ll Need:

·        A few strips of already cooked bacon

·        White frosting- Make your own from a favorite recipe or buy the ready-made kind.

·        Chocolate cake mix- Again, use your favorite recipe or use a mix.

·        Maple syrup

Here’s What to Do:

1.     Mix the cupcake batter.
Cooking Desserts

2.     Crumple the bacon.
Bacon desserts

3.     Sprinkle some of the bacon crumbles into the batter. Set some aside for later. You can also wait until you pour the batter into the cupcake tins, and mix the bacon in then.

4.     Mix the bacon and chocolate batter. Pour it into a cupcake tin.
Chocolate dessert

5.     Bake as directed by your recipe or the box.

6.     Take the cupcakes out of the oven. Let them cool.

7.     Spoon the frosting into a bowl.
Sweet Treat

8.     Squeeze the maple syrup into the frosting. If you’re not into super-sweet tastes, use a small amount. If you want more of a maple taste, continue stirring more of the syrup in.
Frosting mix

9.     Frost the cupcakes.
Sweet recipe

10.  Add the remaining bacon crumples on top of the cupcakes. If you so desire, drizzle maple syrup on top.
Chocolate Cupcakes


Are you looking for more yummy cupcakes? Follow my Pinterest board for ideas!
Follow Mini Monets and Mommies's board Cupcakes! Yum! on Pinterest.

Dr. Seuss Cat in the Hat Felt Board Kids' Art

Dr. Seuss’s The Cat in the Hat was one of my favorite children’s books to read to my son in his younger days. I’ve read the story of the Cat, Thing One and Thing Two and all of their crazy antics more times than I can remember. If your child adores this classic as much as mine did, this art activity is an easy way to celebrate the Seuss story!

Cat in the Hat

(This post contains affiliate links. Please see my Disclosure Statement for more information).

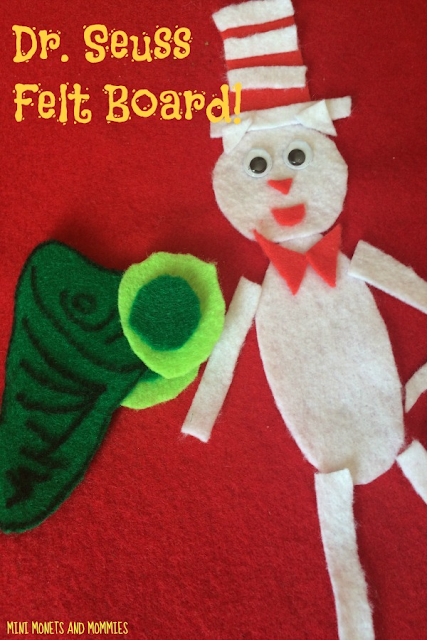
I’ve been making felt crafts right and left. I pulled out my old DIY felt board and got to the art-making. This activity allows your child to create her own version of the Cat in the Hat. She can play with the shapes, patterns and story elements of the book by making her own cat-themed felt collage.

Start by reading The Cat in the Hat with your child. Note the word “with” and not “to.” Engage your child in the book-reading by asking her to point to pictures when you say the words, make some of the movements she sees or even help to act out the story!

Now, on to the art-making…

Here’s What You’ll Need:

·        Craft felt sheets in white and red (you can also choose other colors for the cat).

·        Googley eyes

·        Clear-drying school glue

·        Optional: Felt board—You can use a sheet of craft felt or make your own board. If you want to make your own felt board, follow my super-simple tutorial.

·        Scissors

·        Markers

Here’s What to Do:

1.     Draw a few shapes onto white (or another color) felt to make up the cat. Your child needs a circle for the head, an oval for the body, triangles for the ears and long, thin rectangles for the arms, legs and tail.

2.     Cut the shapes out.
Kids' crafts

3.     Draw shapes for the cat’s hat. Make a red rectangle and a few thin white rectangles.

4.     Cut the hat out.

5.     Build the cat on the felt board. Have your child puzzle together the cat.

Animal craft

6.     Add facial features. Your child can draw these on or add googley eyes (with glue).

7.     Cut out two small triangles from the red felt.

8.     Glue the triangles on the cat (under his head) as a bow tie.
 
Dr. Seuss

Your child can also add other Dr. Seuss favorites, such as Green Eggs and Ham shapes, to the felt art activity.
Books crafts

Are you looking for more children’s book-themed activities? Follow my Pinterest board for ideas!
Follow Mini Monets and Mommies's board Childrens' Book Activities on Pinterest.

Thursday, February 26, 2015

Green Eggs and Ham Dr. Seuss Felt Board Kids' Art

The Dr. Seuss classic Green Eggs and Ham has been a childhood favorite since the 1960s. In celebration of Dr. Seuss’s birthday – March 2 – we’re making felt board art based on this book. Of course, you don’t have wait until the author’s birthday, your child can try this out any time of the year.

Felt Board


(This post contains affiliate links. Please see my Disclosure Policy for more information.)

I’ve been on a DIY felt board kick lately. I rediscovered an old board that I made when I was teaching a summer art program in local libraries. So, I figured – why not use it with a Green Eggs and Ham theme? If you want to make your own felt board, take a look at my super-simple tutorial. But, if your child wants to make a more permanent piece of art, she can glue the ham and eggs onto a smaller-sized piece of felt.

Here’s What You’ll Need:

·        Green and white (or lighter green) felt – You can use a roll of felt or notebook-sized sheets.

·        Another color of felt or a felt board

·        A marker

·        Scissors

Start by reading the Dr. Seuss book Green Eggs and Ham with your child. Talk about the words and pictures, letting her point to what you’re saying.

Now it’s time for the art-making…

Here’s What to Do:

1.     Draw a ham shape onto the green felt. The ham shape is fairly easy to make. Take a look at the book and follow the lines. If your child is struggling to draw directly onto the felt, you can create a card stock template for her to trace (or she can create her own template!).
Green Eggs and Ham

2.     Draw circles onto the green felt to make the egg yolks. Have your child draw larger circles on the white or lighter green felt for the rest of the eggs.

3.     Cut the ham and eggs out.

Children's Books

4.     Press the cut-outs onto a separate felt sheet or your felt board.
 
Dr. Seuss Activity

And that’s it! So simple. Your child can explore and experiment with different ways of pressing the felt shapes onto the board or she can add in characters from other Dr. Seuss stories.
Felt Crafts

Are you looking for more Dr. Seuss kids’ activities? Follow my Pinterest board for ideas!
Follow Mini Monets and Mommies's board Dr. Seuss Children's Activities on Pinterest.

Wednesday, February 25, 2015

DIY Felt Board for Kids

I’m a fan of the DIY felt board. I had forgotten how much fun these homemade learning tools are for kids. A few years ago I spent the summer teaching a library-based literacy and art class for children. I made the felt board so that the children could create cute collages, without making a total mess in the library (as it turns out they frown upon puddles of glue near the books).

Shape art
(This post contains affiliate links. Please see my Disclosure Statement for more information).

Making your own version at home is super-simple, and you can use it to teach almost anything that you want. Ok, not anything. But, you can use it for basic math lessons that include shape, pattern or number recognition as well as learning about letters. You can also make your own felt shapes to teach your child about the continents, the geography of your country, the human body, the plant life-cycle or even make themed felt sets such as Dr.Seuss or holidays.
Counting Activity
 

In this activity I made a few geometric shapes. Your child can combine them to make a picture, reinforcing the concept of part-to-whole.

To make the DIY felt board, here’s what you’ll need:

·        A piece of thick cardboard – I used the side of a moving box. Cut the cardboard to whatever size you want (or have room for).

·        Felt – Those notebook paper-sized sheets they sell at craft stores won’t cut it. You’ll need a piece that wraps all the way around your cardboard. Look for felt fabric or bulk rolls of it.

·        Scissors

·        Packing tape

Here’s what to do:

Felt Board
1.     Cut the cardboard into a rectangle shape.

2.     Wrap the felt around the cardboard.

3.     Cut the felt to fit, making sure it wraps all the way around the cardboard rectangle.

4.     Wrap the rectangle, present-style.

5.     Secure the felt in the back with packing tape.

DIY crafts
 
And, you’re done! Now you’re ready to have your child help you to make some shapes and collage them together.

1.     Cut a few different shapes from craft felt sheets (this time you can use the notebook-sized pieces they sell at craft stores).

2.     Stick the felt onto the board – it will stay put.

Kids' art
 
3.     Have your child move the pieces, puzzling them together into houses, trees and other pictures.
Kids' activity
 

Are you looking for more creative kids’ crafts? Follow my Pinterest board for ideas!
Follow Mini Monets and Mommies's board Creative Kids Crafts on Pinterest.

Monday, February 23, 2015

Jackson Pollock Art-Viewing, Art-Making and Baking for Kids

Jackson Pollock famous artist activities for kids! These are favorites of mine. I mean, who doesn’t think, “Messy kids’ art” when you look at a Pollock?

Jackson Pollock

Ok, so I’m oversimplifying it. But, how great is it to watch your child let loose and be totally creative – without fear, without worrying that she’ll make a mistake and without getting frustrated because what’s in her hand isn’t coming out of her hands?
Kids' crafts

Before breaking out the paints, start with a little art-viewing activity that features the famous artist. Look at one of Pollock’s paintings and talk about what your child is thinking when she sees it. I was fortunate enough to teach in a museum that displays a Pollock, but if your local museum doesn’t, look at a reproduction, put up a poster, take a gander at an art history book or print out a copy to use for this art-viewing activity!

Now, on to the art-making…

Let your little artist get as creative as she wants and try a few different Pollock-style projects. You can do the traditional drip onto a canvas or piece of paper, OR--

1. Pour some tempera paint into a reused plastic fruit container (we used a strawberry container) and then shake it!
Kids' projects

Kids' art

2. Make some ice cubes by freezing food coloring. Take them out of their deep freeze and plop them into colorful cups of water. The splishes and splashes make a Jackson Pollock style paint splatter design. Try red, yellow and blue to add in a bit of color mixing science.
Paint Splatter

3. Bake cupcakes! Yes, cupcakes. I’ve made Monet cupcakes before, so why not Pollock baked goods? Splatter on frosting, sprinkles or food coloring for that famous artist look.
Children's recipes

Are you still looking for more Pollock-themed activities? Check out my printable questions prompts that feature the artist or follow my famous artists Pinterest board!
Follow Mini Monets and Mommies's board Famous Artist Kids' Activities on Pinterest.

Saturday, February 21, 2015

St. Patrick's Day Milkshake Popsicle Treat

It’s shamrock shake time, and I couldn’t be more excited! As I pulled up to the drive-through window I felt like a little kid – giddy for the first minty McDonald’s treat of the season. And I wasn’t even getting the milkshake for myself.

St. Patrick's Day
 
I kind of miss the old shake that came in the regular soda cup, smooshed down with a plastic lid. My son has always known the fancier version in the domed clear café cup, with whipped cream and a cherry. Even though St. Patrick’s Day is still a while away, I really couldn’t pass up the shake.

My son is 13, and I’m pretty sure he’s a bottomless pit. The other day the cashier at the grocery store said, “You’re hear all the time. Like a few times a week.” And, yes I am. To feed the teenager. So, I was fairly certain that he’d guzzle down the shamrock shake. I suppose he had rocky memories of last year when he drank one at record time, and then felt less than great. This year he decided to stop three-fourths of the way through – just in case. Of course, he did ask for another one a few hours later. He did not get one. I didn’t want to toss the rest of the shake, so I decided to see what I could do with it.

I’ve read that freezing a milk shake doesn’t work. But, what if I added a little milk? I tried it out and got some pretty impressive ice cubes. I did try a one with all shake. It did freeze, but quickly got mushy. I also jabbed a straw through to make popsicles and added St. Patrick’s Day sprinkles for a fun look. These are yummy to eat on their own or you can add them into a glass of cold milk (as they melt you get the minty taste and green color). If your child lets you steal one or two away, trying adding them to iced coffee or an iced mocha!
St. Patrick's Day

What You’ll Need:

·        A shamrock shake

·        An ice cube tray

·        Sprinkles – Green work well, but I chose green shamrocks with yellow and white jimmies.

·        Plastic straws

·        Milk

What to Do:

1.     Pour a layer of shake into the ice cube tray. Fill each compartment only half way up.

Mint treat
 
2.     Add a layer of milk.

3.     Mix the shake and milk.

4.     Pop the tray into the freezer.

5.     Take the milkshake ice cubes out when they are partially frozen. Push half a straw through the center to make St. Patrick’s Day popsicles.

DIY popsicles
 
6.    Take the cubes out of the freezer. Roll the cubes through the sprinkles!
St. Patrick's Day
 
Mint Popsicles
 
Are you looking for more St. Patrick’s Day treats? Follow my Pinterest board for ideas!

 
Follow Mini Monets and Mommies's board St. Patrick's Day Fun and Food on Pinterest.

Wednesday, February 18, 2015

Leprechaun Hat Craft for St. Patrick's Day

Cute costume for St. Patrick’s Day anyone? No, not for you, or your child. This leprechaun hat is pint-sized and perfect for your child’s favorite toy (yep, Barbie’s getting a makeover!).

Holiday art

I have something like a million cardboard paper towel tubes sitting around. I kind of hoard them, waiting for a project that requires a tube to hit me. So, when I decided to make a St. Patrick’s Day leprechaun hat craft, the tubes came in handy.

Here’s What You’ll Need:

·        A cardboard tube

·        Scissors

·        Clear-drying school glue

·        Green felt

·        A marker

·        Green card stock

Here’s What to Do:

1.     Cut the cardboard tube to whatever size your child wants.

Kids' art
 
2.     Put the tube on the card sock. Draw a circle around the tube, leaving a few inches to create a brim for the hat.

Children's art
 
3.     Trace the inside of the tube onto the paper. Hold the tube in place for your child as she draws.

Marker art
 
4.     Cut the outer and inner circles out.

5.     Fit the end of the tube into the center of the circle. If it can’t fit through, trim the paper.

6.     Cut slits in the bottom of the tube. These only need to be ¼ of an inch or so.

St. Patrick's Day
 
7.     Push the tube through the card stock brim. Fold the slits up under the brim.

8.     Glue the folded up tabs of the cardboard tube to the bottom of the brim.

Doll art
 
9.     Cut a piece of green felt to match the tube’s size.

Fabric art
 
10.  Glue the felt around the tube.

Kids' crafts
 
11. Cut a thin strip of felt. Glue it near the brim.

St. Patrick's Day
 
Now your child is ready (after the glue dries, of course) to put the St. Patrick’s Day leprechaun hat to use during pretend play!

Are you looking for more St. Patrick’s Day activities? Follow my Pinterest board for ideas!
Follow Mini Monets and Mommies's board St. Patrick's Day Fun and Food on Pinterest.