Mini Monets and Mommies: July 2015

Thursday, July 30, 2015

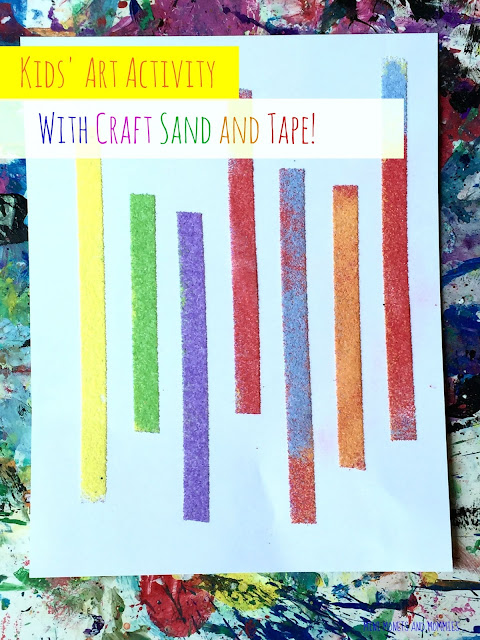
Kids' Craft Sand and Tape Art Activity

Craft sand. It’s beachy, artsy and fun for kids! That said, it’s also messy. Just like glitter, colorful sand will get everywhere from your child’s ponytail to the little crevice between the floorboard and the wall. But, this shouldn’t stop you from trying out a sand-filled art activity!
Crafts for kids

Typically when I craft with the sandy stuff, I use school glue. The kids can draw patterns with it or paint a wash over a larger area, sprinkle the sand on top, shake off the excess and they’ve got a magically textured piece of sand art. Sounds simple. It is. But, if you want to simplify it even more, take out the glue and swap in the double-sided tape!

When your child is done creating her artwork, take some time to explore the sand through the sense of touch. Ask her how the art feels on her hands or simply sift through the excess grains that she’ll shake off of the paper.

Here’s What You’ll Need:

·        Double-sided tape

·        Craft sand – Choose a few different colors.

·        Paper

Here’s What to Do:

1.     Stick the tape onto the paper. Your child can create a rainbow of lines, make letters or create an abstract pattern.
 
Double-sided tape

2.     Pour the sand over the tape.
 
Kids' crafts

3.     Shake the excess off onto another piece of paper or into a bag. Tie the bag and use the sand later on.
 
Children's art
 
Kids' activity

Your child can also mix a few different hues to make a multi-colored piece of tape. If she doesn’t like the texture of the sand (the result is rough) or you don’t have any on hand, you can also use glitter and double-sided tape.

Your child doesn’t have to stick to the paper (and yes, the pun was intended). She can use the tape and craft sand technique on wood, felt, foam or any other surface.

Are you looking for more creative kids’ crafts? Follow my Pinterest board for ideas!

 
Follow Mini Monets and Mommies's board Creative Kids Crafts on Pinterest.

Sunday, July 26, 2015

Double-Sided Tape and Glitter Art Activities for Kids

I’m totally a glitter girl. In all of my years teaching children’s art classes, I’ve found that no material is more loved, cherished and overall adored than the sparkly stuff. Put a jar, tube or messy pile of sparkles in front of your child and you will instantly see his eyes light up. My son is almost 14 and he still slyly says, “Hey mom, what are you making?” whenever the glitter comes out (I know that means he wants to use it, without running the risk of looking uncool and actually asking to get crafty).

Craft Activity

So, we all know that the issue with glitter (and the number one reason that the parents of my students say, “Thanks so much for using sparkles here, because we don’t at home”) is the mess. You can clean as much as you’d like when the art activity is over, but you’re still going to find random sparkling pieces everywhere from your child’s hair to the floorboards for what seems like weeks.

I’m still yet to find a solution to the mess factor. But, I didn’t happen upon one way to use glitter that doesn’t involve that added goopiness of glue. Obviously you need some sort of medium to hold the sparkly stuff in place. School glue is the obvious choice (I’ve also used paint, ice and modeling clay). This time we’re using tape. How? Double-sided tape! It perfectly holds those little shining bits on to just about anything (we used paper, craft foam and even a mason jar!) and is much easier than getting out the glue. This is such as simple craft that you’ll shake your head thinking, “I can’t believe I haven’t been using double-sided tape with glitter all along.”
Tape crafts

Here’s What You’ll Need:

·        Glitter

·        Double-sided tape

·        Anything that tape will stick to – This can be plain old paper, foam, felt, tissue paper, glass jars, plastic bottles, wood, and the list goes on and on.

Here’s What to Do:

1.     Peel the tape off and stick it onto the paper (or anything else you’re using as a surface). Your child can make sparkly lines, shapes, patterns, letters or words. We made letters with card stock paper and craft foam.
 
Alphabet art

2.     Sprinkle the glitter on top of the tape. Try not to touch the top of the tape too much. This tends to make it less sticky.
 
Sparkle Crafts
 
Jar art

Literacy crafts
 

3.     Shake off the excess onto a piece of paper or into a bag to use later.
 
Kids' crafts

4.     Repeat with new surfaces. Here’s a plastic Easter egg:
 
Kids' art

Here’s a glittered mason jar that we use to hold the extra sparkles:
Glass glitter

Are you looking for more shining crafts for kids? Follow my Pinterest board for ideas!
Follow Mini Monets and Mommies's board Kids' Glitter Art on Pinterest.

Saturday, July 25, 2015

Three Ingredient DIY Weed Spray that Really Works

I’m usually all about kids’ art activities, but sometimes I stray. This time I’m talking DIY weed killers. I know, I know – it’s a far stretch from tempera print-making, fizzing water colors and Model Magic sculptures. But, if you’re here chances are that you’ve got kids. And, if you’ve got kids, you may just want something to handle the mess in your yard that isn’t filled with toxic chemicals.

Natural products
 
We spend a lot of time outside in the summer. Every year it seems like pulling the weeds turns into even more of a totally unwanted task. I sometimes joke that I want to spray the whole yard down and then cover up everything green with concrete. Sounds bad, right?

Last year I gave up. The thistle had taken over and I just couldn’t keep up. Maybe if I had a few hours every day to devote to my yard I could do it. Or, maybe if I hired a lawn service it would all look pristine. But, neither of those are possibilities. So, when my husband suggested that I try this DIY weed killer recipe I figured that it couldn’t hurt.

I would love to say that it’s 100 percent all-natural, but it isn’t. I did use blue Dawn dish soap (which obviously isn’t a naturally occurring substance). I kind of figured that if it’s safe enough to put on the dishes (that my family eats from), then it’s not in the same toxic category as plant poisons are. Even though you can’t (and definitely should not) eat this DIY blend, it isn’t as harmful as the chemical sprays available.

Here’s What You Need:

Weed Spray
 
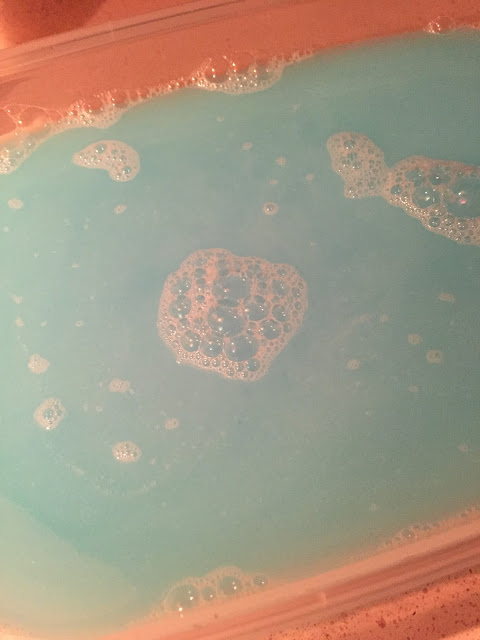
·        ½ cup Dawn dish soap (the blue kind)

·        1 cup salt

·        1 gallon jug distilled white vinegar

·        A spray bottle

Here’s What to Do:

1.     Empty half of the vinegar into a large mixing bowl.

2.     Add the dish soap.

Natural gardening
3.     Stir in the salt.

4.     Pour the mix into the spray bottle.

5.     Spray the weeds thoroughly, drenching them all the way down to the ground.

So, what happened when I sprayed on this magical stuff? First, let me say – don’t spray plants or grass that you want to keep. Don’t even spray near them. You will most likely kill these greens as well. Second, this spray really works! I was kind of surprised myself at how well it worked.

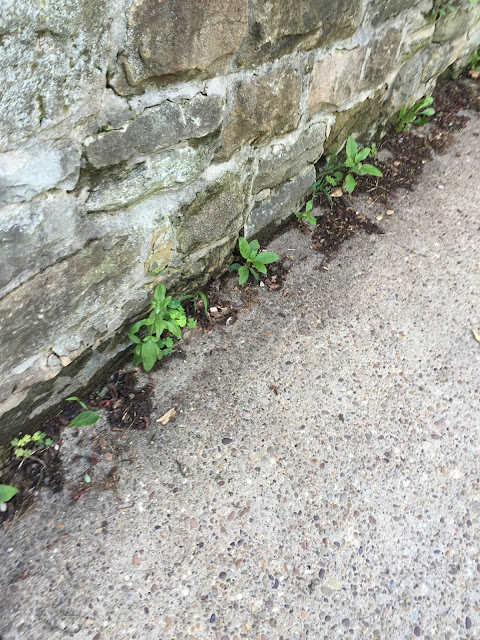
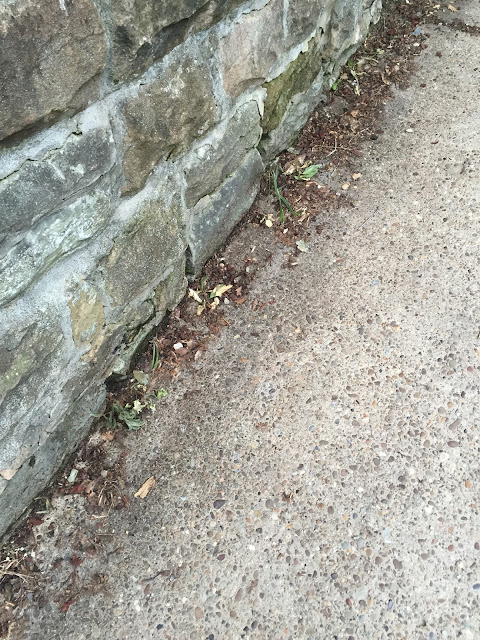
Here’s what my driveway weeds looking out pre-spray:

Outside summer
 
Later that day:

Weed spray
 
The next day:


Weed Spray

My husband took the weed spray to the backyard and hit the thistle with it. This is what happened by the next day:

Do you have a favorite DIY or natural solution to gardening or cleaning woes? Add your favorite idea in the comment section below!

Friday, July 24, 2015

How-to Be a Freelance Writer in 7 Easy Steps

So, I googled “how to become a freelance writer” just to see what the Internet had to say.

Writing career

Actually, I googled “how to become a freelance writer” as I was trying to type and check my email (on my phone) at the same time. Typos aside, I got a lot of amazingly generic advice. “Like what?” you ask. Here are a few of my favorites:

·        Be a good writer.

·        Have self-discipline.

·        Set goals.

·        Be able to communicate clearly.

·        Maintain a professional attitude.

·        Have the ability to motivate yourself, even in the face of mass rejection.

Freelancer guide

I’m going to be brutally honest here, if you actually said to yourself, “Holy wow, those are such helpful ideas!” right now you’re a little more than a step behind in the freelance writing game. That isn’t supposed to be mean – just a bit snarky I suppose. But seriously, you already know that the above mentioned traits/ideas are necessary for any kind of freelance or writing career. What you probably want to know is something that’s less obvious.

I can’t say that I have all the answers. Far from it. There are freelancers out there who have crazy-good careers and make much more money than I do, and then there are those who make less. What I can give you is some friendly advice. A few tips from my own personal experience. These aren’t general ‘go to journalism school’ types of suggestions. They are what I’ve learned from my own successes and failures. Please keep in mind, everyone has their own niche and what worked for me (or didn’t work) might not fit your career.

1.     Speaking of niches – find yours. It took me a surprisingly long time to call myself a ‘parenting writer’. That’s basically what I am. I’ve written everything from home décor and DIY content to fashion and style, but what I truly enjoy is writing for parents. When I write about dental health, dressing for success or how to lay a ceramic tile floor you can really tell that my heart’s just not in it. If the topic you’re writing about bores you, it will show. Find what you’re passionate about and try your best to write about it.

2.     Steer clear of “sign up with us to become a real freelance writer” sites. Or, at least don’t stick with them for long. If you want to read my thoughts on content mills, check out my article on these sites. I made quite a good living off of content mills for a few years. That said, I hated what I was writing and got way to complacent. I wasted years creating mass amounts of crappy content for maybe $25 an article.

3.     Build your social media following right now. Immediately. Why? There are lots of reasons. Maybe you want to start your own blog. You need somewhere to promote yourself. Even if you’re writing for other people, you still need to promote your content – or theirs. This isn’t always as straightforward as it seems. For example, let’s say it’s between you and another equally as talented writer. You have a Twitter following of 10 and the other choice has a following of 10k. Guess who’s getting the job. Um, the person who’s actually able to tweet the content out to more than her BFF, downstairs neighbors and parents.

4.     Prepare proposals. Here’s a story – a potential client asked me for an email explaining my approach to his article. This was for a one-time only job. I replied with a detailed outline that clearly spelled out the structure of the post. He hired me. That turned into an ongoing professional relationship that brought on more work than I could have imagined when crafting that outline.

5.     Don’t say no. Let me rephrase that – don’t say no unless what the client is asking is completely ridiculous. I’ve been asked to write a 1,000 word article for $5. That was a big N-O! If the work aligns with my niche and the client is paying a fair price, I tend to take it. You never know when ‘an article’ will turn into months of consistent pay (see the above example). You also never know when that one random article will get seen (and read!) by someone truly important. Don’t miss out on what could be an amazing opportunity because you’d rather watch the Real Housewives of somewhere or another instead of writing (and yes, I actually have done this).

6.     Value yourself, in a totally realistic way. Go back to that $5 I was offered for 1,000 words. Someone probably will offer you a similar deal. Have some self-respect and don’t do it. At the same time, set your rates at a fair price. If you’re just starting out, don’t expect to make hundreds of dollars per 400 word blog post. It would be nice, but it’s just not likely here in the real world. Don’t quote me on that though. There are freelancers who’ve struck it big from the get-go.

7.     Join a community. Freelancing isn’t exactly a communal experience. Many of us started on this career track as a way to work from home. When you’re going it solo there’s no morning ‘water cooler’ gossip session, no one to bitch at when you’re having a bad day and no one to grab a quick bite with on your lunch break (and eating the leftover crusts from your kid’s PB&J as he finger paints with his pudding doesn’t count as a social lunch date). Joining a Facebook (or similar social networking) community for freelance writers has helped immensely when it comes to finding camaraderie at ‘work’.


At-home careers


P.S. The title was meant to grab your attention. I don’t take myself seriously enough to really think there are seven easy steps to becoming a freelance writer. There are suggestions, advice and tips, but as far as steps go – I don’t believe in them. You won’t find a mystical formula to freelancing, there’s no guide that has all the answers and while magical beans may grow a beanstalk up to the sky, they won’t give you a new career. If someone tells you otherwise, be weary. They are probably just trying to sell you something. Are you considering making the big switch from working outside the home to being a WAHM? My new book Work at Home: A Guide to the Best Change You'll Ever Make has ideas (and worksheets) to help you make the transition!


Thursday, July 23, 2015

Key Lime Pie Oreo Cookie Truffle Balls

Key lime pie is one of my absolute favorites. That said, I’m not at all confident in my ability to actually bake one. So, when Oreo rolled out their special edition Key Lime Pie flavor I was all over it.

Lime pie

(This post contains affiliate links. Please see my disclosure statement for more information).

Even though I can’t bake a passable pie, I can make a mean cookie truffle. These little no-bake treats are super-simple and taste like mini cheesecakes (yay!). In the past I’ve made cotton candy, pumpkin and chocolate pretzel Oreo balls. The key lime variety are possibly my favorites so far. Remember, I said possibly – so you should still check out the other ones.

Here’s What You’ll Need:


·        Graham crackers

·        White chocolate

·        6 oz. cream cheese

·        Green food coloring – or you can mix yellow and blue together if you don’t have green.

Here’s What to Do:

1.     Crush the Oreos in a food processor.
 
No-bake dessert

2.     Mix the softened cream cheese with the cookie crumbles. Use your hands to get a good mix.

3.     Roll the mixture into balls.

4.     Pop the balls
Dessert recipe
into the freezer for at least an hour.

5.     Take the cookies out of the freezer.

6.     Put the graham crackers into the food process and crush them.

7.     Melt the chocolate. I used an easy microwave method – break the chocolate into pieces and microwave it for about one minute (microwaves vary in strength, so you may need more or less time). Be careful, the chocolate and the bowl will be hot. Don’t touch it with your bare hands.

8.     Stir the food coloring in.

9.     Coat the cookie balls with the chocolate. Use a spoon so that you don’t have to touch the hot chocolate.

10.  Sprinkle with the graham crackers.


Key limes

Are you looking for more great desserts? Follow my Pinterest board for ideas!
Follow Mini Monets and Mommies's board Great Desserts on Pinterest.

Wednesday, July 22, 2015

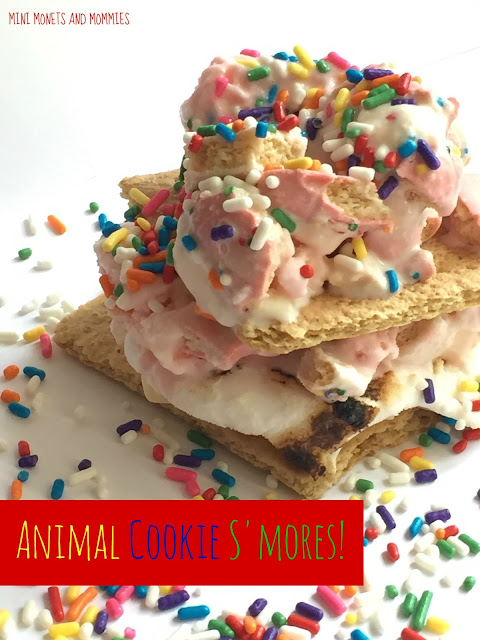
Animal Cookie Ice Cream S'mores Sandwiches

I’m kind of crazy when it comes to s’mores. Even though I wouldn’t say no to the typical graham, chocolate, marshmallow stack, I like to go a step above. That’s where these animal cookie ice cream sandwiches come in.

Animal Cookie

It’s summer now (if you’re reading this at some time in the future, you can still make these tasty treats in the fall, winter or spring), and I was looking for a chilly dessert that was also easy to make. I’m not exactly the best cook/baker, and turning on the oven when the weather guy just said that the heat index is making it feel like it’s between 95 and 100 degrees just doesn’t sound like a good idea. So, I’m going for something cold that requires assembly – not actual cooking. If you’re thinking, “Well, that sounds kind of lazy,” it might be. Honestly, sometimes I want to make an easy treat that really requires no special skill.

Think about it – you’ve been at the pool and the playground for most of the day, then you raced off to the grocery store right before you had to simultaneously cook dinner, keep the kids entertained, wash out everyone’s swimsuits and wash the muddy footprints off of the floors. Whew! It’s time for an ice cream s’more. The kids will enjoy it, you’ll enjoy it, and everyone gets a little break at the end of a busy day.

This is also a simple dessert for a birthday party or warm-weather cookout. If you’re having a circus, animal or carnival themed party, this kid-friendly recipe is a perfect match!

Here’s What You’ll Need:

·        Graham crackers

·        White chocolate

·        Frosted animal cookies

·        Ice cream – I used vanilla and strawberry to match the cookies’ colors, but you can choose any flavor that you like.

·        Marshmallows

·        Sprinkles

Here’s What to Do:

1.     Crumble the cookies into chunks.
 
Frosted treats

2.     Mix the cookie crumbles with the ice cream. Put it back into the freezer until you’re ready to use it.
Ice Cream

 
Chilly Dessert

3.     Stack the chocolate onto a graham cracker.
 
Graham Crackers

4.     Toast the marshmallow. If you have a campfire, great use it. If not, you can microwave the marshmallow (with the graham cracker and marshmallow) in the microwave for roughly 10 seconds. Microwaves vary in strength, so you may need more or less time. You can also toast the marshmallow in a fire pit or in the oven (put it on a graham and heat at 325 degrees until it browns on top.

5.     Put the marshmallow on the chocolate.
 
Graham Crackers

6.     Spoon the ice cream on top.

7.     Sandwich the stack with another graham.
 
Kid-friendly treat

8.     Top with some more ice cream and sprinkles.
Ice Cream Sandwich

Are you looking for more s’mores? Follow my Pinterest board for ideas!
Follow Mini Monets and Mommies's board Sweet S'mores on Pinterest.

Sunday, July 19, 2015

Create Abstract Art with Frozen Paints

I’m a fan of abstract art. Ok, not so much of viewing it in a museum. Instead, more of kids’ art activities that involve some sort of abstract process. I’ve spent years teaching children in an art museum. I’ve sat the kiddos down in front of everything from ancient Egyptian pottery to Jackson Pollock’s paint splatters and gotten the chance to hear some fairly funny insights. My absolute favorites always come from the more abstract pieces.

Abstract Art

Something interesting happens when a child looks at art that doesn’t look like ‘art’ in the traditional sense. In my experience (which I’m in no way generalizing to every child out there) the kids who I’ve taught viewed abstract art through the lens of being child-made. It looked so familiar to them, so much like what they create, that they talked about it in very much the same way that they talked about each other’s art. It was familiar – not foreign like a Renaissance ‘masterpiece’ or 19th century landscape.

I hear a lot of, “Hey, I could have made that” or, “Yeah, my kid could have painted that” when adults talk about abstract art. I don’t really ever have a good response when it comes to what the difference is between a 4-year-old’s paint splatter and an adult-made piece that’s worth millions and hangs on a museum’s wall. There are all kinds of answers that range from, “Well, you didn’t think to paint that” to, “The artist has a deep-seeded intentionality and there is an obvious symbolism to the work” that I’ve heard others say in reference to these questions of artistic creation. In many ways I think that an adult has to let go and get that special freedom of thought (and creativity) that children have back. The ability to create without fear and let art by art – without trading the fun for finesse. In that respect, I’m big on letting children explore the process and be abstract if they want to be.

All of that said, sometimes ‘abstract art activities’ can become old hat. It’s yet another Pollock splatter painting with temperas and thin brushes or the same old Picasso-esque mixed-up face shape collage. I like to add a little something different (even if it is just slightly different from the norm). This time I’m doing a paint splatter, but with ice instead of the tempera/brush technique. It’s part science, part art and all abstract. It also has a little something extra special – glitter! If your child isn’t into the sparkly stuff (does any child really not like glitter?), you can leave that out.

Here’s What You’ll Need:

·        An ice cube tray

·        Card stock paper (or another thick paper)

·        Food coloring

·        Water

·        Glitter (optional)

Here’s What to Do:

1.     Drip a few drops of food coloring into each compartment of the ice cube tray.

2.     Add water.

3.     Sprinkle the glitter in.
 
Frozen art


4.     Freeze the paints.

5.     When completely frozen, pop the icy water colors out onto the paper. I suggest prepping for the mess by putting a garbage bag or some other tarp-type barrier down on the work surface. You can also take this frozen activity outside. If it’s warm out, the temperature speeds up the melting process – making it easier to spread the color around.

6.     Keep three or more cubes on the paper.
 
Kids' Activity

7.     Gently fold the ends of the paper together. Don’t crease it, just make a curved cup.

8.     Jiggle, toss and bounce the cubes around. This splatters the paint and mixes the colors together.

9.     Open the paper to see what the frozen art looks like.
 
Children's painting


10.  Repeat if your child wants. Add more colors or keep the same ones on the paper.
 

Are you looking for more kids’ art activities? Follow my Pinterest board for ideas!
Follow Mini Monets and Mommies's board Process Art for Kids on Pinterest.