Mini Monets and Mommies: February 2016

Friday, February 26, 2016

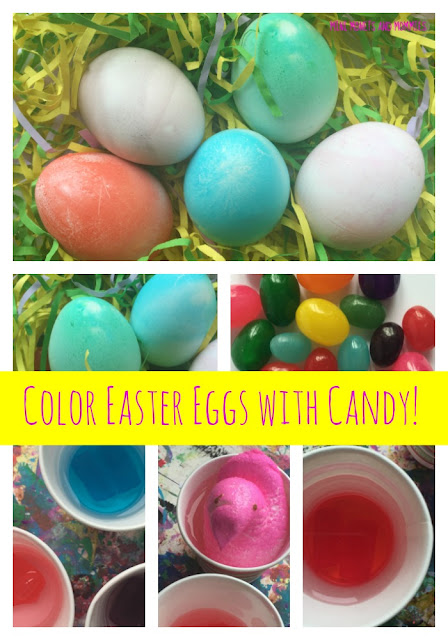
Color Easter Eggs with Candy, Jelly Beans and Marshmallows

Jelly bean Easter eggs anyone? Ok, so I made jelly bean water color paint the other day and decided to try out the same technique with a few hardboiled eggs. It didn’t go so well. That’s alright, plenty of my projects aren’t exactly Pinterest-worthy the first go around. I’d post one of the pics that I took of the eggs here, but honestly they weren’t anywhere near photo-ready. So, I started over.

Jelly beans
 
I’ve never been a fan of using food in art. But, jelly beans aren’t exactly one of the major food groups (unless you happen to be Will Ferrell in ‘Elf’), so I didn’t feel horrible about not eating the candy. After my hips thanked me for using the candy to dye Easter eggs, I figured that I might as well try some other options.

For this artsy activity I used:

·        Jelly beans (I tried a second go-around, this time letting the egg soak much longer in a different color of bean)

·        Marshmallow Peeps

·        Hard candy

Not only is this a kind of creative alternative to regular ol’ Easter egg dye, but it’s also a great option if you don’t want the kids downing their entire Easter basket in one morning. You can also use ‘older’ candy. I’m not saying that I always shove the leftover holiday candy into the back of the cupboard in hopes that no one will see it and I’ll get to eat it all (and then forget about it). But, I may just have a secret, and almost-ancient, stash of candy canes, jelly beans and Halloween pumpkin-shaped sprinkles lurking in my pantry.

On to the egg-making…

Easter art
What else do you need to make these Easter eggs? Along with the candy (and I suggest colorful candy), you’ll only need paper cups and water. Oh yeah, and the eggs.

Here’s What You’ll Do:

1. Hard-boil the eggs. Let them cool completely.

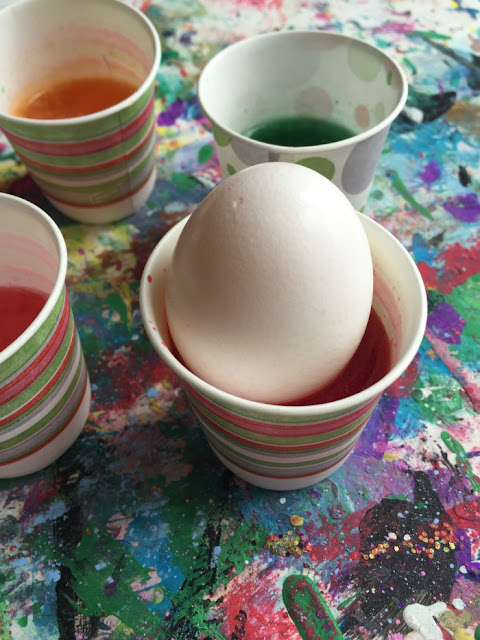
2. Prepare a few different cups, using a different candy or color in each one. We added blue hard candy, green jelly beans, a pink Peep, purple jelly beans and hard candy and red hard candy. Ask your child if he thinks he’ll see any difference between the candies (make the prediction before adding the eggs).

3. Add warm tap water to each cup. Stir the candy around, waiting until the color releases. Make a few observations, asking your child to describe what is happening and how the different candies mix or melt differently.

Marshmallow peeps
 
4. Place one egg into each cup.

Easter eggs
 
5. Wait. I left the eggs in the cups for at least one hour. Experiment with yours, having your child check back often. When the eggs reach the desired colors, take them out and let them dry. Right now you may be noticing that the jelly bean eggs look speckled. Ask your child why the color isn’t solid (hint: The wax from the jelly beans sticks to the eggs).

Kids art
 
6. Let the eggs dry.

Easter project
 
Compare how each egg reacted to the different types of dyes (jelly beans, Peeps, hard candy). Line the eggs up and look for which ones are the brightest or which ones have more/less solid colors. Encourage your child to use more than just his sense of sight. Take a whiff and smell the candy-coated scents!

Kids' holiday

Are you looking for more kids’ Easter activities? Try our jelly bean water color art!

Spring art


AND

Follow our Pinterest board for ideas!

 
Follow Mini Monets and Mommies's board Easter Crafts for Kids on Pinterest.

Tuesday, February 23, 2016

Spring Flower Kids' Art Actvity, with Monet

The weather’s warming up, and you’ve got spring on the brain. Kids’ flower art activities may just be the answer! This one focuses on Claude Monet’s famous Impressionist painting – Water Lilies.

Monet art


(This post contains affiliate links. Please see my disclosure statement for more details).

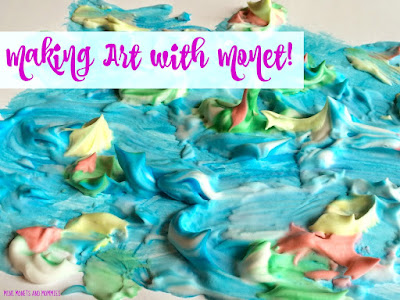
Obviously I’m all in for Monet themed art. Water Lilies is one of my favorite works for art-viewing experiences. When I worked as a museum educator, I always enjoyed taking the kids (even children as young as 3-years) to look at this painting. Recently we did a DIY chalk finger paint activity with this artwork. I’ve also done a clay finger paint and shaving cream art.

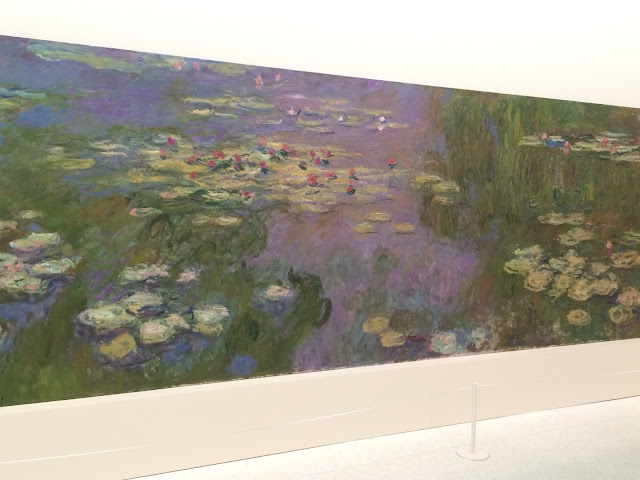
This spring art activity includes a few different processes (water color painting and collage), while getting into concepts such as color, shape and texture. Start out with a look at the real thing. If you don’t happen to have one of Monet’s Water Lilies on hand (and why would you?), here’s a photo to use:
Water Lilies
 

No, your child won’t get to see the complete texture of the work. But, she can take a look and tell you what she sees. If she’s not sure where to begin, ask a few open ended questions such as:

·        What do you see?

·        Why do you think the artist painting this?

·        What do you think the artist used to create this?

·        What time of the year do you think this is, and why?

·        What season do you think this is, and why?

Now let’s get to the art-making…

Here’s What You’ll Need:

·        White card stock paper

·        Water color paint

·        2 paintbrushes (a regular bristle type brush and a spongy one work best)

·        Clear-drying school glue

·        Tissue paper

·        Scissors

Spring craft
Here’s What to Do:

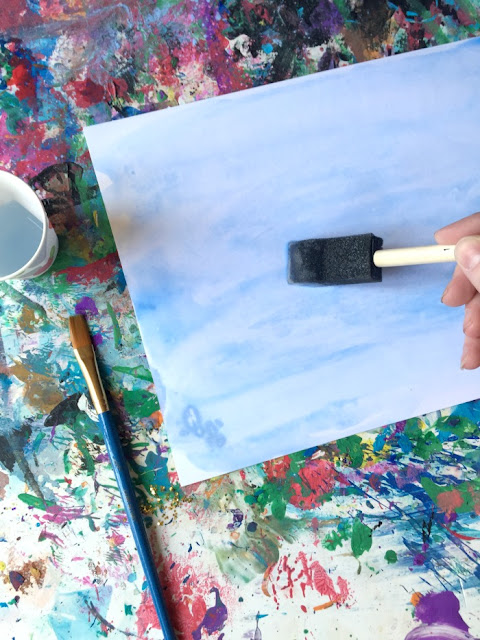
1. Dot a few dabs of water color paint on the paper. Brush over it with water to make a light color wash of blue (this will become the pond’s water). Your child can also experiment with pouring small amounts of water directly on to the paint. Yes, this is messy. But, it’s also tons of fun! Let her pour the water on the paint, and then brush it across the paper.

Water art

Children's art
 
2. Cut green tissue paper out into lily pad shapes. Cut others colors of tissue out into slightly irregular circles to make flowers.

Tissue paper
 
Paper flowers
 
3. Squeeze glue across the paper. Brush the glue over the paint.

School glue
 
4. Press the lily pads onto the paper.

Spring activity
 
5. Pinch the flower paper in the center (your child can also layer two together to make multi-colored flowers). Press it onto the lily pads. You may need to add more glue to make the paper stick.
Tissue paper

Kids' art
 

Are you looking for more famous artist themed activities? Follow our Pinterest board for ideas!
Follow Mini Monets and Mommies's board Famous Artist Kids' Activities on Pinterest.

Friday, February 19, 2016

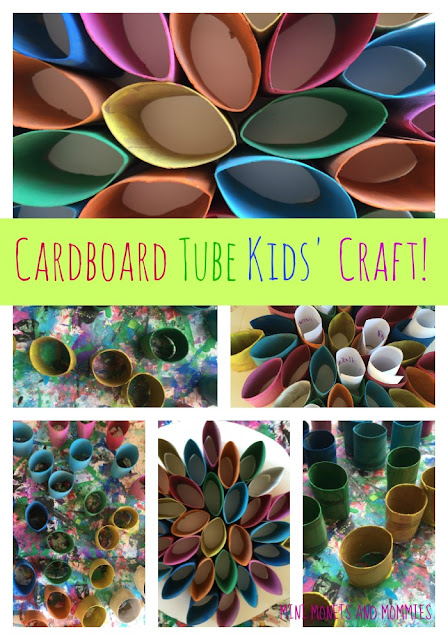
Honeycomb Chore Chart Kids' Craft

That sad little chore chart hanging on your kitchen cork board has spaghetti sauce stains down the side and is looking more than weathered. The kids ignore it, and you feel like it’s become a random sticker repository. That said, you can’t give up on it.

Chore chart

It’s the 53rd time that you’ve asked at least one of your kids to please pick up the abandoned tower of puzzles that have taken over the family room corner, you’ve got a stack of socks that could really use sorting and no one wants to help dad weed the garden. Nix the notion to nag, and get artsy instead! How? Gather the gang around the glue and craft up a honeycomb chore ‘chart’. Even though it’s technically not a chart, this sculptural storage stasher lets the kids get creative and experience a chore list through a very different lens.
Chore craft

Here’s What You’ll need:

·        Reused cardboard tubes (you know you’ve got bushels of them leftover from spills, splashes and your toddler’s try at ‘cooking’)

·        Scissors

·        Tempera paint

·        A paintbrush

·        Clear-drying glue (or a hot glue gun that you – not your child – use)

·        Foam core board (every craft store stocks this thick, spongy-middled board)

·        Paper

·        Markers

Here’s What to Do:

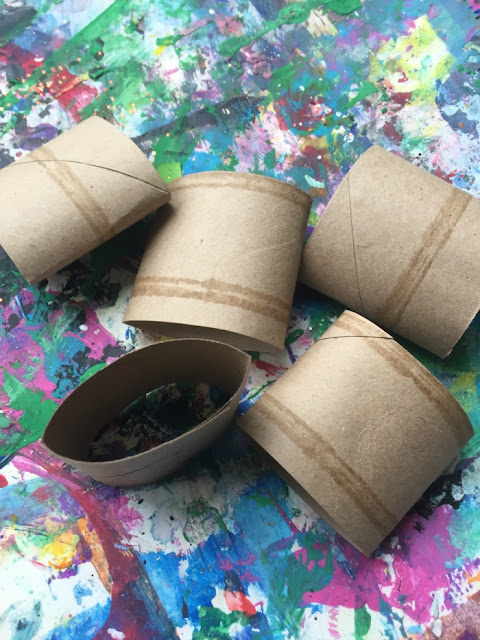
1. Press the first paper towel tube flat. The more tubes that you use, the bigger the chore honeycomb becomes.

2. Cut the paper towel tubes into four or five pieces each.
Kids' art

3. Fluff the tube pieces, making oval shapes.

4. Paint the outside, inside and edges of the tube pieces. Use a brush or let your little artist finger paint them. Give the cardboard one to two hours to dry completely.
Tempera paint

5. Draw a shape onto the foam core board, sizing it to fit your needs. If you have one child or not many chores, make a smaller board. If you’ve got a bigger brood or chores galore, cut a larger one. Make a geometric shape, go with a free form or devise a theme (for example, make a cloud shape for a spring rainbow theme or a honey pot for a summer bee focus). Cut the shape out.
Cloud shape

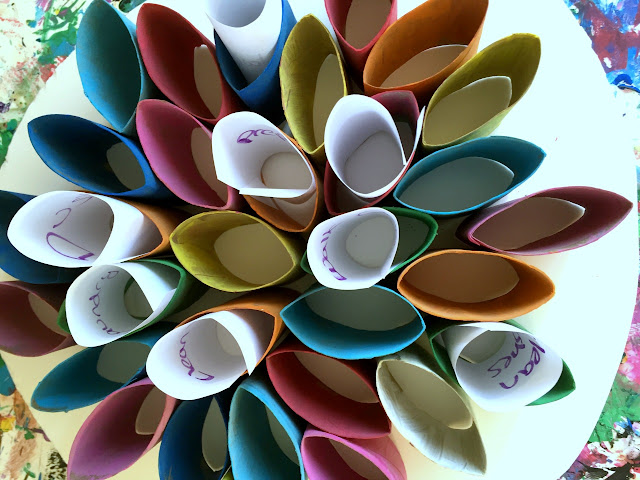
6. Start arranging your honeycomb on the board. Glue the bottoms of the tube pieces to the cut foam core. Attach each piece of cardboard to the one next to it with more glue – making a honeycomb. Snuggle each piece in next to the other, creating a tight pattern. If the regular glue doesn’t stick, use a few dabs of hot glue (adults only).
Reused craft

Hang the board up. Use self-adhesive velcro or punch a hole at the top of the board, thread yarn through it and tie it to a wall hook.  Write down your chores on pieces of paper. Roll the paper up and put it in the honeycomb holes. Voila! Now you’ve got a cool chore chart that the kids can pick from as the week goes along. The crafty creativeness of this activity beats a plain old paper list, a chalk board check-off or the sound of your pleas.
Children's sculpture

Are you looking for more creative and crafty kids’ ideas? Check out my Pinterest board!

 
Follow Mini Monets and Mommies's board Creative Kids Crafts on Pinterest.

Wednesday, February 17, 2016

Chalk Finger Paint with Monet's Water Lilies

What do chalk paint, a famous artist and kid-created art have in common? Well, you can find them all here in this Impressionist Monet’s Water Lilies finger paint art exploration!

Monet painting
 
(This post contains affiliate links. Please see my disclosure statement for more details).

Monet is one of my favorite artists. Back when I was working as a museum arts educator, taking the children to see his Water Lilies was always a treat. Maybe it had something to do with the colors, the brush strokes or the sheer size of the work, but the kids were always drawn to it. With that in mind, I’m also kind of a fan of having kids make some of their own Monet’s Water Lilies-inspired art.

Let’s start with the painting itself. If you don’t have the opportunity to look at the real thing (and plenty of us don’t), you can just as easily use a reproduction. Ok, so you won’t get the full-on texture feel of the work. But, your child will still get the chance to see the famous artwork. If you’re not exactly sure how to get started looking at art with your child, I like to begin with a few open-ended questions. For example:

·        What do you think is going on in this painting?

·        What do you see?

·        Why do you think the artists used these colors?

·        How do you think the artist made this?

·        How could you make an artwork like this?

Now that you’ve take a look at the artwork, it’s time to move on to the art-making…

Let’s start with the Impressionist DIY chalk finger paint. There are two ways to do this. For either, you’ll only need two ingredients: Colorful chalk and petroleum jelly. Ok, so you’ll also need plastic baggies for one of the options.

Put the chalk in the baggies, tie/seal them up and smash away. I used the back of a wooden spoon, but your child can come up with her own creative way to crush the chalk into bits (this promotes problem-solving and critical-thinking skills).

Kids' art
 
When the chalk is smashed, mix in the jelly (the more you put in the lighter the color). Now you’re little artist is ready to finger paint. Yay!

DIY paint
 
OR, try this option:

1. Draw with the chalk on white card stock paper. Start with a blue, creating a pond of water.

Monet project
 
2. Add green lily pads, pink, purple, yellow (and other colors) flowers and draw in a few shaded or highlighted areas with different hues of chalk.


Impressionist art
 
3. Scoop some petroleum jelly out. Your child can use her fingers to spread the jelly over the chalk, smudging and smearing it. Add more chalk drawing (and jelly) as needed.

Children's paint
There’s no ‘right’ way to do this art activity. Let your child experiment and explore with the chalk and jelly, discovering how to make the colors spread or how to make textures.

What was that? Did you just ask about more Monet art for kids? Sure, no problem! If your child enjoyed this one, try a Monet…

Clay art
 

Shaving cream Water Lilies
Water Lilies
 

Cupcake (yes, cupcake)
Baking with kids
 

Monet's art
 

Looking for more activities, but with different famous artists? Follow my Pinterest board for ideas!
Follow Mini Monets and Mommies's board Famous Artist Kids' Activities on Pinterest.

Tuesday, February 16, 2016

Celebrate Dr. Seuss with a Crafty Kids' Activity!

And, March 2 is? … Dr. Seuss’s birthday! Celebrate everything Seuss with a few (or more than a few) fun-filled family activities.
Art activities

(This post contains affiliate links. Please see my disclosure statement for more information).

Get crafty with the kids, creating art activities based on favorites such as ‘The Cat in the Hat’ or ‘Green Eggs in Ham’ or join in on a Read Across America event (schools, libraries and community organizations hold this event annually on March 2). If you’re not exactly sure where to start or what to do, begin with a book. Pick up your child’s favorite Seuss story or grab your own childhood ‘best book pick’ and introduce your little reader to a new-to-her tale. A few favorites to try:

Green Eggs and Ham
The Cat in the Hat
My Many Colored Days
Oh, the Places You'll Go 
The Lorax 
One Fish Two Fish Red Fish Blue Fish 
What Pet Should I Get? 
Horton Hears a Who

What else can you do to celebrate Dr. Seuss?

Try a…

Green Eggs and Ham felt board art activity


Green Eggs


Create a crafty Cat in the Hat

Felt art
Mix colors – Seuss style

Kids' art

Felt art
You can also:

·        Draw your own Seuss-style book together, using paper and crayons.

·        Make paper bag puppets for a pretend play session with some of your child’s favorite characters.

·        Storyboard out one of the books – comic book style.

·        Turn a Seuss story into a one act play. Record your child acting out the characters.

·        Play Seuss-style dress-up. Raid the dress-up bin and create imaginative character costumes.

·        Cook a snack (or a meal) based on a book – such as green eggs and ham.

For even more activities, follow my Pinterest board!
Follow Mini Monets and Mommies's board Dr. Seuss Children's Activities on Pinterest.

Sunday, February 7, 2016

Color-Mixing with Marshmallow Finger Paint

Marshmallow finger paint? Ok, so I’m not in any way saying this is a new invention. Moms, preschool teachers and anyone else who works with young children have probably been using a similar concoction for decades. That said, I happened to have half a jar of uneaten marshmallow fluff on hand (after making candy sushi) and was looking for a way to use it that didn’t end up on my hips.

Kids' art

(This post contains affiliate links. Please see my disclosure statement for more information).

Let me start by saying I’m not a fan of using food for kids’ arts and crafts. I’m not soap box-y about it or anything, but I try (emphasis on try) to stick to what I get at the craft store. Even so, I really don’t look at marshmallow fluff as food. While it technically is (you put it in your mouth, chew it and digest it), the ooey, gooey stuff has no real nutritional value and isn’t exactly my number one pick for my son’s school lunch – even though it might be his.

I’ve been trying to cut back on my sugar intake, and needed something else to do with the fluff in my pantry (I felt guilty tossing it in the trash). The whipped texture may be sticky, but is a pretty cool texture to use for a DIY kids’ paint. Not only is it an easy base for finger paint, but it also smells amazing and is taste-safe for little ones.

This activity allows your child to explore the painting process, discover different textures and mix colors. Let’s start with the basic mixing – the first thing you and your child may notice is that your three primary colors (red, blue and yellow) look more like Easter egg hues than vivid, bold shades. Why? Why is exactly the question that you want to ask your child right now. Ask him to think about why the bright red food coloring turns into a pretty pink when he mixes it with the fluff (hint: the fluff is white and white, does what? – It makes other colors lighter).

Before we begin mixing the paint, I want to cover one other point. Some kids don’t like getting messy. It’s just a fact. No matter how much you want them to get hands-on and engage in messy play, they shy away (or scream, “Ewwwwww!”). For some children it’s a texture thing, for others it’s a clean issue. In my years of teaching art, I’ve had more than a few children who stressed over getting brightly colored paint anywhere near their hands. If your child has this concern, don’t wash the fluff of his fingers after he scoops it out of the container. The thin coating won’t interfere with the painting process, but will protect his fingers from the food coloring (kind of like gloves, without the actual gloves). You can also do the same (that is, if you don’t want food coloring stained hands). And bonus, when you finally do wipe the fluff off, it leaves your fingers surprisingly moisturized!
Primary colors

Here’s What You’ll Need:

·        Marshmallow fluff

·        Food coloring

·        Wax paper

·        Card stock paper

Here’s What to Do:

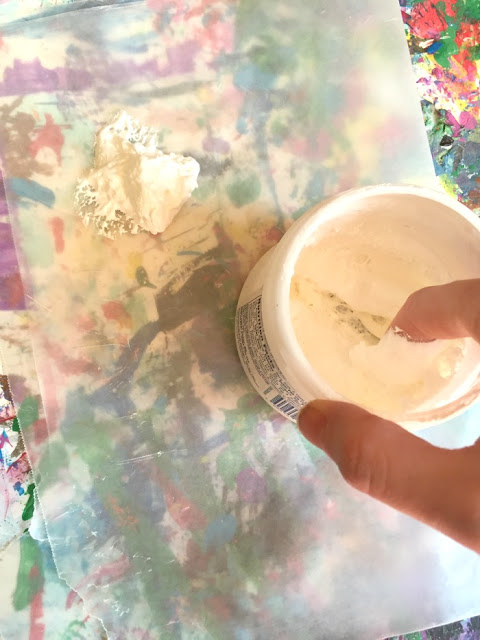
1. Scoop the fluff out onto the wax paper. The wax paper acts as a barrier, making it an inexpensive paint palette. There’s really no need to make exact measurements. Experiment with adding different amounts of fluff and food coloring each time that you try this activity. Changing the quantities of each changes the intensity of the colors. I used two 2-finger scoops of fluff per color.
Marshmallow fluff

Sweet paint

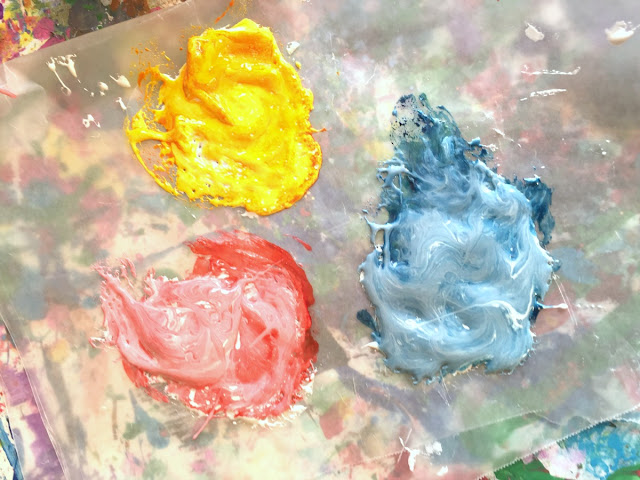
2. Add one to two drops of food coloring into each pile of fluff. Use the primaries (red, blue and yellow), reinforcing new art vocabulary words such as the names of the colors and the term ‘primary colors’. Ask your child what he thinks he can do with these colors or why they are special.
Kids' paint

3. Mix each color in with its fluff to get the marshmallow finger paint.
Finger Paints

4. Paint! Your child can explore the paint, making abstract art and mixing the colors together. One of the things that I absolutely love about using marshmallow fluff paint is the way that children can layer the textures (finger paintings almost turn into having Impressionist style brushstrokes). Your child can also use his fingers to ‘draw’ in the paint after he puts it on the paper, making lines and squiggles or creating negative spaces.

Childrens' crafts

Explore how the paint reacts in different temperatures too! Add in a bit of science and ask your child what he thinks will happen (making a prediction) if you move the paint onto a warm, sunny window. Now, try it. As he paints, the heat makes the fluff a bit runnier – changing the texture and turning it from somewhat solid to more of a liquid (in other words, it melts). You can also pop the fluff paint into the fridge before using just to see if the cold changes it.

Are you looking for more kids’ art activities? Follow my Pinterest board for ideas!
Follow Mini Monets and Mommies's board Creative Kids Crafts on Pinterest.