Mini Monets and Mommies: January 2015

Friday, January 30, 2015

Glitter Valentine's Day Heart Resist

What kid doesn’t love glitter? And when it comes to Valentine’s Day crafts for children, do you think back to those sparkle-covered homemade cards from your own youth? I do! Ah, the sheer joy in tossing glitter about – hoping it would land in the glue, but not really caring if it did (because you weren’t the one doing the after-art cleaning).
Valentine's Day

(This post contains affiliate links. Please see my disclosure statement for more information).

So, you have to do the cleaning now. But, should that stop you from breaking out the sparkly stuff? This super-easy Valentine’s Day art activity is a project that also doubles as a cute card. Leave the glitter heart resist as is or fold the paper in half and deliver it to grandma, grandpa or any special friend!

Here’s What You’ll Need:

·        Card stock paper

·        Glitter

·        Clear-drying school glue

·        Scissors

·        A marker or crayon

·        A paintbrush

Here’s What to Do:

1.     Fold a piece of paper in half, book style.

2.     Draw half of a heart, starting at the fold (this is a great opportunity to teach your child a math lesson).
 
Drawing art

3.     Cut the heart out and open it.
 
Kids' crafts

4.     Press the heart down onto another piece of paper.
 
Kids' art

5.     Paint a layer of glue over the heart (holding it down), extending a few inches from the edges. You can help your child by holding the heart for her as she paints. Squeeze a quarter-sized dollop of glue onto the paper, and then have her spread it out.
 
Holiday craft

Child holiday

6.     Sprinkle the glitter over the glue. Continue to hold down the heart.
 
Kids' art

7.     Pull the heart off of the paper to reveal the glitter resist.
 
Valentine Activity

Are you looking for more Valentine’s Day activities?

Try a:

Math crafts


Gift art

Heart art
And

Follow my Pinterest board for ideas!
Follow Mini Monets and Mommies's board Valentine's Day Activities for Kids on Pinterest.

Wednesday, January 28, 2015

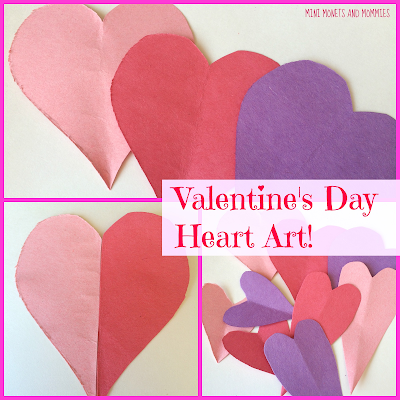
Valentine's Day Art and Math: Symmetry Hearts

So, ‘math’ probably isn’t the first word that you think of when you hear Valentine’s Day. But, when it comes to kids’ art activities – it can be! I always enjoy combining art with other areas. Whether it’s science, literacy, music or just about anything else, I’ve seen how hands-on art-making can really hit a lesson home for a child.

Holiday craft

This time we’re making symmetry hearts. I have to admit, I’m not fantastically fabulous at free-hand drawing (and my son definitely inherited that from me). When he was younger we’d fold a piece of paper in half, draw half the shape, and then cut it out to make a symmetrical looking picture. This activity is no different. Well, it sort of is. It actually expands on this idea with an artsy game.

Here’s What You’ll Need:

·        Construction paper

·        A marker

·        Scissors

·        Clear-drying school glue

Here’s What to Do:

1.     Stack two or three pieces of construction paper together (each paper should be a different color).

Art materials
 
2.     Fold the paper in half book style.

Kids' crafts
 
3.     Draw half a heart on the paper, starting at the fold. You may need to show your child a whole heart first. Then, fold the heart in half to help her visualize what she will draw.

Sgape Drawing
 
4.     Cut the hearts out.

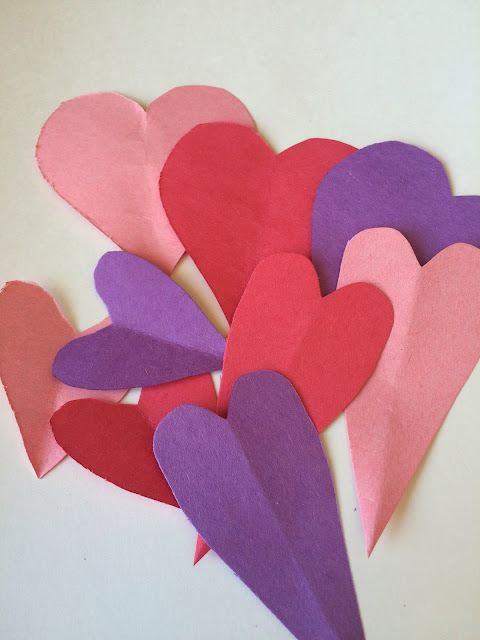
5.     Repeat, making a few more stacks of hearts in different shapes and sizes. Have your child create chubby hearts, skinny hearts, tall ones and short ones.

6.     Unfold all of the hearts.

Valentine's Day
 
7.     Cut each heart at the fold line to make halves.

Kids' art
 
8.     Scatter the hearts on a flat surface.

9.     Match the heart halves. The trick is that your child can’t use the colors to make a match. Each new pair has to have half a heart from a different color. She needs to match the shape and size to create symmetrical Valentine’s Day hearts.

10.  Glue the pairs onto a piece of paper to make a holiday collage.

Valentine Crafts
 
Are you looking for more Valentine’s Day activities? Follow my Pinterest board for ideas!
Follow Mini Monets and Mommies's board Valentine's Day Activities for Kids on Pinterest.

Tuesday, January 27, 2015

Winter Snow Painting Art for Kids

Snow painting isn’t exactly ground-breaking news. This winter art activity is a favorite of many families – including mine! You can squirt food coloring onto the snow, use the melted stuff to make water color paints or even freeze some colorful hues outside on the snow-covered ground.

Art activities

This time we’re making a ‘framed’ artwork and using an outdoor ‘palette’. It’s not a permanent piece that you can hang on your wall (or even the fridge, for that matter). But, you can snap a picture to keep the memory of the abstract artwork alive. If your little artist isn’t in to the whole abstract thing, let her make whatever she wants. A snow landscape, a beachy sea scene or a painting of her pet cat. Really, anything goes – as long as it’s in the snow!
Kids' art

Here’s What You’ll Need:

·        Snow, snow and more snow

·        Food coloring – Be careful, it will stain fabric. So, if you have concerns, don’t let your child try tis wearing her brand new white snowsuit (even though it’s bound to get dirty almost immediately anyway).

·        Sticks or twigs

·        Spoons

Here’s What to Do:

1.     Dig a few small holes in the snow with a spoon.

2.     Drip food coloring into each hole.

3.     Stir the color around, mixing it with the snow.
 

Snow paint


4.     Create an outline with the sticks – this will be the frame.
 
Kids' activities

5.     Spoon the colorful snow into the picture space. Your child can mix it, mash it, layer it or make a picture with it.
 
Paint play

Are you looking for more winter art activities? Follow my Pinterest board for ideas!
Follow Mini Monets and Mommies's board Winter Activities for Kids on Pinterest.

Sunday, January 25, 2015

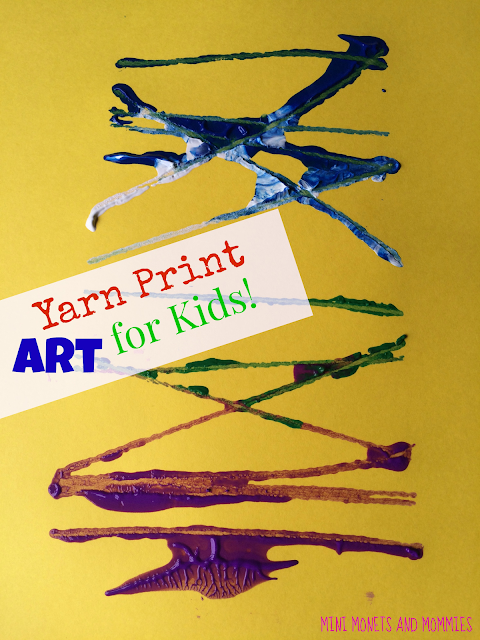
Yarn Prints, Kids' Process Art Activity

I’ve been on a print-making project spree. Printing is one of my favorite art activities to do with kids. In my years teaching children’s art classes, I can’t even count all of the print activities that I’ve done (or maybe I’m just getting old and forgetful!). This time we’re making yarn prints.


Print project

Using yarn as part of print-making allows your child to explore the process, builds fine motor skills and can even help her to learn math. Math? Yes, math. Those lines that she’s making with the yarn create angles and geometric shapes that are the mathematics basics for little kids.

One of the things that I love about this art activity is that the child can make it her own. There’s no set ‘picture’ to make or lines to follow. She can play with the yarn, building her own printing plate. If she wants to make it sparse – ok! If she wants to fill it with what seems like an entire spool of yarn – again, ok!

Here’s What You’ll Need:

·        A block of wood or thick cardboard – We used a broken karate board (my son and I have tons of them that we’ve accumulated over the years, and what else are we going to do with them other than make even more prints), but you can also use the side of a cardboard box or a cereal box.

·        Yarn

·        Scissors

·        Tempera paint

·        A paintbrush

·        Card stock or construction paper

Here’s What to Do:

1.     Wrap a piece of yarn around the wood block or cardboard. Tie it at the end.

Board print
 
Kids' craft
 
 
2.     Keep wrapping the yarn around the block/board. Your child can move up the block/board as she goes along. She can overlap the yarn, make straight lines or create diagonals.

Print Project
 
3.     Cut the yarn when your child gets to the end. Tie another knot.

4.     Paint the yarn (it’s perfectly fine if she gets paint on the block or board). Your child can use one color or mix a few.

Kids' art
 
5.     Turn the paint-covered yarn block over and press down on a piece of paper. Have your child press firmly to transfer to color.

Yarn art
 
6.     Peel the paper off to reveal the print!
 
Yarn crafts

7.     Optional: Keep printing. Your child can add more paint in the same or different colors, printing on or next to the original (or start over with a new piece of paper).

Are you looking for more artsy activities?
Try:
Valentine's Day cotton ball heart print
Model Magic wood block print
OR
Follow my process art Pinterest board for ideas!
Follow Mini Monets and Mommies's board Process Art for Kids on Pinterest.

Friday, January 23, 2015

Heart Print for Valentine's Day

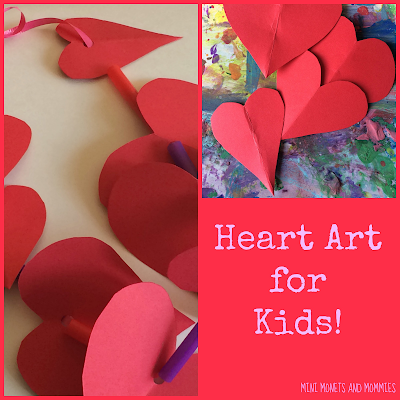
If you’re looking for a little Valentine’s Day art for the kiddos to try, you’re in the right place. We’ve been getting in the holiday spirit with tons of heart art. There have been heart garlands, heart cut-outs, sensory science hearts (with expanding soap), clay finger paint glitter hearts, felt candy carriers and a foam print card (you have to visit Red Ted Art to see that one). But, this time your Mini Monet can learn how to make a print – from cotton balls. It’s messy, it’s super-colorful and it’s so much fun! Plus, your child can use her handmade printing plate over and over again (at least until the cotton wears out).

Valentine crafts

Your child can explore the cotton ball printing process doing more than just Valentine’s Day art. Try the activity out again and again, making different shapes or random abstract patterns.
Heart Art

Here’s What You’ll Need:

·        Cotton balls

·        A piece of wood—My son and I have a ridiculous amount of broken boards from karate, but if you don’t you can still do this project. Use a leftover piece of wood from a home improvement project or a thick piece of cardboard from a heavy-duty box.

·        Tempera paint

·        School glue

·        Card stock paper

·        Scissors

·        A marker

Here’s What to Do:

1.     Draw a heart onto the wood/board.

2.     Cover the line with glue. Add glue to the inside too.
 
Glue Project

3.     Press cotton balls over the glue. Let the cotton dry.
 
Texture art

4.     Squeeze paint over the cotton balls. Use a few different colors.
 
Paint print

5.     Brush the paint around, mixing the colors, with another cotton ball.
 
Kids' art

6.     Turn the Valentine’s Day printing plate over, on top of a piece of card stock paper. Have your child press down firmly.

7.     Peel the paper off of the plate to reveal the print.
 
Valentine's Day

8.     Repeat by adding new paint colors to the cotton. They’ll mix and mingle with old ones.
Valentine art


9.     Optional: Cut out a paper heart from the card stock. Press the printing plate onto it.
 
Kids' art

As if your child hasn’t already had enough fun, add another layer to the art activity – with shaving cream! Squirt shaving cream onto the painted cotton and swirl it around (your child can do this with her hands). Press it down on a piece of paper to make a puffy print.
Kids' PaintKids' art


Are you looking for more Valentine’s activities? Follow my Pinterest board for ideas!
Follow Mini Monets and Mommies's board Valentine's Day Activities for Kids on Pinterest.

Wednesday, January 21, 2015

Valentine's Day Donut S'mores Sundae

Valentine’s Day s’mores are super-simple Holiday treats that the whole family will enjoy. Admittedly, I’m not the best baker. So, smooshing together a stack of chocolate and marshmallows between two graham crackers sounds pretty good to me. That said, I absolutely adore dressing the tasty treats up.

Heart S'mores

I’ve made all kinds of holiday s’mores. There were monster Halloween sweets, pink princess sparkle birthday treats and marshmallow peeps Valentines versions. Then there was the Christmas morning donut s’more sundae (my family has a Christmas Day donut tradition). Those ooey, gooey desserts were so good that I decided, why not make them again? This time with a Valentine’s Day twist!
Valentine Treats

Here’s What You’ll Need:

·        1 chocolate donut – I chose one a frosted cake one (the smell of the warm, melty chocolate frosting was enough to make my knees weak).

·        Graham crackers

·        Pink, purple or red ice cream – I wanted to go with strawberry, but strangely – the grocery store was completely sold out. I opted for raspberry chocolate, and it was amazing.

·        Mini marshmallows

·        Sprinkles in Valentine’s Day colors, or heart-shaped cake decors

Here’s What to Do:

1.     Cut the donut in half – like you’re slicing a bagel or sandwich roll.
 
Valentine Sweet

2.     Stack the top half of the donut and a handful of mini marshmallows on one graham cracker.
Donut s'more

3.     Pop the stack into the microwave for 20 seconds. Microwaves vary in strength, so you may need more or less time to melt the marshmallows. Don’t touch or eat the marshmallows when they are hot out of the microwave.

4.     Add another graham cracker on top.
 
Kids' cooking

5.     Spoon a scoop of ice cream on the graham.

6.     Top the Valentine’s Day s’more sundae with a few more mii marshmallows and sprinkles.
 
Valentine Day

Are you looking for more Valentine’s Day treats? Follow my Pinterest board for ideas!
Follow Mini Monets and Mommies's board Valentine's Day Holiday Treats on Pinterest.

Tuesday, January 20, 2015

Finger Paint Valentine's Day Art, with Clay!

Finger painting is a favorite. That said, not every kid (or every mom) enjoys the oh-so-messy artsy fun. That’s ok. The squish, squash and general splatter of paint isn’t for everyone. So, your child doesn’t want to finger paint a Valentine’s Day card for grandma? No big deal. Try this paint swap art activity instead.

Kids' art


(This post contains affiliate links. Please see my disclosure statement for more information).

I’ve done finger paint with clay what feels like a zillion times. It was a quick, easy activity to pull out almost any time when my son was younger. When I taught an art class entirely in the galleries at a museum, I used this project to get the fine motor aspect of painting in while appeasing the security staff (and keeping the artworks safe from tot-toted temperas).

If you’re looking for a Valentine’s Day art activity that mimics finger paint, but is less of a mess, try this out. Yes, it does involve glitter – the little mess-makers are well-known for sticking around in rugs, furniture or just about anywhere else for what seems like months. But, the clay catches the sparkles in a way that keeps them in check.

Here’s What You’ll Need:

·        Card stock paper

·        A marker

·        Scissors

·        Soft modeling clay

·        Glitter

Here’s What to Do:

1.     Fold the cardstock in half.

2.     Draw half a heart, starting at the fold.

3.     Cut the heart out. Open it to reveal the full shape – this is a great opportunity for your child to get hands-on and learn about symmetry and geometry.
 
Cut-out shapes

4.     Pull the clay apart into dime-sized pieces. Your child can ‘finger paint’ it onto the heart by spreading it with her hands.
Valentine's ArtFinger paint


5.     Sprinkle a few pinches of glitter onto the clay.
 
Holiday craft

6.     Spread the glitter out. Your child can continue to ‘finger paint’, adding the glitter this time. Not only does this add a special sparkle, but it also provides a sensory aspect to the activity. Ask your child how the glitter-covered clay feels compared to the plain clay.

Holiday art
 
Are you looking for more Valentine’s Day art activities? Try:

Heart cut-out negative space art

DIY craft heart felt lacing bag


And why not follow my Valentine’s Day kids’ activities Pinterest board?
Follow Mini Monets and Mommies's board Valentine's Day Activities for Kids on Pinterest.