Mini Monets and Mommies: cooking
Showing posts with label cooking. Show all posts

Saturday, December 24, 2016

6 New Year's Eve Activities that the Kids Will Absolutely Adore!

New Year’s kids’ activities anyone? Um, yes please! You’re celebrating “Noon Year’s Eve” at, well – noon. Or, maybe you have your fave families coming over for an evening get together. Whatever your plans are, having plenty of arts and crafts (along with some tasty treats, of course) on hand is a must-do.

Kids' art


(This post contains affiliate links. Please see my disclosure statement for more information).

Before going crazy with crafts, start simple. You have plenty to do around the holidays. So, why add to it with complicated art projects or overly complex recipes? Yeah, yeah, Pinterest is bursting with an over-abundance of seemingly awesome ideas. You scroll down your feed and think, “Well, I could do that.” Maybe. But, keep in mind, the middle of your New Year’s Eve celebration isn’t the time to find out that what looked oh-so-easy on Pinterest (and, don’t they all?) was actually super-complicated.

Pour the Paint
Kids' crafts
 

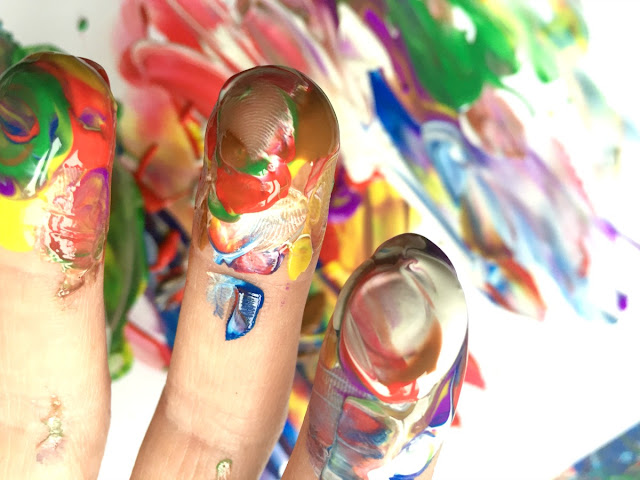
Okay, so if you want something beyond simple to keep the kids busy (and keep them totally happy too!) put out some paints. Is it mess-free? Nope. But, all you really need are four colors – the primaries (red, yellow and blue) and white. They can mix their own hues and then paint a holiday masterpiece. Add in some glitter (yes, this multiplies the mess exponentially) for a festive sparkle.

Try Clay Play

Modeling clay
 
If your goal is to keep the mess to a minimum, one of my favorite kids’ art activities is finger painting with clay. The secret for this one is that there’s no actual finger paint involved. Instead, your kiddo can pull apart soft modeling clay into dime-sized pieces. She can then spread it out over a cardboard surface, finger paint style. It’s a fab fine motor activity and you can adapt it for any occasion. Have your child use the clay to make New Year’s fireworks or just make abstract art.

Confetti Art

Craft activity
 

Let’s say you have tons of magazines hanging out in the basement, garage or attic. Maybe you don’t. But, given that Christmas and Hanukkah were just last week, you might have some extra gift wrap odds and ends stashed around. Cut those up and use as confetti. The kids can paint a piece of card stock paper with clear-drying school glue. Toss the confetti, and watch it stick. Yay!

Glitter Ball Drop

New Year's Eve
 

10-9-8-7-6-5-4-3-2-1! The ball’s dropping in NYC, and at home too. Make your own with some sparkling playdough. Follow this recipe to whip up some DIY dough. Add a drop of food coloring in or don’t (the glitter will create a cool color). Sprinkle tons and tons and tons of glitter in (hey, it has to sparkle like the Times Square ball, right?) and mush it around. Your child can make the midnight drop ball and then take it apart for more playdough fun.

Glitter Gunk

Kids' art
 

As if playdough isn’t fun enough, try some New Year’s glitter slime! Follow these directions to mix up a batch of slime. Add in the sparkles and you’re ready for some festive science fun. The more glitter your kids use, the more solid the color will look.

Kids’ Cookies

Holiday sweets
 

When the kids tire from the crafting, try these easy no-bake cookies (here's the recipe). They’re sparkly (like the glitter) and look like mini New Year’s Eve balls. Oh yeah, and they’re super tasty too!

Thursday, December 1, 2016

Oreo and Yogurt Holiday Smoothie Recipe!

This shop has been compensated by Collective Bias, Inc. and its advertisers. All opinions are mine alone. #MerryMeals #CollectiveBias

The holidays are quickly approaching. And, we all know that means parties, family get-togethers and celebrating, celebrating and then some more celebrating. That also means feeding everyone who comes over (whether it’s for a Christmas party or an impromptu gathering).

Christmas recipes
 

With all of the holiday cheer (and heavy food), I’m kind of into creating lighter fare this time of year. Okay, so I still like sweet treats. I can’t help it. But, I really wanted to spread some holiday cheer without filling my kitchen with cookies, cupcakes and pies. And honestly, I also wanted an easier option. Something that doesn’t require hours and hours of prep-time and baking. Seriously, who has time for that? I’m not saying that this is an entirely healthy holiday treat. But, it’s lighter than a fruit cake and it does have yogurt in it (which makes it healthier than ice cream).

That’s why I’m glad that Giant Eagle has everything I need for my holiday shopping. Not only do they have an awesome array of their own brands, but they also have all of my favorites—that’s partially why I’m using Oro Thins for this super-easy recipe. I’m not stretching the truth when I say that I’m at Giant Eagle at least three times a week. Really, you can go there and ask their team members (believe it or not, the other day one of the Eagle’s Nest employees came up to me to say “hi” – she remembered my now 15-year-old son from when he was a preschooler!).
Holiday foods
 

I’m a fan of fancy drinks (the non-alcoholic kind, I mean). When I saw the Dannon Oikos Yogurt Drinks I immediately thought of trying out an easy holiday smoothie. To add a pinch (or maybe a bit more than a pinch of sweetness) I paired the drinks with Oreo Thins. How? Read on to see how this fab smoothie worked out!

Holiday cards
 

What You’ll Need:

·        Single serve Dannon Oikos Yogurt Drinks (I used vanilla and strawberry—for the wintery white and Christmas-y red!)

·        Oreo Thins (or you could swap in regular Oreos)

·        ½ vanilla yogurt

·        Red and green crystalized sugar or holiday sprinkles

·        1 tablespoon white frosting (this is just for a garnish, it won’t actually go into the smoothie)

·        Optional: 1 cup crushed red berries of your choice

What to Do:

1. Crush the Oreo Thins (leave a few whole ones out). You can put the cookies in a plastic zipper baggies and crush them with the back of a large wooden spoon or you can put them into a food processor.

Cookies holiday
 

2. Add the yogurt drink (I used one per serving), the crushed cookies and the yogurt to a blender. If you’re using fruit, add this now.
Yogurt drink

3. Blend the mix. Until it is smooth, but still thick.

4. Pour the holiday yogurt smoothie into a tall glass. Or you can get fancy, and use a wine glass (minus the wine, of course). We used a mason jar too!

5. Coat the rim with a thin layer of white frosting—it looks like snow! Sprinkle the sugar (or the holiday sprinkles) over the frosting to add a touch of Christmas flare. Don’t worry about it falling into the smoothie—it will just add extra holiday décor.

Remember those leftover Oreo Thins that you didn’t put into the smoothies? You can create an edible accent to your smoothie display (that is, if you’re setting up a table design for a holiday party buffet). Spread some of the white frosting over the cookies, and add more of the red and green crystalized sugar or holiday sprinkles.

If you have a few candy canes on hand, rest one on the top of each smoothie glass.

Now that you’ve got the sweet totally taken care of, you probably need something to balance it. You, and your guests, may start craving the salty stuff. Here’s where I’m glad that there’s a Giant Eagle close to home. I totally didn’t think about the fact that so much sweet needed a salty balance. So, when the thought hit me I had no problem running out (again) to pick up a box of Keebler Club Crackers! Pairing the crackers with Market District Hummus made for an easy savory option. It also gave me the chance to get a few Hallmark Holiday Cards for my guests.

Smoothie treats


That’s it! A simple appetizer-style buffet for the holiday. If you’re looking to create a full-on spread for your holiday party, check out the Giant Eagle Social Hub. You’ll find creative recipes galore there!

Tuesday, August 23, 2016

Purina Beneful Originals Has a New Formula, and We Have a New Healthy Recipe for You Too!


This shop has been compensated by CollectiveBias, Inc. and its advertiser. All opinions are mine alone. #NewBeneful #CollectiveBias

Dog food is kind of a big thing in my family. With two Olde Boston Bulldogs that are, um – energetic to say the least – our little Oliver and Lulu need all the nutrition they can get. Seriously. It’s like having two toddlers running around. So, when I saw that Purina Beneful Originals was reformulated I was all in!

Steak Veggies
 
I’m going to admit something – for many, many years, I wasn’t a dog person. I was totally a cat person. From our first cat (a tabby named Albert that we got when I was 7-years-old), I’ve always been all about felines. That was until I met my now-husband. He’d always had dogs and when we moved in together, that also meant moving in with Duke (his Shepard mix).

Fast forward 17 years, and we’ve had four dogs (including our current two) and one human (that would be our almost 15-year-old son, who by the way, is very much a dog person).
Puppy dogs
 
 
This brings me back to the nutrition thing. That’s why we feed our dogs Purina Beneful Originals. And, I’m glad we do! Why? Because now Purina Beneful Originals and IncrediBites has a new reformulation – with meat as the #1 ingredient and NO sugar added! It was actually created with dog owners in mind, using real feedback and relying on two years of research.

Obviously the dogs aren’t the only ones in the house who need a healthy diet. My son was diagnosed with type 1 diabetes last spring. Now that the dog’s main dish is sugar-free, it matches pretty perfectly to my son’s new meal plan. Not that we ate a high-sugar diet (type 1 diabetes is an autoimmune disorder, and NOT a disease that is a result of lifestyle choices), but there’s always room for improvement. Healthy eating isn’t an option for us, it’s a must-do.

Okay, Ollie and Lu (our little nicknames for the dogs) get the good stuff with the NEW Beneful Formula! Dry Dog Food Reformulation – and they are incredibly happy about it (or at least they seem so, as they can’t exactly tell me). I love the idea that the new formula has meat as a main ingredient, and wanted to recreate a similar ‘meal’ idea for our family. With that in mind, I got a few steaks and an awesome array of fresh veggies. The result? A rainbow vegetable and meat recipe that’s a total parallel to the new Purina Beneful Originals. I can also take care of getting both meals (the Purina for our dogs and the ingredients for my family) at one place! The reformulated Purina Beneful Originals is available at most grocery stores and retailers such as Target and Walmart (and who doesn’t like getting everything in one easy shopping trip?).
 
Purina Benefuls
 

Before I get into the recipe specifics, I need to make an important point – this is not a dog food recipe. The new Purina Beneful Originals takes care of that. I treat my dogs to a tasty meal with it, so there really isn’t much else they need. One thing they certainly don’t need is ‘people food’. Are our dogs part of the family? Yes, of course they are. Do they sit at the table and eat with us? No, they don’t. People food isn’t made for dogs. That’s why our Ollie and Lu get their Purina Beneful Originals, and not the meal from our plates.
 

Also, dogs often have sensitive stomachs. Our little Lulu certainly does. Even though we’ve been feeding them Purina brand food for what seems like forever, we didn’t want to just dive right in with the new Purina Beneful Originals. We started slowly adding it to their existing diet. This let them get used to the new formula, without giving them any tummy issues. Eventually we phased out the old food, and were able to completely feed them the new one.

Okay, okay, and onto the recipe. And, by the way – it’s totally simple. I’m not exactly ready to audition for Top Chef. So, this is easy enough for even the novice to try. But, it’s still super-healthy, completely colorful and tasty.

Here’s What You’ll Need:

·        Steak -- look for a thick cut or if you want to go the easy, non-slicing route, get cubed steak from your butcher’s section.

·        Rainbow veggies – pick whatever’s in season (I used yellow, green and red peppers, zucchini, beets and radishes).

·        Fresh mint

·        1 lemon

·        Olive oil

·        Skewers (the shish-kabob kind)

Here’s What to Do:

1. If the steak isn’t cubed already, cut it into cubes.

2. Put the steak into a mixing bowl, and drizzle the olive oil on top.

3. Finely chop the mint. Add it to the mixing bowl.

4. Cut the lemon in half. Squeeze the juice into the mixing bowl.

5. Mix everything in the bowl. Cover with foil, and refrigerate for one hour (if it ends up being longer, that’s okay too).

6. While the steak is marinating, chop the veggies. If you’re using beets, slice them lengthwise.

Rainbow veggies
 
7. Add the meat and veggies (except for the beets) to the skewers. Alternate the meat with the vegetables.

Meat recipe
 
8. Grill the skewers (if you’re cooking beets, grill them separately) until the meat is completely cooked. Never eat raw or undercooked meat (you can pull off one cooled piece of meat from a skewer and cut it in half to make sure that it’s completely cooked).

Serve the steak and rainbow vegetables on the skewers or take everything off before you add it to the plate. That’s it! It’s so very simple. Maybe it’s not as easy as opening up a bag of Purina Beneful Originals.  But, like the Purina Beneful Originals reformulation, it spotlights meat in a refreshingly healthy way.

Benefuls Food
 
Are you ready to try Purina Beneful Originals new formula? Sign up for a free sample here.
What's your favorite healthy meat recipe? Share it with us in the comments section below!

Thursday, June 30, 2016

Fun Fourth of July Kids' Crafts

The Fourth of July is quickly coming up! That means fireworks, a backyard BBQ and red, white and blue patriotic kids’ crafts.

Fourth July


What’s on your art activity list for the Fourth? You can go simple (which is perfect during a family reunion or party) and put out crayons in American flag colors, add a few star stickers and let the kids get artsy with very little mess.


Child's crafts


If you’re looking for something that sparkles, break out the glitter. This glitter flag craft is easy enough for your preschooler to try, but still fun for older kids.

Sparkle crafts

Chalk doesn't always equal sidewalk art (although, sidewalk drawing is a fabulously fun art activity for kids). You can grind it up, add some water and create your own red, white and blue cubes for a patriotic painting.

Patriotic art

Following the freezing fun of frozen chalk are cubes of another sort. Get out the food coloring, toss in some sparkles and create your own glittering cubes. Make red, blue and silver (or opal) for a Fourth theme.

Sparkling art
Do you have a few extra berries hanging around (especially after you’ve whipped up a few 4th of July-themed treats)? Let the kiddos put them to use, making their own paints. These natural paints are taste-safe, meaning they’re perfect for little kids who just might be into exploring everything with their mouths.

Berry art
 

Jackson Pollock anyone? Mix a famous artist activity and a fun Fourth painting exploration! Paint splatter the day away.
Kids' art

Tissue paper prints are a favorite of mine. Just remember – never use color-fast or non-bleeding tissue. Like the names say, these papers hold their colors. This means that they won’t work for prints.
Flag crafts

While we’re at it, why stop at Fourth of July kids’ crafts? That holiday cookout means that you need some snack-y options for the kids. Summertime grilling season means one thing to me (okay, aside from the requisite hamburgers and hotdogs): S’mores!

We were a big s’mores family. After my son’s Type 1 Diabetes diagnosis last spring we’ve had to forego the ooey gooey *and super sugary) treat. But, someone should eat those tasty marshmallow stackers. So, here are a few of my favorites that are also perfect for your Independence Day party!

Pink princess. Sparkly, pink and filled with strawberry taste.

Cupcake s’mores. This one requires baking. But, it’s oh-so-good.

Cherry red coconut. Add in a few blueberries for a red, white and blue dessert.

Melting snowman. If you have a Frozen fan, these are for you.

Animal cookie ice cream sundae. Sugar-packed? Yes. A cool treat on a hot day? Yes!!!

Dessert ideas
 

With your artsy activities and tasty treats, you’ve got plenty for the kids to do (and eat) on the Fourth of July. What's your favorite Independence Day kids' craft? Share it on the Mini Monets and Mommies Facebook page!

Monday, June 27, 2016

Summer of Grilling Healthy Backyard Barbeque


This shop has been compensated by Collective Bias, Inc. and its advertiser. All opinions are mine alone. #SummerOfGrilling #CollectiveBias

Summer is finally here, and it’s grilling season! About 10 years ago (when my now-teenage son was 4-years-old) we started a Sunday barbequing tradition. We get together with my parents and have hamburgers, hot dogs and all of the ‘summertime favorites’. Sounds fun, right?

Hamburger Recipe


Well, it is. Or, at least was. I have to be honest here, this year I was exactly looking forward to our summer cook outs. A few months ago my 14-year-old was diagnosed with Type 1 Diabetes. After five very scary days in the hospital he was released with a brand new meal plan (and orders to test his blood sugar and give himself insulin injections six times a day). He’s done amazingly well so far – even though it’s been a major change.

Instead of just eating when and what he wants, he now has to follow the guidelines the nutritionist created. When it comes to our summer barbeques that means no gorging on chips and passing on the burgers (and veggies). There are no more refreshingly chilly popsicles or bowls of ice cream at the end of dinner. But, as I’ve come to realize, that doesn’t mean we can’t have still have a super-tasty cookout. We just had to make some adjustments.

When I was planning for the start of grilling season I had to make some adjustments. This meant coming up with ideas for plenty of healthy options, that were still ‘cool’ enough for a teenager to try (believe me, a plain burger on a bun wasn’t going to cut it). So, on my weekly trip to Giant Eagle (okay, so maybe I’m there more than weekly – I should probably write better lists) I decided to try something a bit different than or usual summertime staples.

In past years I’ve pretty much stuck to a package of ground beef that I turn into mega-sized burgers. This year portion control is a must-do, so massive burgers won’t do. What’s the alternative? Market District Gourmet Seasoned Beef Burgers! Not only do they have added flavor, but they’re already in perfect burger form (with a portion size that works within my son’s meal plan – yay!). I chose these as our new centerpiece for our weekend backyard meals.

Instead of chips, dip and ice cream that I usually added, I went with a much more nutritious version of the summer cook out. Keep in mind, this meal worked with my son’s specific meal plan. That said, it might not work for every diabetic (you should only and always follow the doctor’s or nutritionist’s guidelines and plans). Even if your child doesn’t have diabetes, this is a much healthier version of what (at least for us) used to be a not-so-healthy meal.

Along with the burgers, Giant Eagle had everything else that I needed to complete the meal (they truly are the grilling headquarters – and who doesn’t appreciate a one-stop shop?).
Grilling Foods
 
 
What did the meal end up looking like?

Obviously, the burgers came first. Here’s what you’ll need:

·        Market District Gourmet Seasoned Beef Burgers (they are in the meat section, and portioned nicely, with a variety of seasonings -- i.e., you can make everyone happy)

·        Kraft Natural Cheese Slices, from the dairy aisle

·        Heinz BBQ Sauce

·        Pepperidge Farm Buns

·        Nature’s Basket Ketchup

·        Giant Eagle Mustard

Here’s what to do:

1. Grill the burgers! So super-simple, isn’t it? I’m not a fan of handling raw meat (I really don’t know anyone who is). So, the ready-made burgers mean that you can just put them on the grill and cook. No having to measure seasonings, mix and mold the meat into patties.

2. After the burgers are completely cooked add another layer of taste. Teenagers certainly don’t like anything dull (which is a complete contrast from when my son was younger and wanted everything plain, plain and even more plain). I poured the Heinz BBQ Sauce into a small bowl and let him brush some onto his burger (you can also add a light brushing of it before you cook the burger too). This is also an easy alternative for anyone who isn’t into ketchup and mustard.

Hamburger Barbeque
 

3. Put the burger on the bun and add a slice of Kraft Natural Cheese.

Done! My son’s plan calls for more carbs than just the bun. Instead of greasy chips, we grilled strips of zucchini and yellow squash (hint: you can also brush on some of the BBQ sauce for added flavor). We also added the grilled veggies right into burger (on top of the cheese) for an extra pinch of health!

Market District Burgers
 

What about drinks and dessert? I’ve really never explored diet drink options, at least not until my son was diagnosed. But, for special occasions (such as a family meal with the grandparents) he always asks for something more than plain water. I picked up a few bottles of Lipton Ready to Drink Diet Peach Tea and went to the bottled water aisle for some Aquafina Sparkling Black Cherry Dragonfruit. The Diet Peach tea has no carbs, so it was the perfect drink addition to the meal. The Aquafina Sparkling water has 3 g per serving/can, but that still fit well within my son’s meal plan.

Summer Drink
 

I have to admit, I was a bit confounded when it came to dessert. Ice cream and popsicles were no-no’s, so I had to come up with a low-calorie option. That’s when I realized I had already bought dessert, without even knowing it. I could simply freeze the Lipton Ready to Drink Diet Peach iced tea and Aquafina Sparkling into low-cal pops.

Kids' treat


Add a popsicle stick and you’ve got a fruit-flavored treat! I had just bought these cute ring-pop ice molds. They worked perfectly for this recipe. I added slices of strawberries to a few too!.

Summer recipe


The grandparents aren’t exactly into popsicles, so they popped the cubes (minus the sticks) into plain seltzer water for a fresh summer drink. You can also slice up berries and add them to the mix (before freezing, of course).

That’s it! So easy. Show us how you made Giant Eagle you summer grilling headquarters by leaving a comment below. Share your recipe ideas for burgers and more for everyone to see!

Saturday, January 30, 2016

Swedish Fish Candy Sushi with Rainbow Ramen

Swedish fish candy sushi with rainbow ramen noodles anyone? That’s right – you read correctly. Why, you may ask. Why not?

Candy Sushi

Ok, so I’m no sushi chef. But, I do enjoy making cute little candy concoctions. Last spring I made kosher candy sushi for Passover (you can make it minus the kosher ingredients as well). This time I went with a fruit roll-up, marshmallow fluff and fish (the Swedish kind, of course) creation. Let’s get this out of the way – it’s not a healthy snack by any means. If you want to give your child a nutritious after-school treat, by all means slice up an apple or peel a banana. This is a once-in-awhile, birthday party, fun-time, special day treat!

Now, what about the ramen? My son loves, loves, loves these noodles. I’ve seen rainbow spaghetti all over the place, so I figured I’d try it with ramen. Not that candy and ramen necessarily go together all of the time, but it’s a fun snack idea to try.
Candy treat

Before we get started, I have one serious caution to bring up – the Swedish fish sushi candy may pose a choking hazard to young children. It’s definitely not for kids three and under. When you look at all of the ingredients, you’ll notice that they’re all fairly sticky on their own. Combine them and they get massively chewy. While my 14-year-old was good with chewing the sticky sushi, your 4-year-old may not be. I’m always overly cautious when it comes to this type of thing. Seriously – ask my son. I think I may have cut his grapes for him until he was 10, and I’m the mom who refuses to give her kid gum out of fear he may try to swallow it. That said, be cautious when deciding if your child is old enough to chew something that’s quite so sticky. If taffy is a no-no now, skip the sushi (but, you can still give him the ramen).

Here’s What You’ll Need:

·        Ramen noodles

·        Food coloring

·        Plastic sandwich baggies

·        Fruit roll ups (we used the tie dye ones)

·        Marshmallow fluff

·        Swedish fish

To make the sushi:

1. Unwrap and unroll the roll up. You can go one of two ways here: Cut the roll up into long strips or make the sushi and cut it into pieces after.
 

2. Coat the roll up with a thin layer of marshmallow fluff.
Fruit roll-up

3. Cut the fish into pieces. Place the fish pieces onto the fluff, about 1-inch in from the top of the roll up.
Candy roll

4. Roll your creation up.
Candy sushi


5. If you chose not to cut the roll up at the start, do so now (making 2-inch pieces).
Candy cooking

To make the rainbow ramen:

1. Boil the noodles for three minutes.

2. Strain and rinse the noodles under cool water.

3. Divide the noodles into four or more baggies.

4. Add two or three drops of food coloring into each bag. Close the bags tightly.
Food color

5. Mush and mash the bags, spreading the color across all of the noodles.
Ramen recipe

Noodle recipe

Now you’re ready to serve up the sweet creation! Plate it all together, and serve with a side of ‘dipping sauce’. Use a chocolate sauce, more marshmallow fluff or a fruit-flavored drink (we used blue raspberry).
Rainbow noodles

Are you looking for more delicious desserts? Follow my Pinterest board for ideas!


Follow Mini Monets and Mommies's board Great Desserts on Pinterest.