Mini Monets and Mommies: tissue paper
Showing posts with label tissue paper. Show all posts

Monday, September 22, 2014

Fall Tree Pipe Cleaner Sculpture Art Activity


There’s a chill in the air, the leaves are changing colors and it’s finally sweater weather! Its fall and I’m ready to make some autumn art. As the trees change from glossy green to brilliant yellows, oranges and reds, take the kids outside for some science time and then create a fall sculpture.

Fall trees
 

Before you start the art-making process, take a nature walk! As your child takes a look around, ask her:

·        What colors can you find in the trees?

·        Can you tell me what color the leaves used to be in the summer?

·        Why do you think the leaves are changing colors?

Collect a few leaves to take inside for inspiration or set up shop outdoors and let your little artist sculpt sitting in the grass or at a picnic table.

Here’s What You’ll Need:

·        Brown pipe cleaners

·        Green, red and yellow modeling clay

·        A piece of card stock paper or cardboard

·        Red, yellow and orange tissue paper

Here’s What to Do:

1.     Fold two or three pipe cleaners in half.

 
2.     Wrap the pipe cleaners around each other. Your child can create a trunk and branches.

Kids' crafts
 
3.     Create a grassy base for the sculpture. Have your child roll a piece of green clay into a ball. She can smoosh it down onto the paper or board, creating a mound. Press the clay into the paper, smoothing it out around the edges to make it stick. Push the pipe cleaner trunk into the clay.


Tree art


 4.     Pull apart dime-sized pieces of red and yellow clay. Press and blend the clay   
           onto the green mound, creating autumn leaves.

Clay Sculpture

6.     Tear pieces of tissue paper. Wrap the pipe cleaner branches around the tissue paper to make leaves.
Autumn Sculpture

Are you looking or more fall themed projects?

Try:

Tissue Paper Leaf Prints

Tissue Print
 
Paint Splatter Leaves
Autumn Leaf
 

Fall Leaf Mobile

Leaf Sculpture
 
Fall Shaving Cream Trees

Fall Art
 
 
Leaf Print Trees


Fall Trees
 

For even more ideas, follow my Pinterest board!
Follow Mini Monets and Mommies's board Fall Activities for Kids on Pinterest.

Wednesday, August 20, 2014

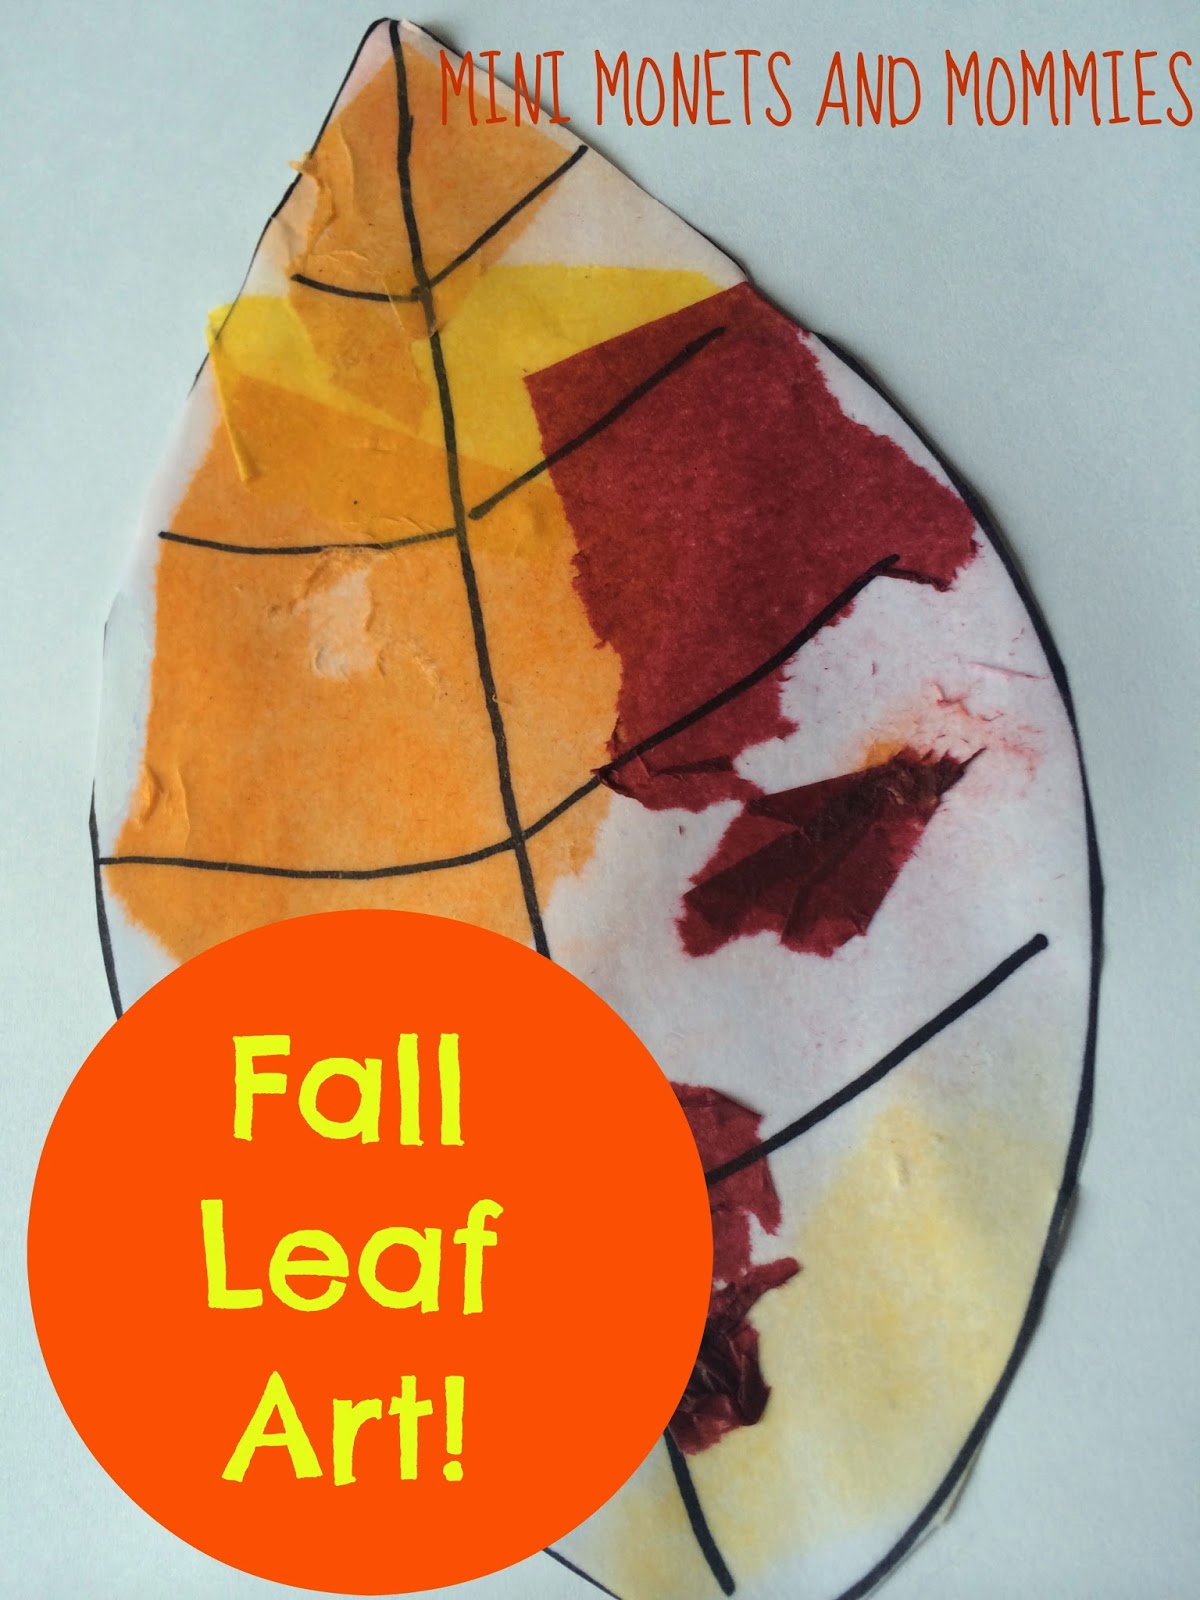
Fall Leaf Tissue Paper Print Art Activity


Even though it seems way too soon, fall is almost here. Get the kids in the autumn spirit with a tissue paper painting project. Non-color-fast tissue paper is kind of the best. Because it doesn’t hold its color, when you get it wet it transfers. What do you get? Instant watercolors!
Leaf art

Kids can turn a plain piece of paper into a fall leaf with red, yellow and orange tissue paper. This printing project requires bright, bold colors – so hold off on soft yellows or pale pinky reds.

Here’s What You’ll Need:

·        Red, orange and yellow tissue paper – If it says colorfast or it doesn’t bleed, don’t get it. It won’t work for this art activity.

·        White construction paper or cardstock

·        A marker – A permanent marker will hold up when you put the tissue paper on. If you want to add another layer to the DIY watercolor theme, use a washable marker. The colors will blend and mix with the wet tissue.

·        Water

·        A bowl or plastic container

·        Paper towels

·        Scissors

Here’s What to Do:

1.     Draw a leaf onto a piece of paper. Your child should make it at least as large as her hand, preferably bigger.
Fall Craft

2.     Cut the leaf out.

3.     Tear or cut apart the tissue.
 
Torn paper

4.     Soak a paper towel in water.
Water art

5.     Place the wet towel on the paper leaf and press down gently.

6.     Flatten the tissue paper onto the wet leaf.
Art leaf

7.     Dip another paper towel into a bowl or container of water. Wet the tissue paper-covered leaf with the paper towel.

8.     Let the wet tissue paper sit on the leaf for a half hour or so.
 
Leaf art

9.     Peel the tissue off to reveal the color underneath. Don’t worry if some of the tissue sticks. This will add a colorful texture to the project.

Are you looking for more creative crafts that your child can try? Follow my Pinterest board for ideas!
Follow Mini Monets and Mommies's board Creative Kids Crafts on Pinterest.

Monday, July 28, 2014

Kids' Butterfly Plant Art Activity

Combining science and art gets two types of learning in to one kids’ activity! I always enjoy a good science + art project, and lately have been working with icy art. There’s only so much that I can do with ice at one time before I go on brrr!!! cold overload. So, I’m switching it up and moving on to plants.

Nature crafts for kids
 
The other day I was looking at my magnolia tree. It didn’t really bloom well this year because of the extreme cold, but when I took a real look at their leaves I noticed just how intricately beautiful they are. The shape, the texture the tiny veins – and it’s not just magnolias. The flowering parts of plants are sure pretty, but don’t forget about the green stuff too.

Get out into nature and take your child on a leaf hunting expedition. Collect an armful of fallen leaves and head inside (or set up your art-making station outside on the patio or in the grass). Now your child is ready to transform her leaves into a beautiful butterfly!

Here’s What You’ll Need:

·        Leaves

·        Clear drying school glue

·        Card stock or poster board

·        Clay

·        Googley eyes

·        Tissue paper

·        Pom poms

·        Scissors

·        Optional: markers, craft fathers or pipe cleaners

Here’s What to Do:

1.     Glue the leaves onto a piece of paper in a fan shape to make one butterfly wing. Repeat this step to make the second wing.

Plant crafts
 
Leaf craft

2.     Cut the wings out.


Art and science
3.     Place the wings on another piece of paper. Have your child glue them on to make the general butterfly shape.

Insect art
4.     Create a butterfly body and head.  Give your child a few different choices. She can glue a line of pom poms down the center of the wings or glue one pom pom at the top (as a head) and make a clay body.

Pom pom
5.     If your child chooses clay, cover it with a textured tissue paper collage. Tear pieces of tissue and have your child ball them up. She can glue them to the clay.

Color paper
6.     Make antennae. Your child can glue two craft fathers, pipe cleaners or draw them on with markers.

Insect activity for kids
 
7.     Glue googley eyes to the head.

Nature-based art
Are you looking for science and art ideas? Follow my Pinterest board or check me out on Facebook!
Follow Mini Monets and Mommies's board Preschool Art and Science Activities on Pinterest.

Wednesday, June 11, 2014

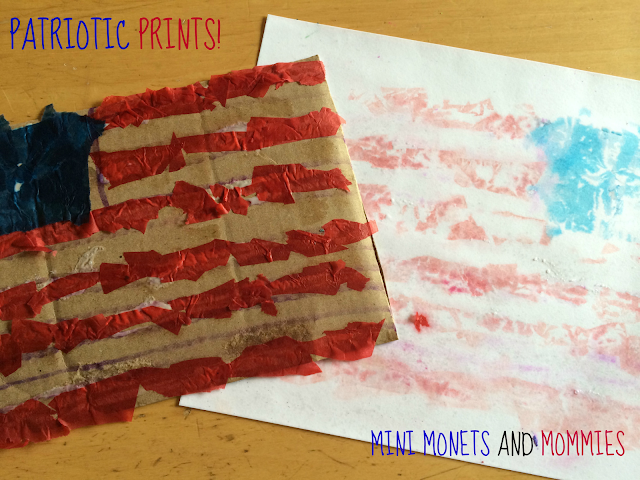
Fourth of July American Flag Print Craft

Get patriotic this July 4th with a star-spangled craft that the kiddos can do. I’ve had a mostly on-again love affair with non-colorfast tissue paper for quite some time now. You can print with it, make water colors and even tint play clay as the color bleeds from the paper onto whatever surface you’ve got. Sure, it gets all over your child’s hands, but that’s what soap is for. Right?
 
Kids Art

This flag art activity allows your child to double up on the crating. The printing plate that she’ll make is something that you can save and display later!

Here’s What You’ll Need:

·         Cardboard- reuse the front of a cereal box (or a similarly sized box)

·         A marker

·         Red and blue tissue paper- Don’t get anything that says non-bleeding or colorfast, it won’t work for this project.

·         Clear drying school glue

·         White paper

·         Scissors

Kids' Crafts
Here’s What To Do:

1.      Cut the cardboard into a rectangle. Size it so that it’s smaller than the white paper.

2.      Have your child draw the star area and the stripes onto the cardboard with a marker.
Cardboard art

3.      Cut or tear the tissue paper into pieces. Your child can choose one method or a combo of both.
Children's art

4.      Glue the tissue onto the cardboard flag drawing. Your child can collage the red pieces onto the stripes and the blue onto the star area. Let the glue dry.
Summer Activity

5.      Wet the paper thoroughly. It shouldn’t be dripping, but should be soaked through.

6.      Press the paper onto the tissue paper-covered collage. Have your child pat the paper to transfer the color.

7.      Peel the wet paper off to reveal the Independence Day print!

Yes, the July 4th flag print is backwards. If you want to make a correct directional flag, have your child make the tissue paper collage backwards (the star area should be on the top right side). In this case, the remaining collage will be backwards. So, if your child absolutely has to have the collage and the print both facing the right way, she’ll need to make two print plates and two prints.

Are you looking for more art activities for your child? Check out and follow my Pinterest board for ideas!
Follow Mini Monets and Mommies's board Creative Kids Crafts on Pinterest.

Thursday, May 29, 2014

Rainy Day Tissue Paper Tape Resist Prints

Learning about letters, science and art all in one kids' activity! A few weeks ago I posted on making a rainy day tissue paper print. Non-colorfast tissue (the stuff that bleeds its color when it gets wet) is one of my favorite art materials to work with. Kids love the magic behind the color transfer process and the results usually look pretty great. I wanted to combine this process with a simple tape resist project. Even though this activity is simple, it can help your child to explore the creative process, learn about science (the weather) and get a jump on her literacy skills (if she chooses to use the tape to make a letter or spell a word).

Kids' Prints

The weather here has been rainy, rainy and then it rained some more. If you’re experiencing the same weather, take the art-making outside and give this one a try.

Here’s What You’ll Need:

·         Paper and/or cardboard

·         Tissue paper – Do not get the colorfast kind. It won’t work for this activity.

·         Tape- Honestly, I only had masking tape, so that’s what I used. This type of tape tends to peel the paper a bit. If your child is up for exploring the process, give it a whirl without regard to the type of tape that you use. On the other hand, if she’s a perfectionist, try blue painter’s tape (it won’t stick as much). There are so many different kinds of tape out there, so choosing one that works for you shouldn’t be a problem. I just got dizzy at the amazing array of tapes at my local office superstore.  Seriously, who really needs duct tape with a picture of mac and cheese printed on it?

Here’s What You’ll Need To Do:

1.      Decide if you want to keep the paper as is or cut it out. I cut out a piece of cardboard into the4 shape of a rain cloud.

Kids' crafts
2.      Tape the design. Have your child make an abstract pattern of lines or create a letter.

Letter Craft
3.      Tape the taped paper outside and place it on a flat surface where the rain will hot it. When the tissue starts to run the colors will bleed onto whatever is below it. So, don’t put it anywhere that can’t get messy.

4.      Pull apart pieces of bright tissue paper. Pastels won’t work well.

5.      Place the tissue on the paper, covering the entre sheet.

Kids Crafts
6.      Let the rain work its magic.

7.      When the tissue is soaked through bring it inside. Set it on a garbage bag, piece of cardboard or similar barrier.

8.      Peel the tissue off to reveal the design. The folds and bumps in the tissue tend to result in an animal print-like pattern.

Art activity
 
 
Children's Art

9.      Peel the tape off to reveal the resist image.

Are you looking for more kids' art activities? Follow me on Pinterest for ideas!
Follow Mini Monets and Mommies's board Creative Kids Crafts on Pinterest.

Friday, May 9, 2014

Model Magic and Tissue Paper Planet Art Project

Earth Day art, or everyday artsy fun! Tissue paper plus Model Magic plus kids equals tons of artsy fun! If you’ve read some of my previous posts you already know (and if you haven’t – go ahead and take a look) that I’m kind of in love with non-colorfast tissue. When it gets wet it bleeds and you can make a print (even with rainwater) or even make your own water color paints.

globe craft
 
The other day I was playing with Model Magic. Yes, even adults enjoy the stiff. Try squeezing it into a ball. Not only can you do this activity with your child (it requires a ball form), but it’s a super-inexpensive stress reliever. While I was playing with the plain white version of the soft clay-like compound, I decided to add some tissue paper and water to the mix – just to see what would happen. It looked a lot like the Earth.

What You’ll Need:

·         White Model Magic

·         Green and blue tissue paper- Do not get the colorfast type. It completely defeats the purpose of this project and won’t work.

·         Paper towels

·         Water

What You’ll Need To Do:

1.      Mold the clay (it’s not really clay, but close enough) into a ball.

clay
2.      Tear pieces of green (the land) and blue (the oceans) tissue paper. Don’t worry about having your child make exact copies of the continents. It’s more about the artistic process and understanding the difference between land masses and bodies of water.

paper craft
3.      Press the tissue onto the Model Magic – it will stick. I left the top and bottom bare, creating polar ice caps.

Kids' crafts
4.      Wrap the tissue-covered ball in a wet paper towel. Let the project sit for at least five minutes.

5.      Unwrap the towel. The paper towel that is left behind has a pretty print too.

6.      Peel the tissue paper off. It leaves behind green and blue prints. If some of the tissue won’t peel off completely, your child can leave it on the globe.

Earth Day

This process doesn’t just work for the Earth. Make an entire solar system of planets. For example, use orange and red tissue to make Jupiter. Or, have your child create her own planet that’s made-up from her out of this world imagination.

Are you looking for more kids' art activities? Follow my Pinterest board for ideas galore!
 
Follow Mini Monets and Mommies's board Creative Kids Crafts on Pinterest.