Mini Monets and Mommies

Tuesday, December 9, 2014

Hanukkah S'mores: Holiday Treats for Kids

Why does Christmas get all of the good treats? What about Hanukkah? I made holiday donut s’mores the other day. They were red and green, and something that my son (who celebrates both holidays – as we are an interfaith family) highly enjoyed. Especially with the scoop of ice cream on top. That got me thinking – I should probably come up with something for the Jewish side of my son.
Chanukah dessert

(This post contains affiliate links. Please see my disclosure statement for more information).

So, I started with s’mores. They are really so simple to make, and the kids always enjoy them. And, you can get super-creative with them – without having to know how to bake! Before we get started, let me say that I don’t keep kosher. I used regular marshmallows. Regular marshmallows contain gelatin and aren’t kosher. Actually, I picked up a bag of berry blue host-shaped marshmallows for under a dollar after Halloween. Given that I didn’t open them, they were stull perfectly fresh (and the ghost shape disappeared when I heated them). But, if you do keep kosher, you can still make this recipe. Some products, such as Paskesz Marshmallows, are kosher.

Here’s What You’ll Need:

·        Marshmallows – Use blue marshmallows or add a few drops of food coloring to change the hue. I recommend adding the food coloring when the marshmallows a warm and mushy.

·        Graham crackers

·        White frosting – I used Betty CrockerWhipped Frosting (and yes, it’s kosher)

·        Blue sprinkles or blue sugar crystals

·        White chocolate

*If you want to swap out the frosting and chocolate for non-dairy items, you may do so. Instead of the frosting, heat a kosher marshmallow or two and use it as a spread. Instead of regular white chocolate, swap it out for a vegan version such as King David Vegan Lactose Free White Chocolate Chips (you’ll need a handful to replace the one chocolate square).

Here’s What to Do:

1.     Stack the chocolate and marshmallow on top of a graham cracker.

White chocolate
 
2.     Heat the stack. I microwaved it for 10 seconds. Microwaves vary in strength, so you need to keep an eye on the marshmallow. When it starts to puff out, it’s ready. Never allow your child to touch or eat the hot marshmallow.

3.     Squish the marshmallow with another graham cracker.

Holiday treat
 
4.     Spread a dollop of frosting (or a melted marshmallow) on top of the s’more.

5.     Sprinkle the blue crystal sugar over the Hanukkah treat.
Hanukkah dessert
 

Are you looking for more s’mores? Follow my Pinterest board for ideas!
Follow Mini Monets and Mommies's board Sweet S'mores on Pinterest.

Sunday, December 7, 2014

Sensory Snowman Art for Preschoolers

Snowmen art activities for the kids are in order today! Ok, so it’s not exactly winter everywhere yet. But, I’m getting ready for the season and breaking out the snowy crafts that will inspire the kiddos to create.

Sensory art
 
(This post contains affiliate links. Please see my disclosure statement for more information).

A few weeks ago we made snow people paint prints. This time we’re taking a more 3-D approach to art. Adding different dimensions and textures to art can turn what seems like just a cute little craft into a sensory adventure! While I’m all for focusing on the process when it comes to art-making, I like to remember that the activity itself can cross boundaries. For example, start with a book about snow or winter. These are a few of my favorites:

Snowballs by Lois Ehlert


Dream Snow by Eric Carle

The Snowy Day by Ezra Jack Keats

You can also add a science lesson in to the activity as well. Talk about states of matter and explore how a snowball (or mini snowman) melts when you bring it inside. Have your child observe the snow and then check back on it as it changes from solid to liquid. If you don’t have snow, try it with shaved ice. Ask your child a few open-ended questions such as:

·        What do you think is happening to the snow/ice?

·        Why do you think it’s turning from a solid to a liquid?

·        How do you think the snow would act differently if we left it outside?

·        What do you think would happen if we put the snow in the freezer?

As your child is working on the art-making aspect of the activity, ask her to use her sense of touch (and words) to tell you about how it feels. Use the word “texture”. Even toddlers can repeat the word and connect it to the sense of touch. This also helps to separate the word “feel” from emotional feelings. If you ask your 3-year-old how the snowman feels she may answer, “Happy!”  I learned this lesson the first time that I taught a sensory unit to preschoolers and got 10 adorably cute responses to, “How does the carpet feel?” These included responses such as, “Sad, because people walk on it.” So, you can ask, “How does the snowman feel on your fingers?” or, “What is the snowman’s texture?”

Now for the winter-themed art project!
Kids' crafts

Here’s What You’ll Need:

·        Cardboard – Reuse the front of an old cereal (or other) box

·        A snowman-shaped cookie cutter

·        Clear-drying school glue

·        Cotton balls

·        Googley eyes

·        Scissors

·        Modeling clay – Your child needs orange to make a carrot nose. You can use plain orange or mix red and yellow clay.

·        Thin ribbon

Here’s What to Do:

1.     Place the cookie cutter on the cardboard.
 
Cookie Cutter
 

2.     Squeeze glue onto the cardboard, inside of the cookie cutter. Your child can use one cotton ball to spread it out so that it reaches the edge of the cookie cutter pattern.

Kids' art
 
3.     Press cotton balls on the glue, filling the shape. Your child can pull the cotton apart to fit the snowman shape. Let the glue dry

Winter craft

4.     Remove the cookie cutter. Cut around the cotton balls.

Winter Theme
 
5.     Glue two googley eyes to the snowman’s face.

6.     Roll a tiny piece of clay into a carrot shape. Glue the carrot to the face.

7.     Cut a hat shape (a square with a thin rectangle underneath) out of the scrap cardboard.

8.     Attach the hat to the top of the snowman with glue.

9.     Add a scarf with a piece of thin ribbon and glue.

Winter craft
 
Your child can dress up her creation by gluing a feather to the snowman’s hat. You can leave the project as-is or have her add it to a winter weather or Christmas collage.

Are you looking for more winter activities? Follow my Pinterest board for ideas!

 
Follow Mini Monets and Mommies's board Winter Activities for Kids on Pinterest.

Thursday, December 4, 2014

Donut S'mores: Christmas Holiday Treat

We have a Christmas morning breakfast tradition in our house—donuts! It all started when my son was a toddler. He had a donut at daycare and was hooked. There was an incident where he threw a toy car at me, splitting my lip open, just because I refused to buy him a donut at the grocery store. That’s not say that I gave him donuts on the daily. That’s why the Christmas day tradition was such a treat!

Christmas Sweets
 

Along with the tree, presents and ornament craftiness, came the donut-making. Ok, so that didn’t go so well. If you have the baking skills, certainly go for it. We ended up hitting the local bakery on Christmas Eve day for our holiday sweets. This year I’m trying to come up with new ways to serve them up. I’ve been on a s’mores kick lately. Awhile back I made cupcake s’mores (I also made s’mores cupcakes – which are actually entirely different). I decided that this year we are going to make holiday donut s’mores! And since it’s a special day, why not step it up a notch? Read on for this super-simple treat:

Here’s What You’ll Need:

·        A chocolate donut – This goes in place of the chocolate bar. We chose one with chocolate frosting. Believe me when I say, the smell of the warm chocolate frosting was just about the best thing ever!

·        Marshmallows

·        Graham crackers

·        Ice cream – Yes, ice cream (I told you that we are taking it up a notch).

·        Red and green crystal sugar or sprinkles

Here’s What to Do:

1.     Slice the donut in half in the same way that you would slice a bun. Put the bottom aside (you can eat it or use it later).

2.     Place the donut’s top on a graham cracker.


Holiday Baking

3.     Stack a marshmallow on top.
 
Chocolate Donut

4.     Place the stack on a microwave-safe plate and pop it into the microwave for about 15 seconds. Microwaves vary in strength. You may need to add more (or have less) time. When the marshmallow begins to expand, take it out.

5.     Sandwich the marshmallow with another graham cracker on top.
 
Holiday S'more

6.     Scoop a spoonful of ice cream (we used vanilla, but you can choose your favorite flavor) on top.

7.     Sprinkle red and green crystalized sugar on top (or use sprinkles).
 
Donut S'mores

This s’mores recipe isn’t just for Christmas. Make a birthday donut s’more, try it for Easter, create a spooky version for Halloween or make a red and pink treat for Valentine’s Day!

Are you looking for s’more ideas? Follow my Pinterest board for lots of tasty treats!

 
Follow Mini Monets and Mommies's board Sweet S'mores on Pinterest.

Christmas Tree Finger Paint Kids' Art Activity

The other day I bought a bag of Christmas cookie cutters while shopping. I’m not the best from-scratch baker, so I was kind of thinking that I’d use them for crafting instead of cooking. As I sat staring at the tree-shaped molds I started think of a common problem that the children who I’ve taught always bring up. The “I can’t draw that!!!!!” complaint.

Tree activity
 

It’s true. A 4-year-old can’t draw or paint in the same way as an adult. That shouldn’t be a ‘problem’ when it comes to making art. Sometimes I have the kiddos start with simple shapes and then combine them. For example, a house is a square with a triangle on top. Other times, we may use stencils to help. The one thing that I never, ever, ever, ever (did I say ever enough?) do is to draw for the child. Whether I’m making art with my own child or teaching other parents’ kids, I always encourage and allow the child to make his own art.

This time, the ‘help’ provided is in the form of a Christmas tree cookie cutter. Your child can paint within the frame of the mold, but still add his own unique touch. Just because you’re using a cookie cutter doesn’t mean that this art activity has to be “cookie cutter.” Prompt your child to make his tree his own. Give him a variety of paint colors to choose from. If he goes for the blue instead of the green, let him go with it. He knows that trees have green leaves (or in this case needles).

Here’s What You’ll Need:

·        A Christmas tree shaped cookie cutter

·        Card stock paper

·        Tempera paint

·        A Pipe cleaner

·        Glitter (optional)

Here’s What to Do:

1.     Pour the paint into golf ball-sized pools on a palette or (my favorite) a piece of wax paper.

2.     Place the cookie cutter on the card stock paper.
 
Holiday craft


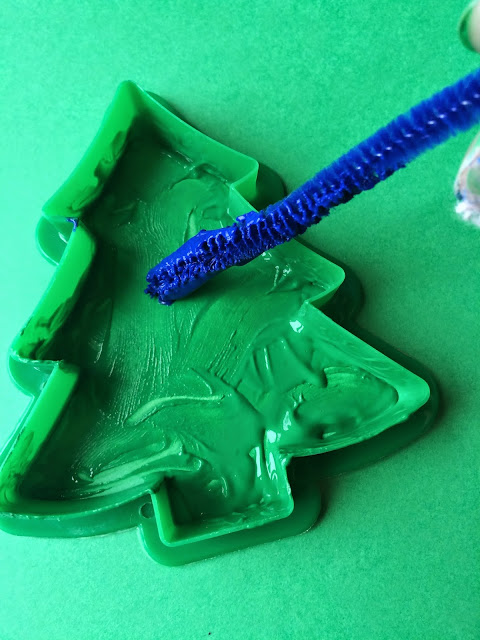
3.     Finger paint inside the tree. Have your child paint a solid color first. He can also add a second color for the tree’s stump.
 
Finger Paint

4.     Dip the end of a pipe cleaner into other paint colors. Your child can dot on the paint to make ornaments.
 
Paint print
 
Kids' art


5.     Sprinkle glitter on the paint. Make sure that the paint is still wet so that it sticks. Pull the cookie cutter off to reveal the painting.
 
Holiday Paint

Your child can also cut the tree out. He can use a hole punch to make a hole at the top of the tree, and then string a ribbon through it to make a Christmas ornament.
Another option is to add it to a holiday collage!

kids' crafts


Are you looking for more Christmas crafts? Follow my Pinterest board for ideas!
Follow Mini Monets and Mommies's board Winter Activities for Kids on Pinterest.

Wednesday, December 3, 2014

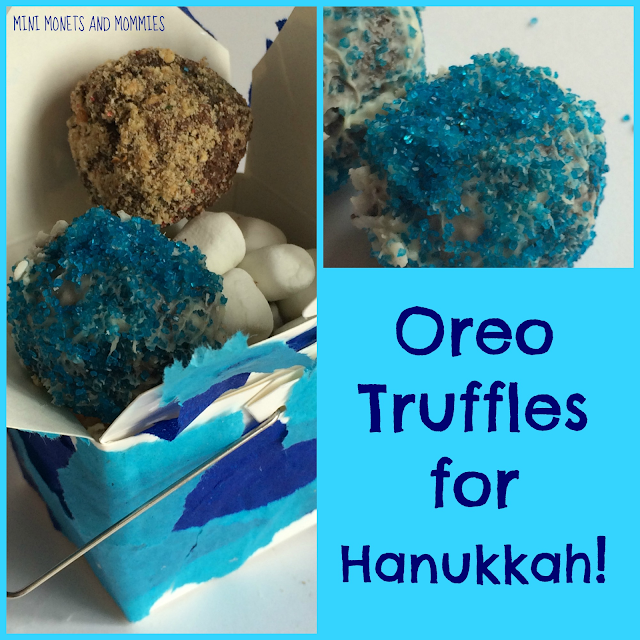
Hanukkah Oreo Truffle Balls: Menoreos!

I’ve been a bit obsessed with making Oreo balls. The sweet little cookie truffles are no-bake treats that almost anyone can make (even those of us who aren’t baking-inclined). This time I’m trying a Hanukkah take on the holiday desserts. My mother thought it was hilarious when I called them menoroes (sounds like menorah, but with the Oreo on the end). And yes, as of the late 90s Oreos are kosher (if you keep kosher).
Oreo Balls

This delicious chocolate recipe is hardly new news. Oreo cookie balls are everywhere. Walking down the aisles of my local grocery store – I see them (artistically advertised on the billboard-like centerpiece that’s taking up so much of the aisle that my cart almost knocks it down when trying to get by). On Pinterest – I see them. Everywhere online – I see them. The one thing that I have noticed is that when I see them, they are very much Christmas treats. There are red and green chocolate dipped cookie truffles, ones with red and green sprinkles and adorable teeny tiny snowmen (ok, so snowmen aren’t exactly Christmas – but do you associate them more with that holiday or Hanukkah?). What’s missing? The Oreo balls for the little Jewish kids (like my son).

I’m sure someone (or lots of someones) have made Hanukkah cookie truffles before. It often feels like there are no completely new, original ideas up for grabs. But, while experimenting with different holiday recipes (yes, I jumped on the Christmas cookie bandwagon) I also wanted to make a few that celebrate Hanukkah.

Here’s What You’ll Need:

·        1 package of Oreos -- the double stuff ones work best

·        White chocolate bars

·        Blue sugar crystals – this comes in a variety names, depending on where you shop. You’ll want to look for chunky crystals that have been colored blue. If you can’t find them you can substitute blue sprinkle or make your own with regular course sugar and blue food coloring.

·        6 oz. of cream cheese

·        Wax paper

Here’s What to Do:

1.     Crush the Oreos in a food processor. It’s tempting just to crunch them up with your hands or a potato masher. I prefer the lowest tech option, but you’ll need to make the cookies into a sand-like consistency. That requires a food processor.
 
Hanukkah Foods


2.     Pour the cookie crumbles into a bowl. Mix in the cream cheese. Use your hands (or have your child use hers). Really get in there and mash the mixture completely.

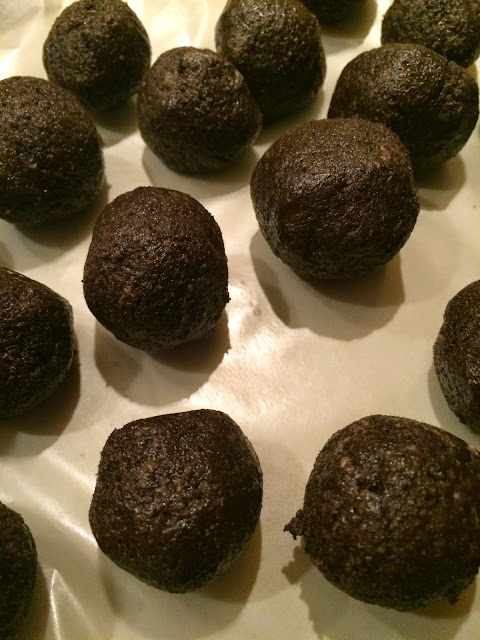
3.     Roll the mix into balls that are slightly smaller than golf balls. Place them on a wax paper-covered plate and pop them into the freezer.
 
Chocolate Truffles

4.     Freeze the chocolate mix for about an hour.

5.     Melt the white chocolate. You can do a stovetop method or you can take the easier route of microwaving it. Use a microwave safe bowl to heat the chocolate for about one minute. Microwaves vary in strength, so keep an eye on the chocolate and stop the heating process when it melts. Do not touch the melty chocolate. It will be very hot.

6.     Use a spoon or poke each ball with a toothpick to add a coating of the white chocolate.

7.     Set the truffle on the wax paper. Sprinkle the blue sugar over it.
 
Chanukkah Treats

Are you looking for more Oreo balls? Follow my Pinterest board for ideas!
Follow Mini Monets and Mommies's board Oreo Truffle Balls on Pinterest.

Tuesday, December 2, 2014

Gingerbread Man Christmas Ornament Kids' Craft

Christmas ornaments that are kid-created are the best! I’ve always found that the ones my son made held the most prominent places on the tree. While the Grinch with broken off legs and random cartoon ornaments that my son is now embarrassed that his friends might see have mysteriously vanished to the back of the tree. We’ve been making paper poinsettias, model magic shapes and all kinds of other ornaments. This one is a photo gingerbread ornament that your child can dress up in her favorite colors.
Christmas Crafts

(This post contains affiliate links. Please see my disclosure statement for more information).

Yesterday I bought a bag (yes, bag) of holiday cookie cutters. I have no intentions of baking holiday cookies. I did want to use them for a few crafty creations though. Recently, I unearthed an old tub of air dry clay from my basement art materials archives (it’s really more like a bunch or completely disorganized baskets and bags that house all things crafty). Luckily, I had sealed the lid – so, the clay inside was still soft. I figured that we might as well use it.

This is an easy-to-make art activity that kids of almost any age can enjoy. As a bonus you can personalize it and add a picture of your child.

Here’s What You’ll Need:

·        Air dry clay – We used Crayola’s Air DryClay

·        Gingerbread man shaped cookie cutter

·        Clear-drying school glue

·        A pipe cleaner

·        Scissors

·        Tempera paint

·        A photo of your child’s face – Choose one that is the size of the gingerbread man’s head (or slightly smaller).

Here’s What to Do:

1.     Roll a chunk of clay into a ball and flatten it like pizza dough.
 
Air Dry

2.     Push the cookie cutter through the flattened clay.
 
Gingerbread Shape

3.     Peel off the excess clay. Save it for another project.

Christmas Ornament

4.     Pull the cookie cutter out.
 
Kids' art

5.     Make a hole at the top of the holiday ornament with a pipe cleaner. Your child needs to do this before the clay dries.
 
Children's crafts

6.     Let the clay dry. This typically takes between one and two days.

7.     Paint the ornament. Have your child finger paint (or she can use a paintbrush if she wants) the clay.
 
Colorful crafts

8.     Cut the photo of your child’s face into a head-shaped circle.

9.     Glue the picture onto the gingerbread man’s head.

10.   Lace a pipe cleaner through the hole at the top to make a hanger (your child can do this now or earlier, before she paints). Twist it at the ends to close the pipe cleaner.
 
Ornament Art

Are you looking for more winter art activities? Follow my Pinterest board for plenty of holiday ideas!
Follow Mini Monets and Mommies's board Winter Activities for Kids on Pinterest.