Mini Monets and Mommies: science
Showing posts with label science. Show all posts

Thursday, March 23, 2017

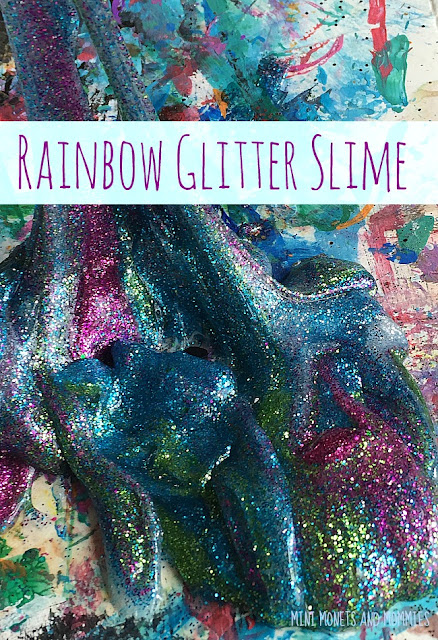
Rainbow Sparkle Slime

Who doesn’t like glitter slime? Seriously. How could your child not absolutely love it? It sparkles, it stretches and it’s so much science-y fun.

Colorful craft


(This post contains affiliate links. Please see my disclosure statement for more information.)

Learning and Development


Slime recipes are perfect for little learners. Why? Not only are they completely cool to play with, but they also include plenty of educational aspects. Yep, I said educational. So, what can your child learn and how can she develop?

·        Science: Sensory exploration (sense of touch), states of matter, exploring light and scientific inquiry (making predictions, observing/collecting data and analyzing data)

·        Math: Making measurement

·        Art: Colors

·        Building fine motor skills

Materials for the Slime Recipe


Here’s what you’ll need:

·        ¼ cup of clear Elmer’s glue

·        ¼ cup Liquid starch

·        ¼ cup of water

·        Fine glitter in a rainbow of colors

To make more of the slimy stuff, use more of each ingredient. Keep them in the same proportions.

How-To Steps


Before starting, keep in mind that this is NOT a taste-safe recipe. If your child tends to put things in her mouth or tries to eat non-edible items, this is not for her. Always supervise your child at all times and never allow her to put any of the ingredients or the finished product in or near her mouth.

Now that you’re ready to begin, ask your child to predict what will happen when you mix the ingredients together. Write down her predictions and compare them to what really happens. As the two of you go through this recipe your child can observe what’s happening to the ingredients, telling you what she thinks is going on.

1. Measure the ingredients.

2. Mix the glue and the water together.

3. Add in the liquid starch, blending it in until the mix gels. If it’s too watery, add a tiny bit more of the liquid starch.

Kids' activity
 

4. Separate the slime into piles.

5. Pour a different color of glitter onto each pile.

Sparkle slime
 

6. Spread the sparkles throughout each slime pile. Your child can use her hands to twist, mush and mash the glittery stuff in.
Glitter art

Childrens' activity

Sparkle project
 

Play Time


Now that your child has several different colors of glitter slime, it’s time to play. She can keep the hues separate or start blending them together. Try holding the stretchy, sparkly stuff up to the light. Your kiddo can move it around, exploring how the lights reflects off of it and makes the colors change.

Are you looking for more super slime ideas? Check these out!


Friday, September 16, 2016

Up! eBook Launch: Creative Kids' Building Activities

Everything is looking Up! Yeah, I know – that was super cheesy. But seriously, I’m super-excited to be part of a brand new eBook. And yes, it’s called Up!

Kids' book


(This post contains affiliate links. Please see my disclosure statement for more information).

So, what is this eBook and why do you need it? Up! has 30+ projects that include math, literacy, science art and play – with hands-on activities that help your child to make connections, get creative and ask questions. These activities have been carefully chosen to give you a wide range of explorations, across a variety of content areas, while incorporating play, imagination, math, literacy, sensory experiences and art!

Up book
 

Buy Now


Up! Includes activities from some of my favorite bloggers (and myself too!), and comes with 100 printables. The projects included are intended for children ages 4 to 10 years. This isn’t just a resource for moms and dads, it’s also a fantastic lesson planning reference book for early childhood educators. Each activity includes a materials list, step-by-step instructions and fill color photos (for some extra guidance).

What kinds of activities will you find in Up!? Well, there are plenty. You’ll find ideas to set up and develop block play, using blocks for math lessons, shape-building challenges, construction play invitations, art projects (Calder-inspired kinetic models and even upright weaving) and science projects (rockets, airplanes, parachutes, pulleys and more).
Kids' art

Up! launches September 16th, and is available worldwide for instant download. You pay via PayPal – which means that you can use any currency (and they’ll do the conversion). The price is $14.99. We have a special launch price for you. You’ll receive a 25% discount, that’s $11.25, for the first two weeks (until September 30). This is an eBook, meaning you’ll be sent a link that allows you to download a PDF file containing all of the resources. You can save the file to your computer or iPad. Read it from your device or print out the pages.

Building activities


While you can buy the eBook and download it onto some mobile devices, you may need special apps to do so (and to read it). If you have any doubts as to if your mobile device can handle the PDF, download the file to your computer first and then share it with your smart phone.
Buy Now


The Up! eBook is published and sold by Cathy James at NurtureStore.co.uk. Please direct any customer service queries regarding purchases of the eBook to support@nurturestore.co.uk or refer to the NurtureStore FAQ.


The Up! eBook is protected under
copyright © 2016. All rights reserved.


Sunday, September 11, 2016

Monster Slime for Halloween

Monster slime! Halloween is coming up and you’re looking for kids’ activities that help your little one learn, explore, develop and best of all – have fun. And, that’s exactly why I love making the ooey gooey slimy stuff so very much.

Kids' science

(This post contains affiliate links. Please see my disclosure statement for more information).

I’m all about slime-making activities. In the past, we’ve made underwater, solar system, feather and disco versions. One of my favorite things about this art-science activity (other than it combines art and science) is that my teenager still actually enjoys it! Even though my teen still thinks it’s cool (he might not ever admit it to his friends), this is a creative way for young children to build critical-thinking skills, explore science concepts and create.

So, you’re starting to think, “Eww! Slime? Isn’t that awfully messy for the kids to make?” Um, not really. This recipe is surprisingly simple, and impressively not messy. I’m not saying it’s completely clean. Come on, that wouldn’t be any fun at all, right? But, it’s not something that’s going to flow all over your family room. Okay, it’s completely possible that those itty bitty shreds of glitter will manage to embed themselves into every crease and crevice in your home. Does that really matter in the grand scale of things? Let’s just say this – don’t mix your slime up in the middle of your white living room rug, on your favorite dining room linen or anywhere that you’ll freak out if your kids get a few sparkles on.

Before starting, ask your child what she thinks will happen (in other words – make a prediction) when she mixes up the ingredients. As you go through the creation process, encourage your child to make observations (basically, she’ll tell you what she sees as it happens). When she’s all dine making the Halloween monster slime, sit back and let her play. One note: Let’s not give your very young child total freedom on this one. It is NOT taste safe. That means it should not go in, on or anywhere near your child’s mouth (nor should it go in your mouth, her brother’s or the cat’s). Always supervise your child while creating and playing with this monster-themed goo.

Here’s What You’ll Need:

·        Fine black glitter

·        Purple glitter

·        Water

·        Liquid starch

·        Clear Elmer’s glue (do not use the white school glue, it will give the black glitter a gray look)

·        Googley eyes

Here’s What to Do:

1. Mix equal parts of the glue and water. I like to use ½ cup of each. You can use more or less, depending on how much you want to make.

2. Add the liquid starch. Mix in the same amount that used for both the water and glue. I used ½ cup, because I also used ½ cup for each of the other ingredients. Now the slime is getting – well, slimy!

3. Sprinkle the black glitter in. Keep pouring it in, and mixing it, until the slime is completely colored with it. Okay, so you can use a spoon or your child can sue her hands. I find that the hand-mixing option is the easiest – and most fun.
Science activity

Goop recipe

4. Mix a few pinches of purple glitter in too!
Sparkle project


5. Drop a handful of googley eyes in to make the slime monstrously fun.
Halloween crafts

You can store the play goo in a plastic ware container (with the lid tightly closed) or in a zipper baggie.

Sunday, August 7, 2016

Oil and Water Kids' Art and Science Experiment

Okay, so we all pretty much know that oil and water don’t mix. But, does your child know? This kids’ science exploration also doubles as an easy art activity!

Children's art


To be honest, this activity didn’t exactly turn out as planned. The beginning idea was to explore marbling paper – with regular ol’ items that you’d have in your kitchen. That said, it didn’t go so well. The marbling part never really happened.

That’s okay. If I had a penny for every failed art activity – well, you can figure out the rest. Art activities don’t always come wrapped in a pretty little box with a perfectly curled ribbon on top. They can be messy and they often have completely unexpected results. But, that’s the joy of art!

This combines both art and science into one discovery-oriented activity. Start it off by making a few predictions. Ask your child what he thinks will happen when he adds the oil to the water. Will it mix into one new liquid? Won’t it? Why or why not? You’ll be adding food coloring later. When you get to that step, stop and ask him to again predict what will happen.

Keep in mind, this is an exploration and not a project where your child ‘make something’. Snap a few pics along the way. This gives you something concrete to remember. It also allows you to document the process. Print the photos, hang them up and use them as a starting point for a discussion later on. You won’t have an actual concrete ‘project’ to talk about, so doing this lets you reinforce the learning – even after clean-up time.

Here’s What You’ll Need:

·        A shallow pan – we used a shallow pie pan

·        Water

·        Veggie, olive or canola oil

·        Food coloring

·        Something to stir with – we used a chopstick, put you can also use a spoon, a straw or a stick

Here’s What to Do:

1. Fill the bottom of the pan with a shallow layer of water.

2. Drop a few drops of oil into the water. Watch what happens.
Science experiment
 

3. Stir the oil. Again, watch what happens. After your child has made a few observations, add some more oil to see what happens.

4. Drip food coloring into the oil and water. Start with the primary colors if possible (red, yellow and blue). Drip the first color in. Watch what happens. Drip in the next, and so on. Let your child see what the colors do, before he starts stirring. Observe, and talk about how they move and if they mix or don’t. Let him to tell you why he thinks this happens.

art activity
 
5. Stir the colors. Start slowly, seeing what new colors come from the primaries. Ask your child to tell you what he thinks will happen if he continues to stir them.
 
Color mixing
 

6. Keep stirring.

Science exploration
 
Make a point of exploring how the water and oil affect the color mixing. You can add to this kids’ science and art activity by making a second pan that just uses water and food coloring (in other words, don’t add the oil). Compare and contrast how the two are different, asking your child why he thinks the liquids behave the way they do.

How did your child’s oil and water color mixing experiment turn out? This is what happened to ours! Tell us what happened with yours, and share your child’s art and science experience in the comments section below.
art activity
 

Tuesday, July 12, 2016

Kids' Art and Science: Frozen Vegetable Oil Prints

What happens to vegetable oil when you put it in the freezer? That’s the starting point for this kids' art and science activity!

Science art
 

(This post contains affiliate links. Please see my disclosure statement for more information).

Okay, so I’ve never frozen oil of any sort before. I’m not sure why I ever would have. I’m not a whiz in the kitchen – and, when would there be a recipe that called for freezing olive oil anyway? What I do happen to do a lot is freeze water. No, I’m not an ice-in-every-drink type of girl. Actually, I rarely put ice in drinks. When my son was 4 we went to a friend’s house on one of those scorching hot summer days (we didn’t have AC at the time). She handed him a glass of lemonade with ice cubes in it. And, he cried. Why? He ran over to me screaming, “Mommy, she gave me lemonade with glass in it.” My son was so not used to ice in drinks, he actually thought it was glass.

Fast-forward a decade and I’m making ice all the time. Only now, it’s more for art purposes than drinking (unless my family wants to drink the rainbow-colored cubes that typically inhabit our freezer. So, this time I decided to pour some veggie oil into the mix. And, here’s where the experimenting begins…

Oh yeah, wait just a moment. Not only is this science-y fun, but it’s also an art exploration. Yep. As your child is making discoveries and experimenting with freezing different liquids, he can also create a print. Let me say now, this printing project part happened totally by accident. But, that’s one of the joys of art (and even some science activities). You don’t have to set out to make ‘something’ -- sometimes even if you do, it turns out completely (and amazingly) different than you and your child thought. What does that mean for you? Let go of the idea that everything has to be ‘right’ or look like it does on Pinterest. Sometimes going off course is better than you could have ever expected -- especially when it comes to kids' art and science activities.

And, here’s what you’ll need:

·        Ice cube tray

·        Vegetable (or olive or canola) oil

·        Food coloring

·        Light-colored or white card stock paper

·        Water

Here’s what to do:

1. Drop one or two drips of food coloring into each compartment of the ice cube tray. Try using the primary colors (red, blue and yellow). Mix them (adding one drop of red and one of blue, and so on) to make more hues.

2. Add water to half of the compartments and oil to the other half. Encourage your child to observe and describe what happens to the food coloring when he adds the oil. He can add another drop to the oil too (it’s pretty cool).

Science art
 
3. Freeze overnight. Ask your child to predict what will happen to the water side and the oil side.

4. Take the cubes out. I don’t want to give away any big secrets here, but I’m going to anyway. For those of you who aren’t up on what freezes and what doesn’t – the oil side will turn into a creamy semi-solid. Shhh – don’t tell your child. Let him explore and observe for himself. So, you can pop the ice cubes out, but not the oil cubes

5. Compare the two kinds of cubes. Your child can use his sense of sight and sense of touch to find out what the differences are. Put the water ice cubes on a piece of paper. Let them start melting. Ask your child to predict what will happen if you put them in the sun. Go ahead and put them outside or on a sunny window sill. Make sure to out cardboard, a garbage bag or something else under it.
Kids' art

6. Scoop out the oil cubes (they won’t pop out). Put them on another piece of paper. Ask your child to describe the differences between the oil and water cubes (when he puts them on the paper).
Vegetable Oil

7. Play! Your child can smoosh, smooth and push the food coloring-oil cubes around. Ask him what words describe how they feel (such as slimy).

 8. Go back to that other paper (you know, the one with the water ice on it). As the cubes begin to melt, your child can paint the paper with them. Compare the two paintings (the one with the water ice and the other with the oil ice).

Children's science

9. Drip the excess water (and remove any un-melted ice cubes) from the paper. Turn it over and press it onto the front of the oil-food color paper. Press or pat it together. As your child pats the surface, some of the oil and the food coloring will seep through. What’s the result? An abstract-looking print!
Art Activity

Science print

Keep experimenting with the oil, food coloring and ice (to keep the kids' art and science activities going). Your child can mix together colors, blend the different liquids and see what happens when you try to re-freeze the paper!

Thursday, June 9, 2016

19 Kids' Slime Activities

Kids’ slime activities! They’re full of science fun, encourage an artistic sense of imagination and are perfect for sensory play.

Kids' activities


(This post contains affiliate links. Please see my disclosure statement for more information).

Slime is relatively easy to make. My favorite recipe includes equal parts clear Elmer’s school glue, liquid starch and water. But, there are tons out there. That’s why I’m bringing you some of the most creative versions that I’ve seen – along with a few of my own!

Kids' science
 

1. Solar system. It’s got stars, planets and glitter.

Slime recipe
 

2. Underwater ocean. No planets here. This recipe has fish, sharks and any sea creatures your child can make.

Underwater activity
 

3. Disco. It sparkles – need we say more?

Disco art
 

4. Feathers. A super sensory experience for your kiddo.

Feather crafts
 

5. Alien. If an outer space being had a nasty cold, this is what you’d get.

6. Patriotic. Red, white and blue.

7. LEGO. Brick by brick fun from Lemon Lime Adventures.

8. Sand. Little Bins for Little Hands made this beachy science version.

9. Fluffy and squishy. Oh the sensory fun, courtesy of Sugar Spice and Glitter.

10. Jungle. Go green with this recipe from Buggy and Buddy.

11. Alphabet Fybogel. Adventures of Adam made this letter mixture.

12. Fluorescent. Can I just say that this glowing concoction from Go Science Girls is amazingly awesome?

13. Shampoo. It’s not just for clean hair. Play and Learn Every Day used it to make slime for kids with sensitive skin.

14. Writing tray. Sugar Aunts helps your little one build fine motor skills with this hands-on (literally) activity.

15. Paint. Yep, your child can make art with the ooey, gooey stuff.

16. Googley Eyes. It’s like a puddle of monsters – from Adventures of Adam.

17. Cornflour. It’s a cool ingredient that Learn with Play at Home used.

18. Chocolate. Little Bins for Little Hands made this sweet smelling mix!

19. Bird seed. Sugar Spice and Glitter adds the totally textured ingredient to their activity.

Sparkle craft
 

Now that you’ve got plenty of ideas to choose from, it’s time to play. Stretch it, squish it or even paint on it (really – your child can finger paint or get the brushes out to decorate flattened slime). Kids' slime activities provide plenty of opportunities to explore, make discoveries and work out those fine motor skills!


Monday, June 6, 2016

Slime Recipes for Kids' Process Painting

Homemade slime recipes are kind of awesome! Okay, so these kids’ science activities are way more than awesome – they’re super, extra, amazing sensory fun.

Slime paint

(This post contains affiliate links. Please see my disclosure statement for more information).

We’ve made all kinds of slime – solar system, patriotic, alien, feathered, disco, underwater and more. The latest concoction to hit our art table (and, my 14-year-old actually still enjoys this activity) was a sparkle sea ocean creature version. We used glitter to turn the clear goo into an ocean-esque color. Some recipes call for food coloring, or similar products, to color the slimy mix. I prefer fine glitter.

Why use sparkles? Well, I kind of think everything is better with a little glitter. If you use enough it completely colors the slime, and leaves almost no mess behind. It also adds a super-cool sheen. So, why not?

Back to ocean slime activity. After adding little clay sea creature sculptures to it, we found a secondary use – as a painting base. Some people use a canvas, apparently we use goop. But, really… if your kiddo is done with the sensory exploration and you don’t want to store (or toss) the slime, you can use it for this art activity. The slippery, goopy texture adds another layer to your child’s process painting fun. Whether she uses a brush or her hands (I recommend finger painting), it’s an unexpected canvas that’s totally different from what she’s used to.

First things first, you’ll need some slime. Like I said, we used our ocean recipe. But, you can make any color base you want. Here’s what you’ll need:

·        1/3 cup clear Elmer’s school glue

·        1/3 cup water

·        1/3 cup liquid starch

·        Fine glitter – in any color your child wants (or mix a few into a rainbow)

Here’s What to Do:

1. Add the glue and the water together. Mix.

2. Pour the liquid starch in. Mix. It’s pretty slimy now!
Slime art

3. Stir in the glitter. Fold it over and over and over again.

Sparkle project


Now it’s time to paint. Grab your favorite temperas and pour them onto a palette (I like using a sheet of wax paper – it’s inexpensive and really works). Spread the slime across the paper. Make a blob, cloud or other shape.
Slime recipe

Children's project

Sparkle art
 

Paint! Your child can brush on a few hues (we made Monet’s Water Lilies in slime paint). Or, go abstract with a process painting splatter ala Jackson Pollock. Who knew such simple slime recipes could turn into artsy fun?
Paint process