Mini Monets and Mommies

Friday, July 24, 2015

How-to Be a Freelance Writer in 7 Easy Steps

So, I googled “how to become a freelance writer” just to see what the Internet had to say.

Writing career

Actually, I googled “how to become a freelance writer” as I was trying to type and check my email (on my phone) at the same time. Typos aside, I got a lot of amazingly generic advice. “Like what?” you ask. Here are a few of my favorites:

·        Be a good writer.

·        Have self-discipline.

·        Set goals.

·        Be able to communicate clearly.

·        Maintain a professional attitude.

·        Have the ability to motivate yourself, even in the face of mass rejection.

Freelancer guide

I’m going to be brutally honest here, if you actually said to yourself, “Holy wow, those are such helpful ideas!” right now you’re a little more than a step behind in the freelance writing game. That isn’t supposed to be mean – just a bit snarky I suppose. But seriously, you already know that the above mentioned traits/ideas are necessary for any kind of freelance or writing career. What you probably want to know is something that’s less obvious.

I can’t say that I have all the answers. Far from it. There are freelancers out there who have crazy-good careers and make much more money than I do, and then there are those who make less. What I can give you is some friendly advice. A few tips from my own personal experience. These aren’t general ‘go to journalism school’ types of suggestions. They are what I’ve learned from my own successes and failures. Please keep in mind, everyone has their own niche and what worked for me (or didn’t work) might not fit your career.

1.     Speaking of niches – find yours. It took me a surprisingly long time to call myself a ‘parenting writer’. That’s basically what I am. I’ve written everything from home décor and DIY content to fashion and style, but what I truly enjoy is writing for parents. When I write about dental health, dressing for success or how to lay a ceramic tile floor you can really tell that my heart’s just not in it. If the topic you’re writing about bores you, it will show. Find what you’re passionate about and try your best to write about it.

2.     Steer clear of “sign up with us to become a real freelance writer” sites. Or, at least don’t stick with them for long. If you want to read my thoughts on content mills, check out my article on these sites. I made quite a good living off of content mills for a few years. That said, I hated what I was writing and got way to complacent. I wasted years creating mass amounts of crappy content for maybe $25 an article.

3.     Build your social media following right now. Immediately. Why? There are lots of reasons. Maybe you want to start your own blog. You need somewhere to promote yourself. Even if you’re writing for other people, you still need to promote your content – or theirs. This isn’t always as straightforward as it seems. For example, let’s say it’s between you and another equally as talented writer. You have a Twitter following of 10 and the other choice has a following of 10k. Guess who’s getting the job. Um, the person who’s actually able to tweet the content out to more than her BFF, downstairs neighbors and parents.

4.     Prepare proposals. Here’s a story – a potential client asked me for an email explaining my approach to his article. This was for a one-time only job. I replied with a detailed outline that clearly spelled out the structure of the post. He hired me. That turned into an ongoing professional relationship that brought on more work than I could have imagined when crafting that outline.

5.     Don’t say no. Let me rephrase that – don’t say no unless what the client is asking is completely ridiculous. I’ve been asked to write a 1,000 word article for $5. That was a big N-O! If the work aligns with my niche and the client is paying a fair price, I tend to take it. You never know when ‘an article’ will turn into months of consistent pay (see the above example). You also never know when that one random article will get seen (and read!) by someone truly important. Don’t miss out on what could be an amazing opportunity because you’d rather watch the Real Housewives of somewhere or another instead of writing (and yes, I actually have done this).

6.     Value yourself, in a totally realistic way. Go back to that $5 I was offered for 1,000 words. Someone probably will offer you a similar deal. Have some self-respect and don’t do it. At the same time, set your rates at a fair price. If you’re just starting out, don’t expect to make hundreds of dollars per 400 word blog post. It would be nice, but it’s just not likely here in the real world. Don’t quote me on that though. There are freelancers who’ve struck it big from the get-go.

7.     Join a community. Freelancing isn’t exactly a communal experience. Many of us started on this career track as a way to work from home. When you’re going it solo there’s no morning ‘water cooler’ gossip session, no one to bitch at when you’re having a bad day and no one to grab a quick bite with on your lunch break (and eating the leftover crusts from your kid’s PB&J as he finger paints with his pudding doesn’t count as a social lunch date). Joining a Facebook (or similar social networking) community for freelance writers has helped immensely when it comes to finding camaraderie at ‘work’.


At-home careers


P.S. The title was meant to grab your attention. I don’t take myself seriously enough to really think there are seven easy steps to becoming a freelance writer. There are suggestions, advice and tips, but as far as steps go – I don’t believe in them. You won’t find a mystical formula to freelancing, there’s no guide that has all the answers and while magical beans may grow a beanstalk up to the sky, they won’t give you a new career. If someone tells you otherwise, be weary. They are probably just trying to sell you something. Are you considering making the big switch from working outside the home to being a WAHM? My new book Work at Home: A Guide to the Best Change You'll Ever Make has ideas (and worksheets) to help you make the transition!


Thursday, July 23, 2015

Key Lime Pie Oreo Cookie Truffle Balls

Key lime pie is one of my absolute favorites. That said, I’m not at all confident in my ability to actually bake one. So, when Oreo rolled out their special edition Key Lime Pie flavor I was all over it.

Lime pie

(This post contains affiliate links. Please see my disclosure statement for more information).

Even though I can’t bake a passable pie, I can make a mean cookie truffle. These little no-bake treats are super-simple and taste like mini cheesecakes (yay!). In the past I’ve made cotton candy, pumpkin and chocolate pretzel Oreo balls. The key lime variety are possibly my favorites so far. Remember, I said possibly – so you should still check out the other ones.

Here’s What You’ll Need:


·        Graham crackers

·        White chocolate

·        6 oz. cream cheese

·        Green food coloring – or you can mix yellow and blue together if you don’t have green.

Here’s What to Do:

1.     Crush the Oreos in a food processor.
 
No-bake dessert

2.     Mix the softened cream cheese with the cookie crumbles. Use your hands to get a good mix.

3.     Roll the mixture into balls.

4.     Pop the balls
Dessert recipe
into the freezer for at least an hour.

5.     Take the cookies out of the freezer.

6.     Put the graham crackers into the food process and crush them.

7.     Melt the chocolate. I used an easy microwave method – break the chocolate into pieces and microwave it for about one minute (microwaves vary in strength, so you may need more or less time). Be careful, the chocolate and the bowl will be hot. Don’t touch it with your bare hands.

8.     Stir the food coloring in.

9.     Coat the cookie balls with the chocolate. Use a spoon so that you don’t have to touch the hot chocolate.

10.  Sprinkle with the graham crackers.


Key limes

Are you looking for more great desserts? Follow my Pinterest board for ideas!
Follow Mini Monets and Mommies's board Great Desserts on Pinterest.

Wednesday, July 22, 2015

Animal Cookie Ice Cream S'mores Sandwiches

I’m kind of crazy when it comes to s’mores. Even though I wouldn’t say no to the typical graham, chocolate, marshmallow stack, I like to go a step above. That’s where these animal cookie ice cream sandwiches come in.

Animal Cookie

It’s summer now (if you’re reading this at some time in the future, you can still make these tasty treats in the fall, winter or spring), and I was looking for a chilly dessert that was also easy to make. I’m not exactly the best cook/baker, and turning on the oven when the weather guy just said that the heat index is making it feel like it’s between 95 and 100 degrees just doesn’t sound like a good idea. So, I’m going for something cold that requires assembly – not actual cooking. If you’re thinking, “Well, that sounds kind of lazy,” it might be. Honestly, sometimes I want to make an easy treat that really requires no special skill.

Think about it – you’ve been at the pool and the playground for most of the day, then you raced off to the grocery store right before you had to simultaneously cook dinner, keep the kids entertained, wash out everyone’s swimsuits and wash the muddy footprints off of the floors. Whew! It’s time for an ice cream s’more. The kids will enjoy it, you’ll enjoy it, and everyone gets a little break at the end of a busy day.

This is also a simple dessert for a birthday party or warm-weather cookout. If you’re having a circus, animal or carnival themed party, this kid-friendly recipe is a perfect match!

Here’s What You’ll Need:

·        Graham crackers

·        White chocolate

·        Frosted animal cookies

·        Ice cream – I used vanilla and strawberry to match the cookies’ colors, but you can choose any flavor that you like.

·        Marshmallows

·        Sprinkles

Here’s What to Do:

1.     Crumble the cookies into chunks.
 
Frosted treats

2.     Mix the cookie crumbles with the ice cream. Put it back into the freezer until you’re ready to use it.
Ice Cream

 
Chilly Dessert

3.     Stack the chocolate onto a graham cracker.
 
Graham Crackers

4.     Toast the marshmallow. If you have a campfire, great use it. If not, you can microwave the marshmallow (with the graham cracker and marshmallow) in the microwave for roughly 10 seconds. Microwaves vary in strength, so you may need more or less time. You can also toast the marshmallow in a fire pit or in the oven (put it on a graham and heat at 325 degrees until it browns on top.

5.     Put the marshmallow on the chocolate.
 
Graham Crackers

6.     Spoon the ice cream on top.

7.     Sandwich the stack with another graham.
 
Kid-friendly treat

8.     Top with some more ice cream and sprinkles.
Ice Cream Sandwich

Are you looking for more s’mores? Follow my Pinterest board for ideas!
Follow Mini Monets and Mommies's board Sweet S'mores on Pinterest.

Sunday, July 19, 2015

Create Abstract Art with Frozen Paints

I’m a fan of abstract art. Ok, not so much of viewing it in a museum. Instead, more of kids’ art activities that involve some sort of abstract process. I’ve spent years teaching children in an art museum. I’ve sat the kiddos down in front of everything from ancient Egyptian pottery to Jackson Pollock’s paint splatters and gotten the chance to hear some fairly funny insights. My absolute favorites always come from the more abstract pieces.

Abstract Art

Something interesting happens when a child looks at art that doesn’t look like ‘art’ in the traditional sense. In my experience (which I’m in no way generalizing to every child out there) the kids who I’ve taught viewed abstract art through the lens of being child-made. It looked so familiar to them, so much like what they create, that they talked about it in very much the same way that they talked about each other’s art. It was familiar – not foreign like a Renaissance ‘masterpiece’ or 19th century landscape.

I hear a lot of, “Hey, I could have made that” or, “Yeah, my kid could have painted that” when adults talk about abstract art. I don’t really ever have a good response when it comes to what the difference is between a 4-year-old’s paint splatter and an adult-made piece that’s worth millions and hangs on a museum’s wall. There are all kinds of answers that range from, “Well, you didn’t think to paint that” to, “The artist has a deep-seeded intentionality and there is an obvious symbolism to the work” that I’ve heard others say in reference to these questions of artistic creation. In many ways I think that an adult has to let go and get that special freedom of thought (and creativity) that children have back. The ability to create without fear and let art by art – without trading the fun for finesse. In that respect, I’m big on letting children explore the process and be abstract if they want to be.

All of that said, sometimes ‘abstract art activities’ can become old hat. It’s yet another Pollock splatter painting with temperas and thin brushes or the same old Picasso-esque mixed-up face shape collage. I like to add a little something different (even if it is just slightly different from the norm). This time I’m doing a paint splatter, but with ice instead of the tempera/brush technique. It’s part science, part art and all abstract. It also has a little something extra special – glitter! If your child isn’t into the sparkly stuff (does any child really not like glitter?), you can leave that out.

Here’s What You’ll Need:

·        An ice cube tray

·        Card stock paper (or another thick paper)

·        Food coloring

·        Water

·        Glitter (optional)

Here’s What to Do:

1.     Drip a few drops of food coloring into each compartment of the ice cube tray.

2.     Add water.

3.     Sprinkle the glitter in.
 
Frozen art


4.     Freeze the paints.

5.     When completely frozen, pop the icy water colors out onto the paper. I suggest prepping for the mess by putting a garbage bag or some other tarp-type barrier down on the work surface. You can also take this frozen activity outside. If it’s warm out, the temperature speeds up the melting process – making it easier to spread the color around.

6.     Keep three or more cubes on the paper.
 
Kids' Activity

7.     Gently fold the ends of the paper together. Don’t crease it, just make a curved cup.

8.     Jiggle, toss and bounce the cubes around. This splatters the paint and mixes the colors together.

9.     Open the paper to see what the frozen art looks like.
 
Children's painting


10.  Repeat if your child wants. Add more colors or keep the same ones on the paper.
 

Are you looking for more kids’ art activities? Follow my Pinterest board for ideas!
Follow Mini Monets and Mommies's board Process Art for Kids on Pinterest.

Friday, July 17, 2015

Frozen Glitter Ice Paint for Kids

Does child adore Elsa? Is he over-the-top for Olaf? Then this Frozen kids’ activity is for him. Yes, it’s ‘Frozen’ like the Disney movie, but it’s also freezing too.

Science kids

Maybe it’s the summer heat or maybe it’s just a desire to use my new set of ice cube trays, but I’ve been doing icy exploration after icy exploration – ice building blocks, experiments, freezing chalk paint and now sparkling, glitter Frozen water colors!

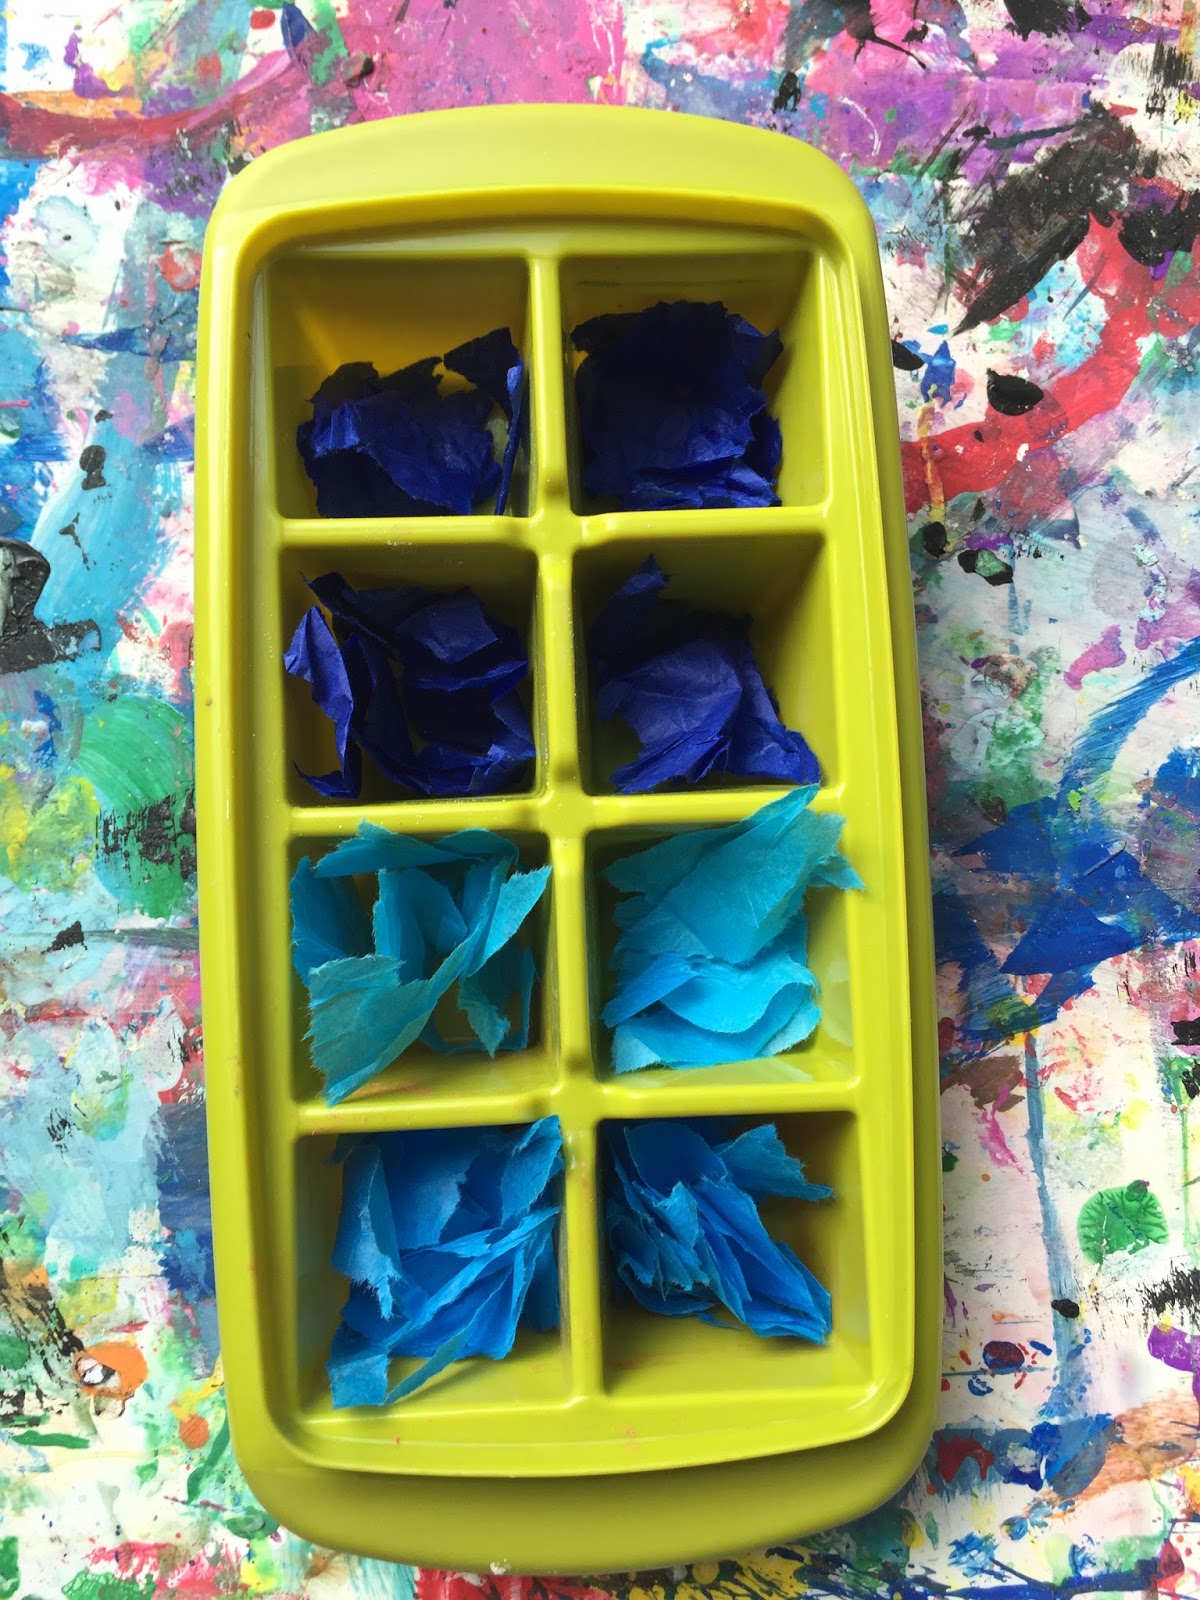
This kids’ activity combines art and science. Sure, it’s got gaggles of glitter. But, it also includes a bit of exploration and discovery. You can make the Frozen ice cubes one of two ways – use food coloring or go with tissue paper. If you’re asking what tissue paper has to do with making icy blue sparkle cubes, keep reading to find out. It’s a really cool (I’d say no pun intended, but it was just too good to pass up) project.

Before you get started ask your child to predict what will happen when you freeze the colorful water. Ask if he thinks the glitter will freeze too. After the exploration is over, talk about your child’s predictions. Remind him of what he said and have him compare that to what really happened.
Water colors

Here’s What You’ll Need:

·        An ice cube tray

·        Blue tissue paper – Do not use color-fast paper. It won’t work for this activity.

·        A straw or paintbrush

·        Blue food coloring

·        Blue glitter

·        Water

·        Card stock paper

Here’s What to Do:

1.     Tear up the tissue paper into pieces. Try a few different shades of blue to see what happens.
Kids' art

2.     Put the tissue into the ice cube tray.
 
Paper art

3.     Fill each compartment with water.
 
Science activity

4.     Let the tissue color bleed into the water, stirring periodically with a straw or paintbrush. Your child can compare the different shades of blue to see if they look different. Our lighter blue didn’t work at all – sometimes these things just don’t come out like you think they will. But, the deep blue did work well.
 
Art activity

5.     Fill any remaining compartments (or use another tray) with water and a few drops of blue food coloring.
 
Frozen art

6.     Stir the food coloring.

7.     Sprinkle glitter across the top, covering the water completely.
 
Sparkle activity

8.     Put the colorful sparkle cubes into the freezer.

9.     Pop the frozen cubes out when they are ready.

10.   Paint with the blue glitter water colors on the card stock paper.
 
Ice Science

11.   Optional: Add a layer of school glue (your child can paint it on) first. This gives the glitter something to stick to.

When your child is finished painting with the ice, ask him about the liquid to solid to liquid transformation that just happened. Talk about the water and why it turned into ice. Have your child explain (in his own words) what happened to make the ice turn back into water again. You can also discuss the tissue paper and why the color came off of it. Instead of telling your child, let him tell you!
Glitter project

Are you looking for more science and art activities? Follow my Pinterest board for ideas from around the Internet!
Follow Mini Monets and Mommies's board Preschool Art and Science Activities on Pinterest.

Monday, July 13, 2015

10 Reasons Not to Write for a Content Mill

So, you want to be a freelance writer? You’ve heard that content mills are the place to begin, and are wondering what they’re all about. If you want to write online (is there really anywhere else to write these days?), content mills are totally tempting.


Freelance writer


Shortly after I started freelancing a fellow writer told me about this website that had thousands of article titles to choose from, paid every few days and was guaranteed work whenever I wanted it. I jumped at the chance. That was in 2009. Fast-forward six years and I’ve moved on. As a recently reformed content mill junkie, I’m going to share my thoughts on why this is NOT the place to create your career.

1.     The pay sucks -- seriously. When I started, I was writing $7.50 articles. Eventually I was making $25 an article. But, in the grand scheme of the online writing world that really isn’t a decent wage. Private clients will pay you more. How much more? It depends. It could be $50, or it might be $500. I have blogging friends who won’t write a guest post or a sponsored post for less than $150. So, why on Earth is it ok to pay someone $7.50 for the same amount of work?

2.     There’s no negotiation. I’m a terrible negotiator. That said, I’ve managed to get a fair price from almost all of my clients through the process. With content mills the pay is standard across the board. You accept it, or you don’t.

3.     It’s boring. My topic of choice is ‘kids’ art activities’. Second to this is ‘parenting’. I actually started my blog out of frustration brought upon by not being able to write about what I truly loved. If you don’t particularly mind writing a dozen articles about emergency dental procedures one day, decorating tips for middle-aged men the next and fascinating facts about oak trees after that, content mills might be a perfect match. On the other hand, if you want to use your professional or educational background, don’t do it.
 
Working writer

4.     It’s kind of weird. Some mills use a computer-generated titling or keyword selection tool. This makes the content somewhat off. I’ve written stupendously stupid titles such as, “Places to Hang My Purse” (um, if you can’t figure this one out on your own, you’re probably not smart enough to google it either) and, “Is It a Beaver in My Backyard?” (maybe, I mean if it looks like one). Some companies won’t give you titles. Instead, they give you keywords to work with. These too can be odd, and while they do make sense as search terms they don’t flow naturally. For example, “outdoor activities summer kids”. What am I going to do with that?

5.     You’ll get lazy. Complacency is not a good thing, especially when you’re a budding freelancer. You’ve got to get out there and really sell yourself. No one will hustle for you, and if you’re not hustling you’re not getting any work. I had steady work through a content mill giant for a few years. I had enough work that my student loans went from an economic hardship deferment to the income-based repayment plan to full repayment. In other words, I was making a pretty great full-time income while I was sitting on my couch, watching the Real Housewives of some place or another and writing about purses and beavers (among many other things). I completely stopped looking for clients and tossed out the idea of starting my own blog. Why mess with a good thing, right? Nope, na-ha, now way, couldn’t be more wrong. When the mill fell apart, many of us lost some serious work. I went from a steady income to nothing. After years of what I know realize was wasting time, I had to start over and build a client base.

6.     The cookie cutter-ness of it will make you crazy, stupid or both. I got so used to writing in one format, with one style that I forgot to be original and use my own voice.

7.     Rushing work will become the norm. I have blogger buddies who spend hours on one post. Had I done that while working for content mills I would have made almost nothing. At my work-load height I was writing between eight and ten 600+ word articles per day.

8.     Real publications might not respect your work. When I submit online writing samples to potential clients I never, ever use my mill work (some of it is published under my name, while others were ones that I had ghost-written).

9.     There’s no real client-freelancer relationship. I enjoy the online interactions that I have with my private clients. I like the friendly emails and sometimes we even talk via phone or FaceTime. On the flip side, unless you’re emailing the tech department of the content-producing site because your editing window refuses to accept changes or you can’t log into your account, you may as well be working for the same computer program that’s picking those weirdo titles.

10.   You want a career. Content mills rise and fall. They overflow with an abundance of work for thousands of writers, and then abruptly shut down. Instead of putting your faith and talents into one of these sweatshops for writers, put it in yourself. Build your skill, confidence and brand – and contribute to your own success!