Mini Monets and Mommies

Sunday, December 20, 2015

Craft Felt Christmas Card Art Activity

Christmas cards that you buy at the store? Sure. There’s no shame in that. We’re not all craft and there’s never enough time. But, if you’re already looking for a kids’ art activity and you have a smidge of time on your hands (at least enough to help the kiddos get artsy) – then why not try this handmade holiday greeting card?

Tree art

(This post contains affiliate links. Please see my disclosure statement for more information).

It's a felt board and a holiday greeting all in one! Not only do you get a kid-created card out of this activity, but your child gets to play in an artsy way, build fine motor skills, learn about colors and even practice some math (geometry, patterns and part to whole relationship). You can go one of two ways with this Christmas card: 1. Use glue. Choosing this option lets your child make a permanent greeting (and keeps the felt pieces in place). 2. Don’t use glue. Why wouldn’t your child use glue? He can make a ‘pieces pouch’ inside of or on the back of the card, including parts of the scene or design that he’s planned out. Friends and other family members (who are children) can then puzzle together the felt pieces and create their own Christmas décor.

Here’s What You’ll Need:

·        8x10-inch sheets of craft felt (in different colors)

·        Scissors

·        Clear-drying school glue

·        Cardboard (reuse the front of an old box)

·        Fabric markers

Here’s What to Do:

1. Cut the cardboard into a rectangle. Choose the size based on how large you want the card to be (it needs to be smaller than the craft felt sheets).
Reused art

2. Sandwich the cardboard between two craft felt sheets.

3. Fold the felt and cardboard in half, making a card.

4. Glue the felt to the board. Let your child paint it on with a thin brush. While the glue is still wet you may need to slide the felt around to make room for the fold.

Glue art

 
5. Cut any excess felt from around the edges.
Holiday project

6. Create felt pieces that make up a Christmas scene. For example, your child could cut a green triangle to make a tree, a brown square for the tree stump and colorful circles as ornaments.
Christmas art

7. Puzzle together the pieces on the front of the card.
DIY card

8. Optional: Glue the pieces to the felt on the front.

9. Or, your child can cut another sheet of felt in half. Glue the bottom and sides to a middle page or the back of the card, making a pocket.

10. Stash the pieces for the front in the pocket.

11. Use the markers to write a message in the center of the card.

Are you looking for more kids’ Christmas activities? Follow my Pinterest board for ideas!

 
Follow Mini Monets and Mommies's board Christmas Activities for Kids on Pinterest.

Friday, December 11, 2015

Kids' Goal Setting Art Activity: Christmas Tree Ornament Craft

Do you need a class Christmas or holiday activity for your students? This goal-setting holiday tree is super-simple to create, lets kids get crafty and helps them to take ownership of themselves while looking towards the future.

Kids' art


I teach a children’s martial arts class, and setting goals is par for the course. Whether it’s something immediate or something more long term (such as passing a belt test), creating a goal is a step that every child needs to know. It helps the child to focus and, when the child meets the goal, gives him a true sense of pride in accomplishment.
But, simply saying, “Let’s set a goal!” doesn’t always work for every child. Some kids, especially younger ones (in kindergarten and younger), may have difficulty understanding the concept. With the holidays coming up I decided to take the goal-setting concept and make it a bit more concrete. I asked each child to make a paper Christmas ornament for the ‘Goal Tree’. You can easily adapt this project for any kind of class (preschool, elementary school or an extracurricular or arts class). This activity also works for sports teams or for parents at home.

What’s a ‘Goal Tree’? Easy – it’s a Christmas tree that is entirely decorated with the children’s goals. I started with paper ornaments. Simple circles with “My goal is…” on one side. You can download and print them here:

 
Setting goals template


Print the ornaments to whatever size you need. I used different colors of paper that corresponded to my students' belt colors, but you can go with traditional Christmas red and green, a wintery snow white or any other hue that you'd like. After talking about what a goal is, the kids wrote their picks under, “My goal is…” They drew a picture of the goal on the other side. Next, we threaded yarn through a hold punched at the top and hung the artwork on the tree (we got a mini Charlie Brown-looking tree).

Ornament Craft

Children's Ornaments
 

The plan is for the children to take home their ornaments before the holiday break. They can also use them for New Year’s, turning their ornament goals into next year’s objectives.

Setting goals
 
Even though our goals seemed to focus on karate (I told the children that they could pick any goal), your students’ can revolve around anything that you chose. Some ideas include goals for at home (such as be a better brother or listen to mom and dad more), school (e.g., get better grades, pass every spelling test or pay attention to the teacher) or other areas (be a better friend or help others more often). Encourage the children to get creative with their goals. Keep in mind, social and behavioral goals are equally as important as the academic ones.
Kids' craft
 If you want to keep the 'Christmas' theme out, you can simply call this a goal tree or holiday tree. You can swap in a large potted plant or your own sculptural tree for a pine.

Are you looking to add some creativity to your classroom? Want a few art activities for the kids to try out? Follow my Pinterest board for ideas galore!
Follow Mini Monets and Mommies's board Creative Kids Crafts on Pinterest.

Wednesday, December 9, 2015

7 Ways to Make Finger Painting More Fun!

Finger paint is ... There are lots of ways to finish this sentence. Most kids would say fun or cool, some moms may echo this sentiment, and others would say messy, a pain in the butt or the thing that stained my precious white carpet blue. Whether you love, hate or have a love-hate relationship with finger paint, you can up the creativity factor by adding a little something extra in.

Art Ideas


(This post contains affiliate links. Please see my disclosure statement for more information).

Try one (or all) of these options that add texture to the painting process or change the quality of how the medium feels:

1. Play sand: Don't take that dirty, mud-crusted sand out of your little one's backyard sandbox to use for his art adventures. Buy new play, or craft, sand instead. Add in enough sand to make the paint feel rough.
Colorful art
2. Baby or vegetable oil: A few teaspoons of oil will make the already slimy paint even more slick. This is ideal for little hands that want to slide and glide across the paper.
3. Kosher salt or course sugar: The mega-sized crystals will roll and spin under your child's fingers as he mixes and mashes them into the paint.
Salt art

4. Cotton balls: If you have the desire to make a messy project even messier, this one's a must. Hand the cotton balls over to your child, letting him have the honors of pulling them apart. Mix the cotton strands in with the paint. As he finger paints, they'll create a heavy texture and tornado-like design.
5. Glitter: Who doesn't love glitter? Most likely your vacuum cleaner doesn't. Let your child mix sparkling golds, greens, bronzes, silvers and rainbow assortments of hues into his finger paint before he starts his masterpiece or give him the go-ahead to our it directly onto a piece of paint-covered paper to play with. Did I mention that this is uber-messy? But it's pretty!
Sparkle Craft

6. Crushed leaves and grass clipping: Get back to nature. Go outside and collect fallen leaves or grass clippings in a paper bag. Roll the bag down, crunch up your green materials and spill them into the finger paints. The end result is a naturally bumpy, lumpy painting experience.

Nature art


Kids Plants

7. Flour: No, not flowers (which you can add to the previous suggestion). Spoon in some flour and you'll have instantly thicker finger paints that have a gluey consistency.
While I enjoy finger paint about as much as a toddler does, I am not a fan of the mess. To make the most of the activity -- minus the worry about paint spilling everywhere -- I have three words for you: Prep, prep, prep. Throw down some newspaper on your kitchen table (although heavy, watery paint will seep through) or go with something more substantial such as an old shower curtain liner or painter's tarp.

Kids' Art
There's virtually no way to mess-proof your kid. I suggest dressing him in clothes that you don't really care about. Even though the red finger paint says that it's washable, if you happen to let it sit for a few days it's not as likely to come out. One time, during a preschool art class that I was teaching, I had a 4-year-old ask me if he could have rubber gloves so that his fingers wouldn't get messy while painting. Here's my answer: NO! This project is all about exploring the paint and getting messy in the process. If your child freaks out over the mess, try something that is more on the tame side such as the "clay paint" I describe in the previous post.

Tuesday, December 8, 2015

Christmas Melting Ice Art and Science Kids' Activity

It’s almost Christmas! And that means – red and green food colored ice? Ok, in this case it does. Combining art, science, math and engineering (STEAM without the technology) gets kids thinking, doing, making and imagining. It also helps to build fine motor skills, creativity and much, much more.

Ice art

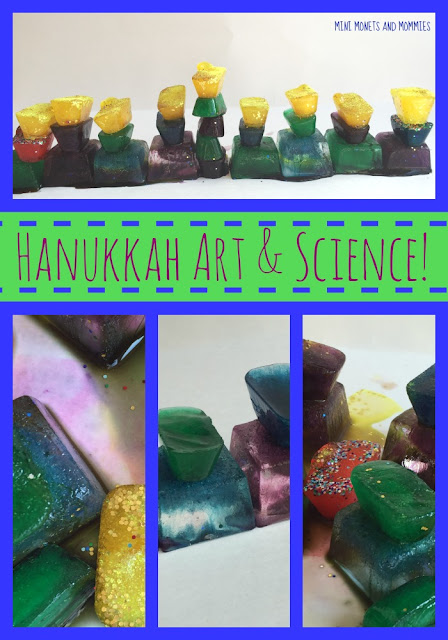
I’m a fan of using colorful ice for kids’ art and science activities. We’ve done primary color paintings this way, made Frozen-themed glitter paint and most recently made a melting Hanukkah menorah. So, now it’s time for a red and green Christmas ice art and science exploration.

Let’s start with a prediction. Before you even make the ice, ask your child to predict what he thinks will happen when you pop the colorful water into the freezer. As you go through the activity, ask a few open-ended questions such as, “What’s happening to the water?”, “What do you think will happen to the ice as it sits in the sun?” or, “What do you think will happen to paper under the ice?” Go through the activity and take a cue from your child. If these questions aren’t working for you, come up with your own based on what he’s doing and seeing.

Here’s What You’ll Need:

·        Red and green food coloring

·        Water

·        Ice cube trays

·        Card stock paper (the thickness works well with the melting ice)

Here’s What to Do:

1. Add a drop of either red or green food coloring into the ice cube tray compartments. Make as many red and as many green cubes as you and your child want. You can also try making a few in different shapes or sizes (use different shapes of trays).

2. Pour water over the food coloring and stir.

3. Put the trays into the freezer until the water turns into ice.
Kids' activity


4. Take the trays out of the freezer and pop the cubes out.

5. Set a few cubes onto the paper (use white or add red and greed Christmas colors of paper). Put the paper and cubes in a sunny spot and observe to see how quickly the ice melts. Make sure to put something such as cardboard or a plastic bag under the paper to catch any liquid.
Christmas activity

6. Move the cubes around to make melted water colors.
Christmas Paint

Or you can get your little engineer building…

1. Build a Christmas tree shape with the ice cubes.
Holiday paint

2. Press a piece of white paper on top. Ask your child is he can feel the cold through the paper. You can also swap in a piece of craft foam or felt to make comparisons.

3. Peel the paper off to reveal a print.
 
Ice print
 

4. Gently pull up the remaining cubes to reveal another print OR push them around to make imaginative abstract art.

Are you looking for more kids’ Christmas activities? Follow my Pinterest board for ideas!
Follow Mini Monets and Mommies's board Christmas Activities for Kids on Pinterest.

Monday, December 7, 2015

Holiday Gift Guide: The Best Books for Kids

Holiday gift buying for kids doesn’t always have to include pretty little plastic dolls and crazy-massive playsets that require hours of assembly and a wheelbarrow filled with batteries. Something as seemingly simple as a book can give your little one hours of enjoyment.

Holiday gifts

Does your child love art? Are you looking for a way to introduce the art-viewing experiences to your toddler, preschooler or young child? Keep in mind, the illustrations in these books are art too! I was so excited to receive the book Dress Up in the mail from Home Grown Books (while I did receive the book for free, all opinions are my own). After paging through this awesomely artsy board book I couldn’t help but add it to my list of gifting favorites. If you’re not sure which books to put under the tree (or stuff in a stocking) this holiday season, check out what ‘Dress Up’ is all about and some of these other top picks!

Holiday Guide

(This post contains affiliate links. Please see my disclosure statement for more information).

Dress Up, by Kyla Ryman, artwork by Cecile Dyer
Board Book

Originally published as part of The Play Set from Home Grown Books, Dress Up is a creatively cute easy read with imaginatively artistic pictures (courtesy of Brooklyn-based artist Cecile Dyer). Cats play ‘dress up’ with accessories, accompanied by a word on each page for the item. Simple enough for babies and toddlers to take on, with illustrations that will still interest preschoolers.


This is one that I’ve read something like a million (ok, that’s a bit of an exaggeration) times while teaching children’s art classes. Not only is it an intro to some famous artists (in animal form), but it also teaches about getting along with others and accepting different opinions.

You Can’t Take a Balloon into the Metropolitan Museum by Jacqueline Preiss Weitzman, illustrations by Robin Preiss Glasser

Take a trip through NYC, and some famous artworks, in this wordless book.

Snowballs by Lois Ehlert

The found object collages make easy work for your child when she wants to identify the natural items in this winter-themed book.

Brown Bear,Brown Bear, What Do You See? By Bill Martin Jr. and Eric Carle

Animals and colors make this pick perfect for kids who are just learning the basics.

Dream Snow by Eric Carle

A Christmas book for Christmas time! Carle’s collage-like style interest’s the child’s eye, adding vivid visuals.

Babar’s Museum of Art by Laurent De Brunhoff
Museum art

Who doesn’t absolutely love Babar? The adorable elephant book features some of the most famous works of art – all elephant style. I love this one for young children. It gently introduces them to the world of art, through the eyes of a favorite character.

Art Dog by Thatcher Hurd
Kids' book

An art heist at the Dogopolis Museum of Art is the focus of this oh-so-cute story. With imaginative illustrations, this read tells a tale that will interest kids in preschool through the early grade school years.

Where the Wild Things Are by Maurice Sendak
Maurice Sendak

Chances are that this was one of your childhood favorites too. It’s a classic for a reason! The detailed illustrations jump off the page, making it an amazing entry into the idea of ‘viewing’ art.

The Snowy Day by Ezra Jack Keats

I remember my mom reading this to me as a child. And, I certainly remember the hundreds of times that I read it to my own child. The bold pictures turn a winter’s snow into a can’t-miss children’s book.

So, now that you have a few choices—what’s next? Take some time to look at the pictures with your child. Point to them, ask your child what she sees and encourage her to tell you what she thinks is going on. This can help her to figure out the story, even if she isn’t able to read the words quite yet. Why do this? It helps to build her budding early literacy skills and lets her see that art is all around us!
Gift Guide

Are you looking for some creative crafts to go with your book reading adventures? Follow my Pinterest board for ideas.


Follow Mini Monets and Mommies's board Childrens' Book Activities on Pinterest.

Sunday, December 6, 2015

8 Nights of Kids' Hanukkah Activities

Are you looking for a few Hanukkah activities that the kids can enjoy? Well, you do have eight nights – and, that means eight opportunities for art, crafts and cooking fun!
Children's projects

Whether the kids are clamoring to paint, play with clay or make a tasty treat, these eight Hanukkah activities offer opportunities for artsy play, a fine motor workout, holiday learning and more.

Check out our eight night of Hanukkah, eight nights of kids’ activities:


Clay menorah
 
Not looking for a major mess? Swap out the real finger paint for soft modeling clay. The result looks almost the same (and your child gets in a similar fine motor workout), minus goop and glop everywhere.

Kids' art

Ok, so the kids want the messy paint experience. Cut up a regular kitchen sponge and try this pattern play art activity (it also doubles as a math lesson – with geometric shapes and patterns).

Chanukkah dessert
 

Chocolate, marshmallows, graham crackers and Hanukkah? Yes! You can even make these super-tasty treats entirely kosher.

Ice art

It’s science and art all in one! Let’s not forget math and engineering too. Your child can build his own menorah, watch it melt (make a few predictions and observations) and then paint with it.


Kids' craft
Art-making in three dimensions. This 3D project pops off of the paper with a finger paint feel.


Holiday treats
What? These cookie truffle balls are all about the holiday. Serve them up after dinner, give them to a friend/family member or no-bake them for a school party.

Gift box

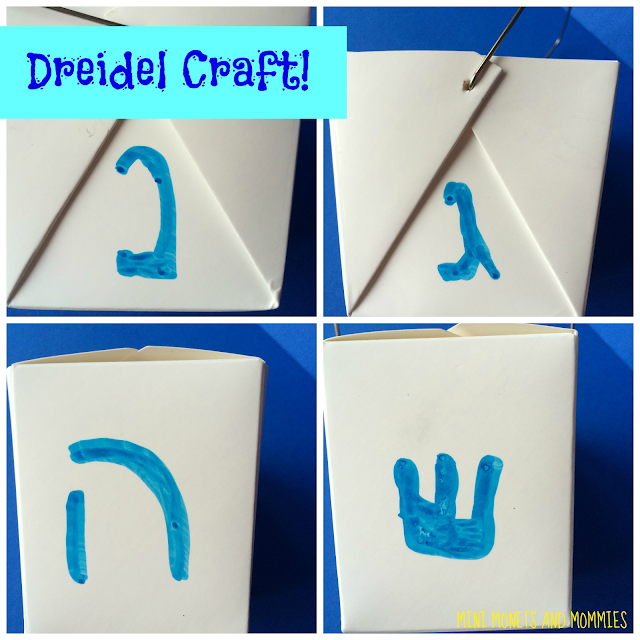
Turn a takeout container into a dreidel. No, it doesn’t really work. But, you can open it and fill it with gifts to give.


Collage craft
If you’re looking for another gift box creation, this one is covered in a Hanukkah-themed collage. It’s easy to make, but still gives the kids the chance to build fine motor skills.

Are you looking for more creative kids’ crafts? Follow my Pinterest board for ideas!
Follow Mini Monets and Mommies's board Creative Kids Crafts on Pinterest.

Thursday, December 3, 2015

Kids' Hanukkah Clay Craft Menorah

I’ve been making menorahs lately. No, not real ones. Instead, a few kid-sized Hanukkah art activities. There were 3D recycled cardboard finger paint menorahs, melting ice sculptures ones and even a version made from paint printed sponges.

Hanukkah art

(This post contains affiliate links. Please see my disclosure statement for more information).

If you’re looking for something a bit different (and less mess than painting), mock ‘finger painting’ with clay takes the cake. For this kids’ holiday activity I added the finger paint clay to craft sticks to make mini menorahs. No, you can’t really light them. But, your child can add faux flames with yellow modeling clay. Like finger paint, your child can mix, mingle and blend colors together. The difference is that there’s no goopy mess and he can layer on a bumpy or lumpy texture (or smooth it out).

Here’s What You’ll Need:

·        Thick craft sticks

·        Scissors

·        Modeling clay in a few different colors (look for a soft, spreadable clay)

·        Clear-drying school glue

·        Card stock paper or poster board

Here’s What to Do:

1. Cut four craft sticks in half.
Kids' art


2. Cut another craft stick about one-third of the way up. This one will become the shamash, or helper candle (it lights the other ones).

3. Pull the clay apart into dime-sized pieces.
Modeling clay

4. Spread the clay over the craft sticks (only one side). Your child can spread several colors together. They’ll mix almost like paint. He can even try mixing primary colors (red, yellow and blue) into secondaries (orange, purple and green).
Children's crafts

Colorful clay

5. Repeat the clay finger painting step for two more whole craft sticks (these will become the bottom or base of the menorah).

6. Glue the base sticks horizontally next to one another onto a piece of card stock or poster board.

7. Glue the eight candle sticks and shamash vertically, starting at the top of the horizontal sticks.
Clay finger paint

8. Spread a piece of yellow clay above each stick candle to make mock flames. Your child can do this all at once (to complete the menorah craft) or add one each night of Hanukkah.
Menorah Art

Are you looking for more kids’ crafts? Follow my Pinterest board for ideas!
Follow Mini Monets and Mommies's board Creative Kids Crafts on Pinterest.