Mini Monets and Mommies

Tuesday, August 11, 2015

The Ever Evolving Kids' Art Activity: Paint It, Draw It and More!

Who says that kids’ art activities have to be a one-time thing? For years I taught week-long summer art camps for children. One of my favorite parts of the five day programs was that we could start a project on Monday and keep on exploring it for four more days.
Child creativity

Adding on to an art activity doesn’t just keep the kids busy, but it also gets them thinking about what they are making and what they can turn it into. It evolves and changes day-by-day, showing your child that one brush stroke, line made with a marker or glued on piece of paper doesn’t make or break the art. If your little artist is all about the color blue on Monday, she can paint it on. On Tuesday she may be feeling rather green or purple. She can add these hues too!

Even though you’re about to see my version of this extended art activity, there’s no reason that your child needs to repeat it exactly as is. Create your own design, combining different materials and processes. Choose a theme for each day, a type of art-making or go with whatever your child is feeling. Keep in mind, you don’t need to set a specific date for finishing the art. You can quantify it and tell your child that she’s making a 3-day-long project or you can just let it go until it reaches its natural conclusion. You can also skip days if your child doesn’t have time or doesn’t feel like making art.

If you’re not sure where to begin, try this out first…

Here’s What You’ll Need:

·        Card stock paper

·        Tempera paint

·        Paintbrush – Use different brushes in different thicknesses o with sponge tips.

·        Colorful chalk

·        Food coloring

·        Dish soap

Here’s What to Do:

This extended kids’ art activity is a 3-day project.

1.     Day 1-- Pour the paint onto a palette (I like to use wax paper or kitchen foil).

2.     Cover the paper in different colors of paint. Encourage your child to mix the hues to make her own colors.
 
Kids' art

3.     Let the paint dry overnight.

4.     Day 2 – Explore making lines with the chalk. Have your child draw straight or curved lines over the paint.
 
Line art


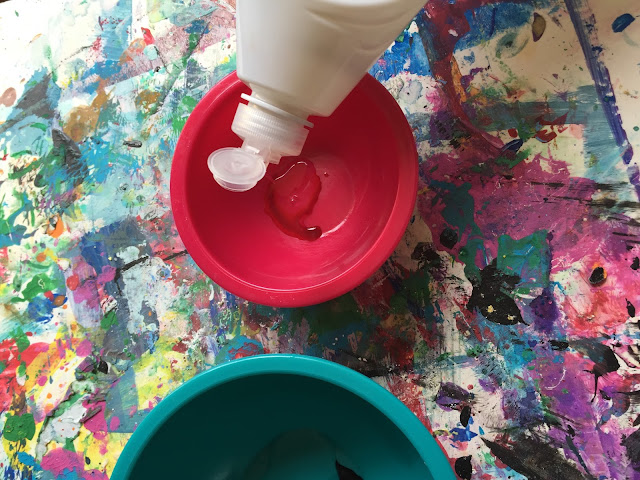
5.     Day 3 – Mix a batch of bubble paint. Add two to three drops of food coloring to one cup of dish soap and a tablespoon of water. As you mix it, the bubbles will grow.
 
Bubble paint

6.     Paint the colorful bubbles onto the paper. Use a brush (either the bristle part or the other end) to spread and ‘draw’ the click paint across the surface.
 
Bubble painting
 
Kids' paint
 

What kinds of art process do you plan on including in your child’s extended creative activity? Tell us in the comments section.

Are you looking for more creative kids’ crafts? Follow my Pinterest board for ideas!
Follow Mini Monets and Mommies's board Creative Kids Crafts on Pinterest.

Monday, August 10, 2015

Kid-Created S'mores

It’s National S’mores Day! I tend to go a bit overboard (and that might just be a serious understatement) when it comes to these marshmallow chocolate treats. If you don’t believe me, check out some of my favorite s’more recipes (which includes animal cookie ice cream sandwiches, coconut cherries, strawberry sparkles, peeps, donut-topped versions and much, much more).

National s'mores day

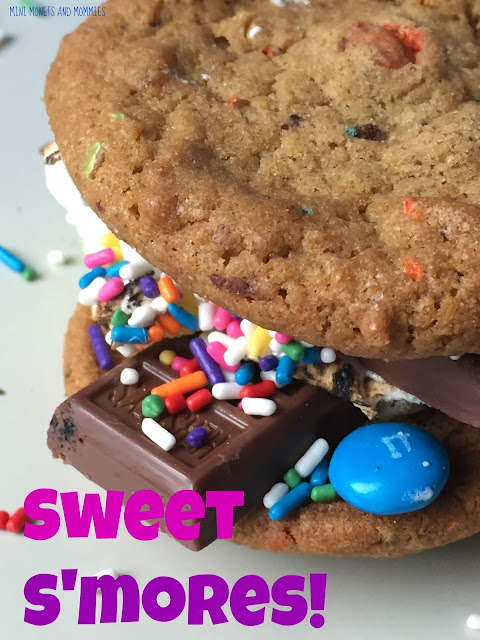
Today I decided that my almost 14-year-old would get the honor of choosing the ingredients. This ended up being much more fun than when I go to the store and buy something that I think he’ll like. I let him make the list and put everything together on his own. So, as much as this post is about making a super-special s’moretastic sweet, it’s also about letting your child be the creative genius behind it. I’m sharing what my son chose, but try swapping in the ingredients that your child asks for. We went all out for treat’s celebratory day, but you can try a theme or even a color scheme. For example, make everything red s’mores. Your child can add in red fruits such as strawberries and raspberries or red sprinkles and strawberry syrup on top.

If you want to give my son’s creation a try…

Here’s What You’ll Need:

·        Cookies – We took the easy way out and used big bakery cookies, but you can bake up your own from a favorite recipe.

·        Chocolate

·        M&M’s

·        Marshmallows

·        Sour gummy worms

·        Rainbow sprinkles
 
Dessert for kids

Here’s What to Do:

1.     Toast the marshmallows. If you have easy access to a campfire or fire pit, go for it. We didn’t (and it was raining out). I toasted the marshmallow over the stove’s flame. Children should not do this. You must be extremely careful not to drop the marshmallow onto the burner or catch the whole thing on fire. A few other options include warming it up in the microwave (10 seconds usually does it, but microwaves vary in strength) or heating them up in the oven (put them on top of the cookies in an oven-safe pan and heat at 350 degrees for until golden brown).
 
Sugar treat

2.     Add a few pieces of chocolate and the M&M’s to the first cookie.

3.     Slide the toasted marshmallow onto the chocolate.

4.     Add a few more M&M’s and the gummy worms.

5.     Spoon the sprinkles on.

6.     Sandwich the s’more with another cookie.
 
Kids' recipes


When asked, "What would you change about your s'mores?" my son answered, "I'd use saltines instead of cookies." Really?

Desserts made by kids


Are you looking for more sweet recipes? Follow my Pinterest board for ideas!
Follow Mini Monets and Mommies's board Sweet S'mores on Pinterest.

Friday, August 7, 2015

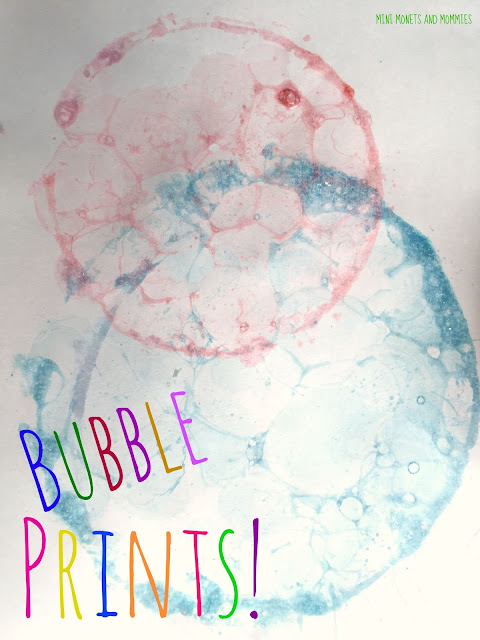
Kids' Bubble Painting Art Activity

Bubble painting is always a big hit with the kids. Not only does it combine art and science, but it’s always an option when you don’t have actual ‘paint’ on hand.

Kids' art

Instead of packing up the kids and heading out to the craft store, you just need a few things from the kitchen cabinets to get creative! Keep in mind, just because this art activity is made from everyday items, it’s not edible. Dish soap is the main ingredient. Talk to your child about soap, ask her why she thinks it bubbles and why she shouldn’t drink or eat it. You can get more specific, and ask your child:

·        What do you think will happen (or, can you predict) when you blow air through the straw into the liquid soap?

·        What do you think is inside of the bubbles?

·        What shape are the bubbles?

·        How does the food coloring change the bubbles?

·        What do you think will happen when you put the paper on top of the bubbles?

·        How would the paint look different if you used a brush?

Here’s What You Need:

·        Dish soap

·        Bowls

·        Plastic straws

·        Food coloring

·        Construction paper

Here’s What to Do:

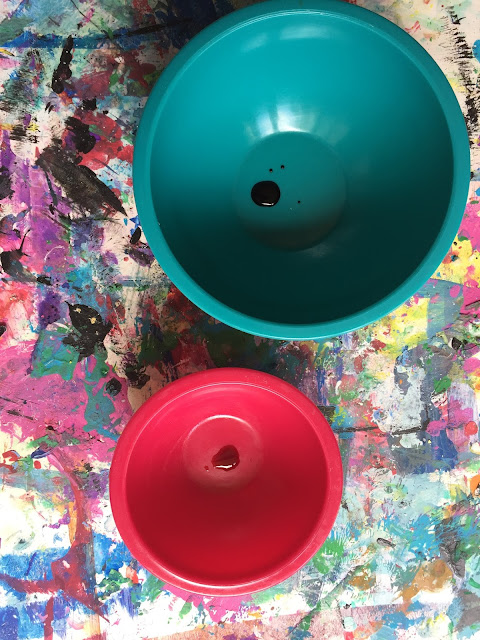
1.     Drip a few drops of food coloring into the bowl. Make one bowl of bubble paint or a few with different hues.
 
Kids' art

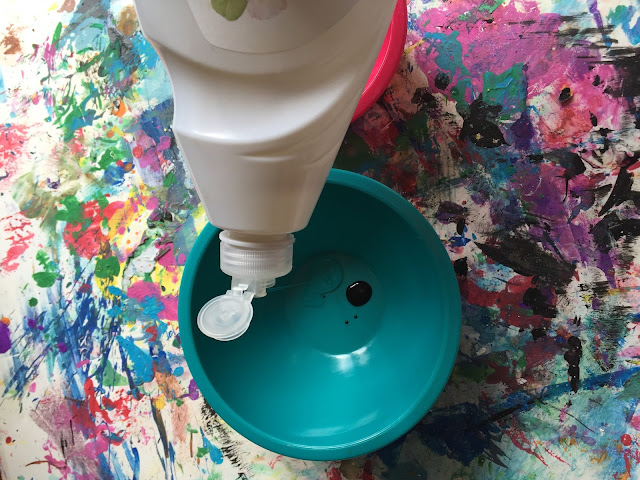
2.     Pour in the soap. I used one cup of soap per bowl (with three to four drops of food coloring), but you may want to add more or less, depending on how much paint you want to make.
 
Kids' science

3.     Blow air through the straw into the paint. Make sure that your child pushes the air out and doesn’t slurp in the soap. If she does happen to get a bit of soap in her mouth, tell her to spit it out immediately. If your child is too young to blow bubbles without drinking the soap, do this step for her. The bubbles should balloon up above the bowl’s edge.
 
Children's science

4.     Gently press the paper on top to make a honeycomb-like pattern.

5.     Repeat with another bubble paint color or try it again with the same shade.
 
Print Paint
 

Are you looking for more creative kids’ crafts? Follow my Pinterest board for ideas!

 
Follow Mini Monets and Mommies's board Creative Kids Crafts on Pinterest.
Wednesday, August 5, 2015

How To Make Process Art from Kitchen Foil

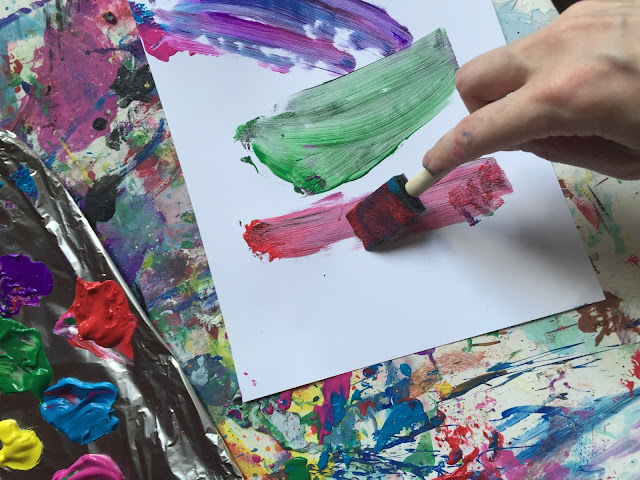
Do you have an extra sheet of kitchen foil? Then you have the perfect palette for your child’s process art exploration. Sure, you usually use the shiny stuff to wrap up leftover, line your baking pans and keep the kids’ lunches in place. But, this time you can use it for an artsy adventure!

Kids' crafts

Kitchen foil and wax paper are two of my favorite inexpensive paint ‘trays’. They provide pretty effective barriers to keep whatever mess your child is making off of the table. If you’re already using a piece of foil for your child’s art activities, don’t let that leftover paint go to waste. Instead, keep it out and let your child experiment with it. How?

Here’s What You’ll Need:

·        Tempera or finger paints

·        Kitchen foil

·        Paper

·        Optional: A Paintbrush

Here’s What to Do:

1.     Pour the paint. If your child isn’t already crafting, pour at least three colors of paint onto the flattened foil. You can use any colors that you want or go with a primary mixing exercise (use red, blue and yellow to mix green, orange and purple).

2.     Let your little artist mix the colors. She can use her finger or a paintbrush.
 
Process art

3.     Explore how folding the foil changes the paint. Fold and unfold it or crinkle the foil together.
 
Children's crafts

4.     Flatten the foil again. Draw designs into the paint. Your child can use her hands or the end of the paintbrush to do this.

Kids art
 

5.     Press a piece of paper on top of the paint to make a print.
 
Print-making art

Eventually the paint will turn into a brownish hue that’s none too pleasing on the eyes. But, your child is having fun – so, that’s all that matters. Keep mixing the paint, drawing in it and printing until your child has made enough discoveries for the day. Then start over again tomorrow!

Are you looking for more process art for kids? Follow my Pinterest board for ideas!
Follow Mini Monets and Mommies's board Process Art for Kids on Pinterest.

Monday, August 3, 2015

25 S'mores Recipes That You Have to Try Right Now!

August 10 is National S’mores Day! I kind of adore the graham cracker, chocolate and marshmallow stackers, so this is a pretty major holiday for me. That said, I like to go a bit beyond the traditional treat.
S'mores Day

I know, I know, s’mores purists will balk at the idea of adding all kinds of ‘stuff’ to the ooey, gooey treats. But, I enjoy adding something a little extra. From summertime ice cream sundaes to modern art masterpieces, I’m here to say, “Happy S’mores Day!”

Check out these sweet, sweet s’mores, that you make for the treat’s special day – or any day!

1.     Animal Cookie Ice Cream Sandwiches – Perfect for an animal, carnival or circus themed kids’ party!

2.     Banana Splits – The classic summer sundae in s’mores form.

3.     S’mores Cookie Ball Truffles – So, they’re not exactly the typical flat stack, but these Oreo goodies are so, so, so, so good!

4.     Peeps and Marshmallow-Middle Chocolate Eggs – It’s two Easter candy traditions in one perfect package.

5.     St. Patrick’s Day Desserts – They’re lucky, chocolatey and green!

6.     Valentine’s Day Donut Deluxe – Heart-shaped marshmallows, a donut and more makes this s’more a sweetheart surprise.

7.     Hanukkah S’mores – Celebrate the Festival of Lights with a festival of fun chocolate goodness (and you can even make them kosher as well).

8.     Christmas Morning Donuts – The holiday morning donut is a tradition in our house. We took the typical and made it Christmas-tastic by adding in more s’mores.

9.     Candied Yam Marshmallow Casserole – It’s so Thanksgiving. Think of this one as a deconstructed sweet potato pie.

10.  Cupcake Cuties – Swap out the chocolate bar for a sliced cupcakes!

11.  Candy Corn for Halloween – The sugary fall treat makes the sweet stacker even better.

12.   Monster Madness – They’re gooey with goodness (and candy eyes!).

13.   ModernArt – A little food coloring and you’ve got a painted masterpiece.

14.  Olaf’s Melting – The Frozen snowman melts in the microwave with this indoor s’more.

15. Cherry Red Coconut Concoction – It’s a bit more grown up, and totally tasty.

16.   Pink Princess Sparkles – They’re pink with strawberry scent and sparkle with a sugar crisp.

National s'mores day

If you’re looking for s’mores that are also ‘something’ else, try:

17.  Chocolate Marshmallow Cupcakes – It’s everything you love about the stack, including the graham crackers, in a cupcake design.

18.  Cookies – These S’mores Cookies from Fireflies and Mud Pies turn the campfire favorite into a kitchen creation!

19.  Bread Pudding – When it comes to creative, this recipe from Spaceships and Laser Beams takes the cake (or rather, the bread putting).

20.   Brownie Trifle – Yum! Mom Endeavors’ trifle is brownie-packed and full of marshmallowy goodness.

21.  Rice Krispie Treats – They already have marshmallows in them anyway, so why not try this kid-friendly treat from Real Life at Home?

22.  Sweet and Salty – Pint-sized Treasures has combined the sugary and savory tastes that you will want to try – right now.

23.  Mini Pies – These pint-sized pies from Mess for Less are still big on suburb s’mores taste.

24.   Banana S’mores – The Typical Mom’s BBQ taste treats are literally bananas!

25.  French Toast – Crazy Adventures in Parenting’s breakfast recipe is a mouthwatering morning treat.

Are you still on search for more s’mores? Follow my Pinterest board for ideas galore!

 
Follow Mini Monets and Mommies's board Sweet S'mores on Pinterest.

Sunday, August 2, 2015

Pipe Cleaner Paint Prints: Kids' Flower Art

Flower printing is a favorite kids’ art activity of mine. But, sometimes Mother Nature just doesn’t cooperate with your crafting. When that happens you have to come up with a creative solution.

Kids' print-making

(This post contains affiliate links. Please see my disclosure statement for more information).

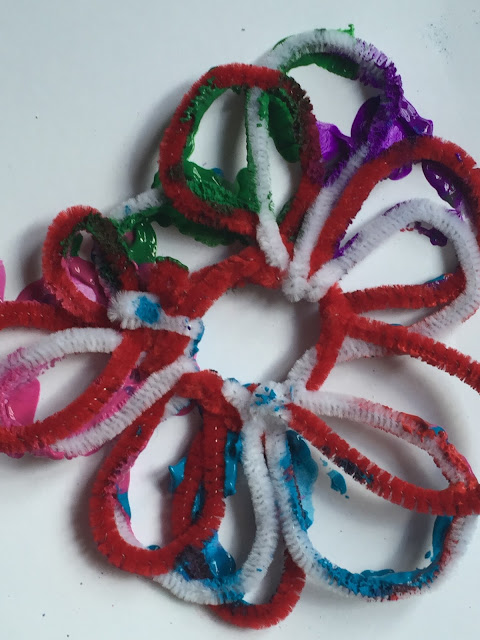
What can you do when the kids want to make flowery paint prints – minus the flowers? Pull out the pipe cleaners! This easy craft isn’t just colorful, pretty and fun. It helps your child to improve her fine motor skills, teaches about shape and line and can even become a color-mixing exploration.

Here’s What You’ll Need:

·        Pipe cleaners

·        Paper

·        Tempera paint

·        Wax paper or kitchen foil

·        Optional: Paintbrush
Art Activity

Here’s What to Do:

1.     Bend the pipe cleaners into a flower shape. Turn the straight lines into rounded curves and circles. Start with a center circle. Wind the next pipe cleaner’s end around the circle. Curve it into a flower petal shape. Loop it under the circle and make another petal or two. Wind the end around the circle and repeat with another one. Your child should keep going until she’s completed her flower.
 
Flower art

2.     Pour the paint onto wax paper or foil (these make inexpensive barriers/palettes).

3.     Dip one side of the pipe cleaner flower into the paint. Your child can use one color (making a solid print) or a rainbow of hues (different colors on different petals). Get messy and let your child use her hands to spread the paint out or try a brush.
 
Kids' art

4.     Press the flower (paint-side down) onto the paper.
 
Children's Crafts

5.     Peel the flower up to reveal the print.
 
Kids' crafts


6.     Repeat!
 
Paint art

Try this kids’ art activity with other shapes. Instead of a flower your child can explore shapes (make it into a math lesson). Encourage her to bend circles, rectangles, diamonds and triangles, and then make prints. Another option is to make two or more different shapes and create a print pattern – such as triangle, diamond, circle, triangle, diamond, circle.

Are you looking for more children’s arts and crafts? Follow my Pinterest board for ideas!

 
Follow Mini Monets and Mommies's board Creative Kids Crafts on Pinterest.